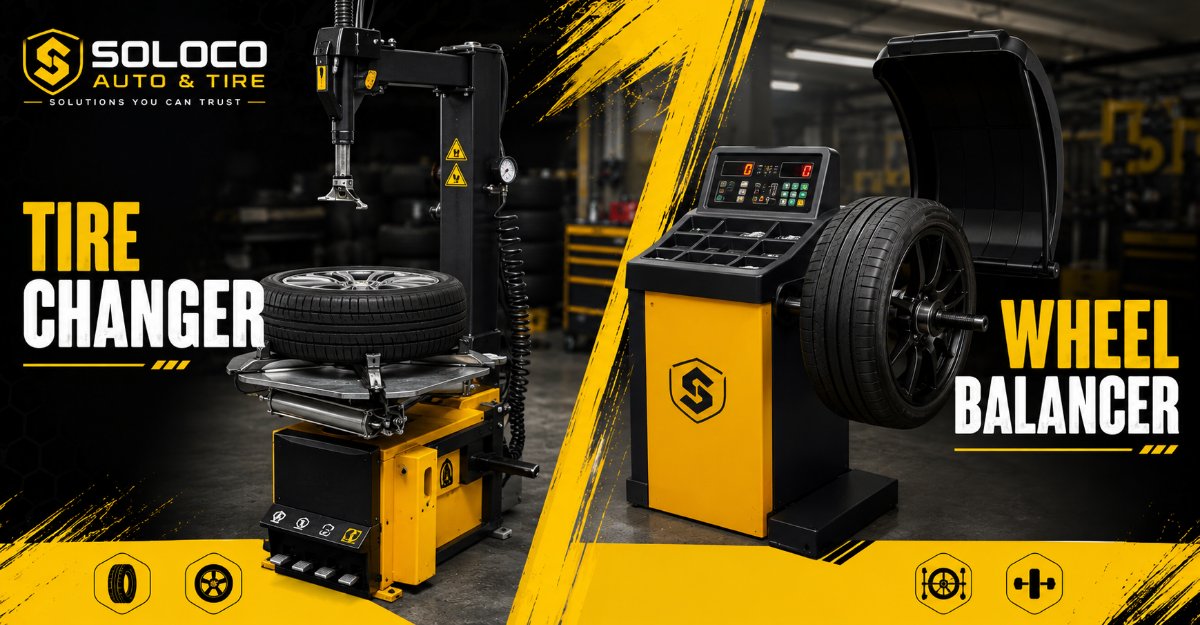
A tire changer machine and a wheel balancer form the foundational machinery required to mount, demount, and weight-correct automotive wheel assemblies safely and efficiently.
The tire changer is a mechanical system utilizing pneumatic and electrical actuators to separate a tire bead from a wheel rim and swap the rubber, while the wheel balancer spins the completed assembly on a high-precision shaft to measure centrifugal weight distribution and direct precise counterweights.
Together, these two machines constitute the core revenue-generating station of any professional automotive service facility, mobile tire van, or high-volume custom wheel shop.
+-----------------------------------------------------------------+
|                        KEY FACTS AT A GLANCE                    |
|                                                                 |
| * Air Supply: Standard pneumatic changers require 110 to 150 PSI|
|   of clean, dry compressed air to operate bead breakers.        |
| * Balancer Accuracy: High-precision electronic and road force   |
|   units resolve weight imbalances down to 0.05 oz (1 gram).     |
| * Cycle Speed: A standard dynamic balance spin takes 6 to 10    |
|   seconds; complete tire replacement averages 3 to 5 minutes.   |
| * Power Requirements: Entry units operate on 110V single-phase; |
|   heavy-duty commercial units demand 220V or 3-phase power.     |
+-----------------------------------------------------------------+
How Tire Changer Machines and Wheel Balancers Work
Understanding the internal mechanics of both machines ensures safe operation, protects expensive alloy wheels from damage, and prevents premature equipment failure.
Tire Changer Mechanism & Operation
A modern tire changer utilizes an electric motor to drive a rotating turntable and a pneumatic circuit to power the side shovel bead breaker and vertical tower locking mechanisms. The mechanical sequence follows a strict operational protocol:
- Deflate: Remove the valve core completely to exhaust all pressurized air from the tire cavity.
- Break Bead: Position the tire against the side shovel and actuate the pneumatic cylinder to press the metal blade against the tire sidewall, pushing the rubber bead away from the rim safety hump. Repeat on both sides.
- Clamp: Place the wheel assembly onto the tabletop. Actuate foot pedals to drive internal or external pneumatic jaws that grip the rim securely without slipping.
- Demount: Lower the horizontal or swing-arm tool head until the metal or plastic duckhead sits precisely against the upper rim lip. Lift the tire bead over the head using a specialized tire lever, then rotate the tabletop clockwise to peel the top bead off. Repeat the process for the bottom bead.
- Mount: Apply specialized bead lubricant liberally to both tire beads and the rim edge. Position the new tire at an angle, hook the top bead over the tool head, and rotate the turntable to force the rubber over the rim lip.
- Inflate: Connect the air chuck to the valve stem and utilize integrated blast inflation jets (or tabletop bead seating rings) to deliver a high-volume burst of air that snaps the beads against the rim flanges, followed by standard inflation to target PSI.
Wheel Balancer Mechanism & Operation
A wheel balancer utilizes a high-precision rotating main shaft coupled with internal piezoelectric load sensors to detect physical imbalances. The operational workflow requires meticulous user input:
- Mount: Select the correct tapered cone matching the center bore of the wheel. Slide the wheel onto the balancer shaft and secure it firmly using the quick-release wing nut to eliminate runout.
- Input Data: Measure and enter the three core wheel parameters: rim diameter, nominal width, and distance from the cabinet face to the inner plane (entered manually or via automatic sonar data arms).
- Spin: Lower the protective safety hood to engage the belt-driven motor, spinning the wheel assembly up to high rotational speeds (typically 150 to 200 RPM).
- Locate: Internal piezoelectric sensors capture centrifugal forces generated by heavy spots. The digital microprocessor calculates exact weight values and flashes the required clock positions (typically indicated at the 12 o’clock position).
- Apply Weight: Clean the inner and outer rim surfaces with a solvent wipe, peel the backing off adhesive lead-free steel tape weights, and apply them precisely to the indicated locations.
- Check Spin: Run a secondary verification spin to ensure the digital readout confirms a true zero balance (0.00 oz or 0 g).
Main Types and Classifications of Equipment
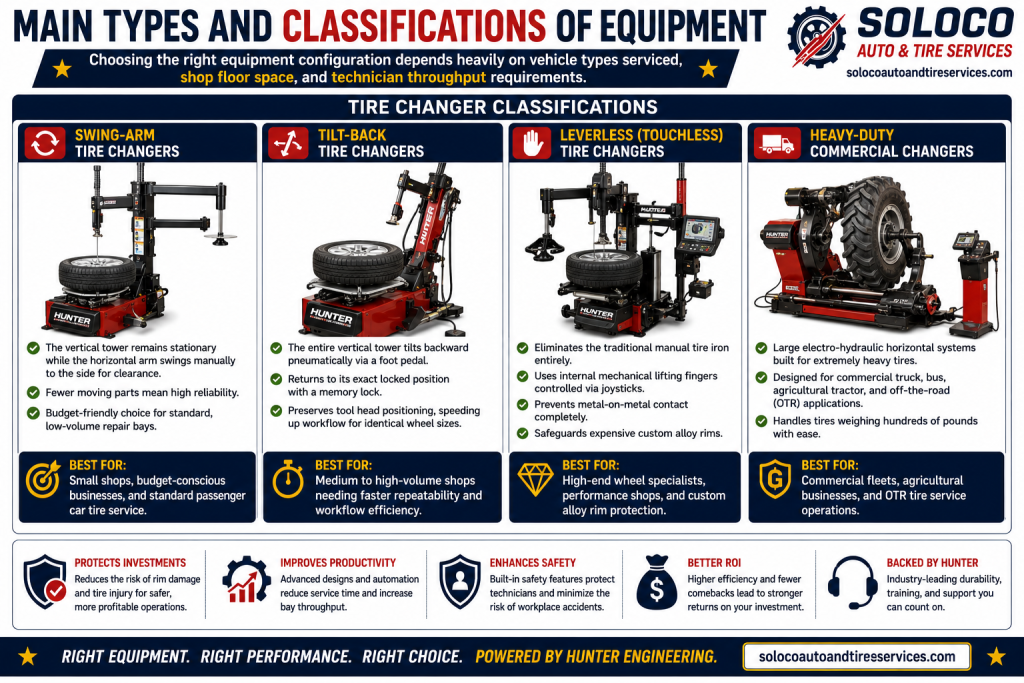
Choosing the right equipment configuration depends heavily on vehicle types serviced, shop floor space, and technician throughput requirements.
Tire Changer Classifications
- Swing-Arm Tire Changers: The vertical tower remains stationary while the horizontal arm swings manually to the side for clearance. They feature fewer moving parts, making them highly reliable, budget-friendly choices for standard low-volume repair bays.
- Tilt-Back Tire Changers: The entire vertical tower tilts backward pneumatically via a foot pedal and returns to its exact locked position with a memory lock. This design preserves tool head positioning, speeding up workflow when servicing identical wheel sizes repeatedly.
- Leverless (Touchless) Tire Changers: These advanced machines eliminate the traditional manual tire iron entirely, employing internal mechanical lifting fingers controlled via joysticks to pull the bead over the rim. This completely prevents metal-on-metal contact, safeguarding expensive custom alloy rims.
- Heavy-Duty Commercial Changers: Large electro-hydraulic horizontal systems designed specifically for commercial truck, bus, agricultural tractor, and off-the-road (OTR) tires weighing hundreds of pounds.
Wheel Balancer Classifications
- Hand-Spin Balancers: Portable units where the technician spins the wheel manually by hand. They require minimal electrical power, making them ideal for mobile tire service vans and emergency roadside response vehicles.
- Dynamic Electronic Balancers: Standard motorized shop units featuring microprocessor displays that calculate both static (up-and-down hop) and dynamic (side-to-side wobble) imbalances simultaneously.
- Road Force Balancers: Premium diagnostic balancers featuring a hydraulic load roller that applies up to 1,200 lbs of simulated vehicle weight directly against the spinning tire. This detects underlying tire stiffness variations, radial runout, and conicity issues that standard spin balancers miss.
Specifications, Pricing Tiers, and Operating Economics
Investing in a tire changer machine and balancer combo requires analyzing technical operating thresholds alongside capital expenditures.
+-----------------------------------------------------------------+
|                 EQUIPMENT SPECIFICATIONS MATRIX                 |
|                                                                 |
| * Clamping Range: Standard changers handle 10" to 30" rim diameters.|
| * Max Tire Diameter: Up to 50" overall outside tire diameter.   |
| * Balancer Resolution: Standard units resolve to 0.25 oz (7 g); |
|   premium commercial units achieve 0.05 oz (1 g) accuracy.      |
| * Air Pressure Demand: Requires continuous 110 to 150 PSI line  |
|   pressure with an integrated water-oil separator trap.         |
+-----------------------------------------------------------------+
Typical Industry Pricing Tiers
- Entry-Level Combo (DIY / Hobbyist): $2,500 – $4,500 total. Includes a standard swing-arm changer and a basic motorized dynamic balancer. Best for low-volume users mounting tires occasionally.
- Professional Mid-Tier Combo (General Repair Shops): $6,500 – $12,000 total. Features a tilt-back changer equipped with a pneumatic assist tower alongside an advanced dynamic electronic balancer.
- Premium Touchless & Road Force Combo (High-End Euro / Custom Shops): $15,000 – $35,000+ total. Integrates a fully automated leverless changer with a top-tier road force diagnostic balancer to protect high-dollar wheels.
Comprehensive Machine Comparison
| Machine Type | Primary Advantage | Primary Limitation | Ideal Operating Environment |
|---|---|---|---|
| Swing-Arm Changer | Low initial cost; minimal maintenance required | Slower setup workflow; higher risk of rim scratching | Home garages, light service shops |
| Tilt-Back Changer | Fast cycle times; preserves tool head settings | Requires rear wall clearance (12–18 inches) | General automotive repair bays |
| Leverless Changer | Zero metal-on-metal rim contact; effortless operation | Steep technician learning curve; expensive repairs | Luxury, exotic, and custom wheel shops |
| Standard Balancer | Fast spin cycles; reliable; affordable upkeep | Cannot diagnose internal tire stiffness or vehicle pull | General mechanical repair shops |
| Road Force Balancer | Resolves complex vibration complaints; detects bad tires | High equipment cost; slower cycle times (20–30 seconds) | High-end tire specialty and dealership shops |
Common Shop Mistakes and Troubleshooting Procedures
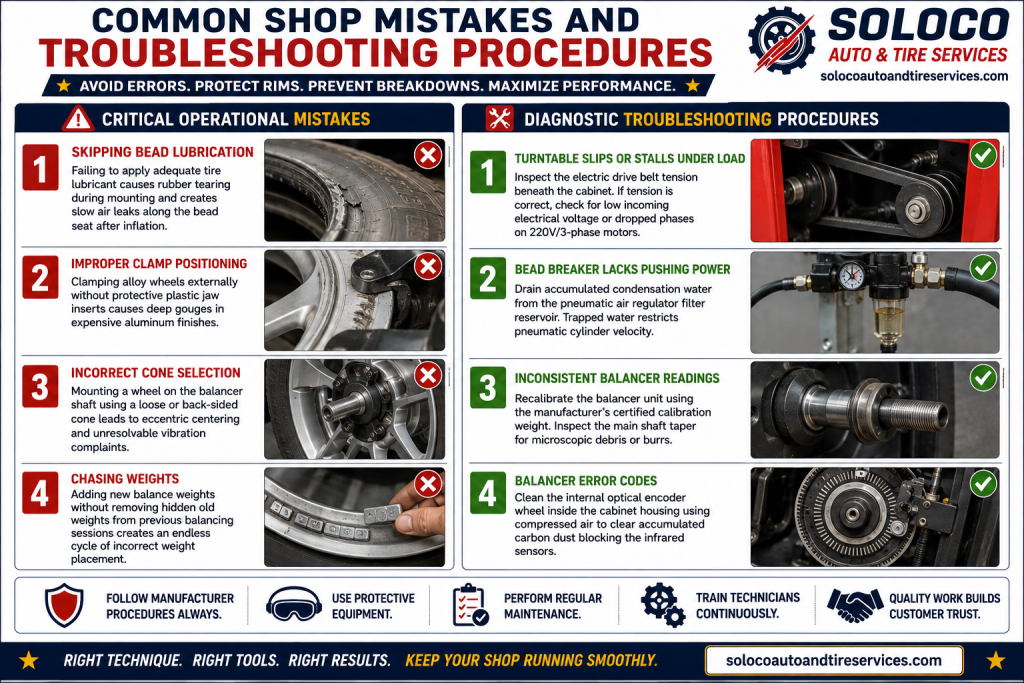
Avoiding operational errors prevents costly rim damage, customer callbacks, and premature mechanical breakdown.
Critical Operational Mistakes
- Skipping Bead Lubrication: Failing to apply adequate tire lubricant causes rubber tearing during mounting and creates slow air leaks along the bead seat after inflation.
- Improper Clamp Positioning: Clamping alloy wheels externally without protective plastic jaw inserts causes deep gouges in expensive aluminum finishes.
- Incorrect Cone Selection: Mounting a wheel on the balancer shaft using a loose or back-sided cone leads to eccentric centering and unresolvable vibration complaints.
- Chasing Weights: Adding new balance weights without removing hidden old weights from previous balancing sessions creates an endless cycle of incorrect weight placement.
Diagnostic Troubleshooting Procedures
- Turntable Slips or Stalls Under Load: Inspect the electric drive belt tension beneath the cabinet. If tension is correct, check for low incoming electrical voltage or dropped phases on 220V/3-phase motors.
- Bead Breaker Lacks Pushing Power: Drain accumulated condensation water from the pneumatic air regulator filter reservoir. Trapped water restricts pneumatic cylinder velocity.
- Inconsistent Balancer Readings: Recalibrate the balancer unit using the manufacturer’s certified calibration weight. Inspect the main shaft taper for microscopic debris or burrs.
- Balancer Error Codes: Clean the internal optical encoder wheel inside the cabinet housing using compressed air to clear accumulated carbon dust blocking the infrared sensors.
Expert Recommendations for Shop Setup
Selecting the correct equipment package ensures long-term operational profitability and protects technician safety.
- DIY / Home Garage / Hobbyist: Choose a standard Swing-Arm Changer paired with a basic Dynamic Balancer combo. Prioritize brands offering established parts availability and robust consumer support networks, such as Atlas (Greg Smith Equipment) or MaxJax.
- General Repair Shop (Mid Volume): Invest in a Tilt-Back Changer equipped with a pneumatic assist arm (essential for mounting stiff low-profile and run-flat tires) alongside a standard Motorized Electronic Balancer. Industry-proven platforms like Ranger (BendPak) or Coats provide reliable daily throughput.
- High-End Euro / Custom Wheel Shop: Opt for a Leverless (Touchless) Changer and a premium Road Force Balancer. Equipment from Hunter Engineering or John Bean is considered the industry standard for protecting high-end custom wheels valued at $2,000 or more.
Frequently Asked Questions
Can a single-phase 110V power supply run a commercial tire changer and balancer?
Standard entry-level tire changers and motorized balancers operate efficiently on a standard 110V, 15-amp single-phase circuit. However, heavy-duty commercial truck tire changers and industrial-grade balancers require a 220V single-phase or 3-phase electrical supply to deliver the necessary motor torque without tripping thermal overload breakers.
What is the difference between static and dynamic wheel balancing?
Static balancing measures an unbalance in a single plane, addressing vertical hop or up-and-down vibrations. Dynamic balancing measures unbalance across two distinct planes (inner and outer rim edges), correcting both static hop and dynamic wobble, which prevents steering wheel shimmy at highway speeds.
Why do low-profile and run-flat tires require an assist arm?
Low-profile tires feature extremely stiff sidewalls with minimal flex, making it physically difficult for a technician to force the bead down into the drop center of the rim using standard manual levers. A pneumatic assist arm utilizes multiple rollers and pressing discs to hold the stiff rubber down into the drop center automatically during rotation.
How often should a wheel balancer be calibrated?
A wheel balancer should be recalibrated at least once every six months under normal shop operating conditions, or immediately if the machine has been relocated, bumped by heavy equipment, or if technicians notice inconsistent weight readings across multiple verification spins.
What causes a tire to spin on the rim after mounting?
Tire slippage on the rim is almost always caused by using excess, low-quality, or petroleum-based bead lubricant that fails to dry properly. To prevent slippage, technicians should use approved vegetable-based or quick-drying synthetic mounting lubricants and ensure proper inflation pressures are maintained immediately after seating.


