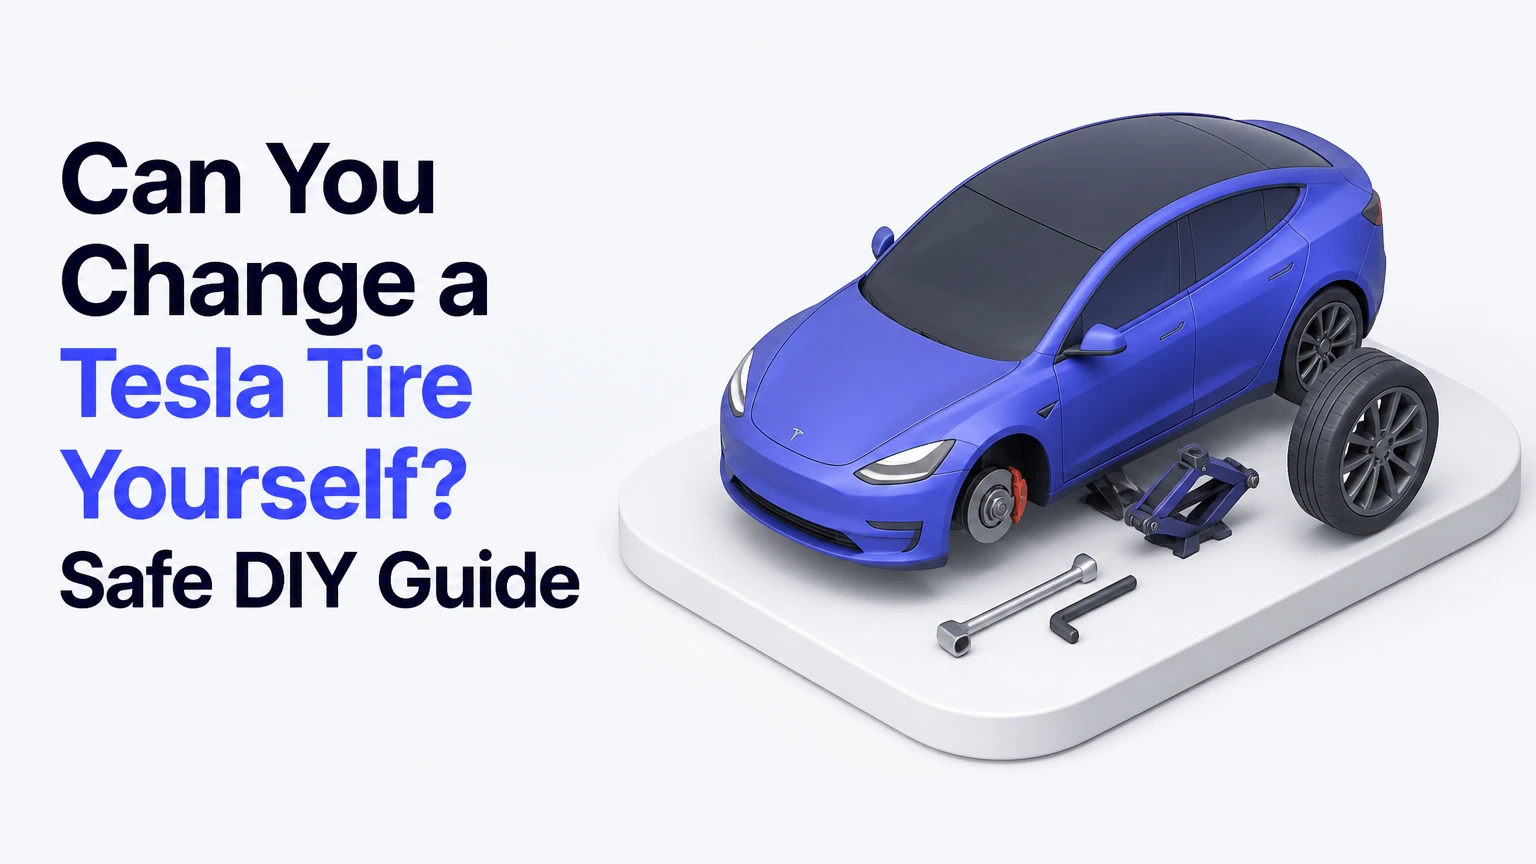
Yes, you can change a Tesla tire yourself if you have a compatible replacement wheel, Tesla-specific jack pads, a properly rated floor jack, and a calibrated torque wrench. The safest DIY job is a complete wheel swap, not tire mounting. Never lift a Tesla from an unapproved point because the battery enclosure and vehicle structure can suffer expensive damage.
Key Facts at a Glance
- Most Tesla vehicles are delivered without a spare tire, vehicle jack, or lug-nut wrench.
- Tesla jack pads must engage the designated lifting points before a floor jack supports the vehicle.
- Model 3 and Model Y generally do not have an air-suspension Jack Mode; Model S and Model X versions with adjustable air suspension may.
- A common Tesla wheel fastener specification is 175 Nm, or 129 lb-ft, but the owner’s manual and wheel specification control.
- A tread puncture can sometimes be repaired without removing the wheel, but shoulder, sidewall, and large-impact damage require tire replacement.
- A complete wheel swap typically takes 25-45 minutes for a prepared owner, excluding roadside setup and seized-wheel problems.
Can You Change a Tesla Tire Yourself?
A Tesla owner can replace a damaged wheel assembly at home or roadside, but the job requires more preparation than changing a conventional spare. Tesla normally supplies no spare wheel, so DIY replacement means carrying a compatible spare assembly or repairing a suitable tread puncture with an inflation kit.
A wheel swap is different from changing the tire itself. Replacing the tire on a rim requires a tire machine, bead lubricant, balancing equipment, and knowledge of tire-pressure sensors. Most home mechanics should remove the damaged wheel and take it to a tire shop for tire mounting and balancing.
The battery is the main safety constraint. Tesla’s battery pack occupies much of the floor area between the axles, while the approved lift points concentrate force at reinforced locations. A bare jack saddle, ramps placed incorrectly, or a jack pad that does not fit the vehicle can damage the battery enclosure or rocker structure.
Tesla’s owner manuals consistently direct owners to use the correct lift points and suitable equipment. The practical rule is simple: if the car cannot be lifted on a level, hard surface with verified pads and stable support, call for professional assistance.
What Equipment Do You Need?
A prepared Tesla wheel change needs a replacement wheel, four jack pads, a rated floor jack, a 21 mm socket in many applications, and a torque wrench capable of the specified value. The exact wheel fastener, tire size, and torque value must be checked against the vehicle’s current owner manual because Tesla specifications vary by model, wheel, and market.
| Equipment | Typical specification | Typical cost | Purpose |
|---|---|---|---|
| Tesla jack-pad set | 4 fitted rubber or polymer adapters | $15-$45 | Protects and locates approved lift points |
| Floor jack | 2.5-3 ton minimum rating | $90-$250 | Raises one corner under controlled conditions |
| Torque wrench | 40-200 Nm or 30-150 lb-ft range | $40-$150 | Sets wheel fastener torque accurately |
| Deep socket | Usually 21 mm, thin-wall or sleeved | $10-$35 | Removes and installs lug nuts |
| Replacement assembly | Matching wheel, tire, and TPMS sensor | $150-$600 or more | Restores a driveable wheel |
| Tire inflator | 12-volt compressor, 100-150 psi rating | $30-$100 | Restores pressure after a plug or slow leak |
| Wheel chock | Rubber or heavy-duty polymer | $10-$30 | Prevents unintended vehicle movement |
A breaker bar makes initial loosening easier, while a torque wrench performs the final tightening. A scissor jack included in a third-party spare kit may be adequate for an emergency wheel change, but it should not be treated as a workshop substitute for a stable floor jack.
What should the replacement wheel match?
The replacement tire must match the Tesla’s approved size, load index, speed rating, and seasonal configuration. A wheel can physically bolt on and still be unsafe if its offset, brake clearance, load rating, or tire diameter is wrong.
Check these values before buying a spare:
- Tire size, such as 235/45R18 or 255/45R19.
- Minimum load index and speed rating shown on the vehicle placard.
- Wheel diameter, width, bolt pattern, offset, and center bore.
- Brake-caliper clearance, especially on Performance models.
- Tire-pressure sensor compatibility.
- Directional-tire rotation direction, if applicable.
A space-saver spare is an emergency solution, not a permanent replacement. Do not mix a temporary spare with incompatible all-wheel-drive use, prolonged high-speed driving, or extended mileage unless the spare manufacturer and Tesla documentation permit it.
How Do You Safely Change a Tesla Wheel?
A prepared owner can usually complete a complete wheel swap in 25-45 minutes, but roadside work may take longer because of traffic, weather, darkness, and uneven ground. The deciding safety factor is not speed. It is secure lifting at the designated points.
Before You Start
- Time: 25-45 minutes for a complete wheel swap.
- Difficulty: Moderate for a wheel swap, advanced for tire mounting.
- People: One trained operator is possible; a second person improves roadside visibility.
- Surface: Level, solid pavement or concrete, never soft soil or a slope.
- Vehicle state: Park selected, parking brake applied where available, occupants outside the vehicle.
- Tools: Jack pads, floor jack, socket, breaker bar, torque wrench, chock, gloves, and inflator.
- Replacement: Correct wheel and tire assembly with adequate pressure.
- Safety: Hazard lights, reflective vest, warning triangles, and a safe position away from traffic.
Step 1: Secure the Tesla
Move the vehicle as far from traffic as the damage permits, then select Park and activate the hazard lights. If the tire is losing air rapidly, do not continue driving to search for a better location because a deflated tire can destroy the sidewall and wheel.
Turn off Climate Control and unnecessary electrical loads. Keep the key or phone key available, and prevent anyone from entering the car or changing its controls while the vehicle is raised.
Success checkpoint: The Tesla sits on hard, level ground with no person inside and the damaged wheel accessible.
Common mistake: Attempting the change on a crowned road shoulder. Call roadside assistance if the vehicle cannot be positioned safely.
Step 2: Prevent Movement and Prepare the Suspension
Place a wheel chock on the opposite side of the vehicle from the wheel being lifted, following the chock manufacturer’s instructions. Do not rely on the parking brake alone, especially on a surface with any slope.
Model S and Model X vehicles equipped with adjustable air suspension may have a Jack Mode setting under the suspension or service controls. Select the setting shown by the vehicle’s current touchscreen software and owner manual before lifting. Model 3 and Model Y generally do not offer the same air-suspension Jack Mode, so do not search for a control that the vehicle does not have.
Success checkpoint: The vehicle is in Park, movement is blocked, and any applicable suspension setting is active.
Common mistake: Assuming every Tesla has the same menu. Model year, software, suspension, and market affect the available controls.
Step 3: Install the Correct Jack Pad
Locate the approved lifting point nearest the damaged wheel. Tesla lift points are typically recessed openings along the underside of the rocker area, but their exact appearance and access can vary by model.
Insert a correctly sized jack pad fully into the opening. The pad’s locating stem should engage the hole, while its top surface presents a suitable contact area for the jack saddle. Do not substitute a loose hockey puck, a block of wood, or a bare metal saddle if the adapter does not fit securely.
Tesla’s Model 3 owner guidance warns against placing lifting equipment on battery components or other underbody areas. That instruction matters because the visible underbody is not a reliable map of the reinforced lifting structure.
Success checkpoint: The jack pad is fully seated, centered, and unable to fall out before the jack contacts it.
Common mistake: Using a universal pad whose stem is too short or too wide. Stop if the pad rocks, binds, or does not seat completely.
Step 4: Loosen the Wheel Fasteners
Remove the wheel cover if fitted, then use the correct socket and breaker bar to loosen each lug nut approximately one-half turn counterclockwise. Keep the wheel on the ground while breaking the initial friction.
Tesla wheel nuts may have protective caps on some configurations. A standard socket can damage or seize a cap if the fit is poor, so use the correct cap-removal tool and a non-marring or thin-wall socket where required.
Success checkpoint: Every fastener turns without the vehicle moving, and no nut has been fully removed.
Common mistake: Using an impact gun for initial loosening without controlling the socket. Cross-threaded or damaged wheel nuts complicate the repair.
Step 5: Lift the Vehicle
Position the floor-jack saddle directly beneath the installed jack pad. Raise the vehicle slowly and watch the pad, jack, tire, and opposite wheels throughout the lift.
Raise only until the damaged tire clears the ground by roughly 50-75 mm, or 2-3 inches. More height increases instability and gives the vehicle greater potential to fall if the jack shifts.
Never place any part of your body under a Tesla supported only by a floor jack. If the wheel must remain off the vehicle for an extended period, use a correctly positioned, rated axle stand only where Tesla service information permits it, and never place the stand against the battery enclosure.
Success checkpoint: The tire clears the surface, the jack remains vertical, and the pad stays centered.
Common mistake: Lifting from the battery tray or suspension arm because the approved point seems inconvenient. Lower the vehicle and reposition correctly.
Step 6: Remove and Replace the Wheel
Unscrew the lug nuts by hand, keeping them together, then pull the wheel straight outward. If the wheel is stuck to the hub, lower the vehicle until the tire barely contacts the ground and seek a controlled method to release it; do not strike the tire violently while the vehicle is high in the air.
Clean loose corrosion from the hub mating surface without removing material from the wheel or hub. Install the replacement assembly with the valve stem and tire direction correctly oriented.
Thread every lug nut by hand for several turns. Hand-starting prevents cross-threading and reveals a damaged nut or stud before the wheel carries vehicle weight.
Success checkpoint: The replacement wheel sits flush against the hub and every nut turns freely by hand.
Common mistake: Installing a directional tire backward or forcing a nut with a wrench. Stop and correct the fit.
Step 7: Tighten and Torque the Lug Nuts
Snug the lug nuts by hand, then lower the vehicle until the tire touches the ground but does not carry the vehicle’s full weight. Tighten the fasteners in a star or cross pattern, then use a calibrated torque wrench set to the exact specification for that Tesla and wheel.
Many Tesla Model 3 and Model Y configurations use 175 Nm, or 129 lb-ft. That number should not be treated as a universal Tesla rule: Model S, Model X, Cybertruck, aftermarket wheels, and regional specifications can differ. Tesla’s current owner manual and wheel manufacturer’s instructions take precedence over a generic chart.
Success checkpoint: The torque wrench clicks at the documented value on every fastener, with the pattern completed twice if the wheel manufacturer requires it.
Common mistake: Estimating torque from arm strength or using an impact wrench as the final measurement. Both can produce loose or overstressed wheel hardware.
Step 8: Lower Fully and Recheck
Lower the Tesla completely, remove the jack pad, and confirm that no equipment remains under the vehicle. Check tire pressure against the driver-door placard rather than the maximum pressure molded into the tire sidewall.
After a short drive, stop in a safe location and recheck the fasteners with the torque wrench. A practical check after approximately 25-50 km, or 15-30 miles, can identify seating problems, although the wheel manufacturer’s instructions control the interval.
Success checkpoint: The tire pressure is correct, the wheel runs without vibration, and no warning indicates a wheel or tire problem.
Common mistake: Driving at normal highway speed immediately after installation without checking pressure, wheel seating, or steering behavior.
Can You Repair a Tesla Tire Without Removing the Wheel?
A Tesla tire with a small puncture in the central tread can sometimes receive an external plug as an emergency measure, but a plug is not suitable for shoulder or sidewall damage. The tire should be removed and internally inspected by a qualified tire professional, especially after driving while underinflated.
A plug kit and compressor are useful for a nail or screw that has left a clean, narrow hole. They are not appropriate for a cut, split, bead leak, bulge, exposed cord, puncture near the shoulder, or damage larger than the repair kit’s stated limit.
Tesla tires may contain acoustic foam bonded inside the tread area to reduce cabin noise. A repair technician must account for that foam because careless probing can detach material and create imbalance. Foam damage does not automatically make a tire unrepairable, but it increases the value of professional inspection and balancing.
Plugging also leaves the tire mounted on the vehicle, so the internal liner, carcass, and run-flat condition cannot be fully assessed. Treat an external plug as a way to reach a tire shop unless a qualified professional has inspected and approved the completed repair.
Which Flat-Tire Option Is Best?
A complete wheel swap is the fastest independent solution when the owner already has a compatible spare assembly. A plug is cheaper and lighter for a clean central-tread puncture, while Tesla Roadside Assistance is the safest choice when lifting conditions, equipment, or damage are uncertain.
| Option | Typical cost | Typical time | Appropriate damage or situation | Main limitation |
|---|---|---|---|---|
| Complete wheel swap | $150-$600 assembly, plus tools | 25-45 minutes | Wheel or tire replacement with a matching spare | Requires storage and correct fit |
| External plug and inflation | $20-$60 kit, plus compressor | 15-30 minutes | Small central-tread puncture | Temporary or inspection-dependent repair |
| Mobile tire service | $100-$300 service, tire extra | 45-120 minutes | Remote repair or tire replacement | Availability varies by location |
| Tesla Roadside Assistance | $0 under eligible coverage, otherwise variable | 45-180 minutes typical | Unsafe roadside scene, major damage, no tools | Wait time and destination limits |
| Tow to tire shop | $100-$300 typical local tow | 30-120 minutes | Wheel cannot turn or vehicle cannot be lifted | Requires a suitable EV-capable provider |
Tesla Roadside Assistance often provides towing or roadside help under eligible vehicle and regional terms, but coverage duration, mileage, and tire-related limits can change. Confirm eligibility in the Tesla app or current roadside policy rather than assuming every flat is covered without charge.
What Tire Damage Must Not Be Plugged?
Sidewall, shoulder, bead, and large-impact damage should not be repaired with a plug. A tire with a bulge, exposed cord, separated tread, or evidence of extended driving while flat should be replaced or professionally assessed.
Use this decision screen:
- Puncture location: The hole must be in the repairable central tread area.
- Puncture size: The kit and tire professional must approve the diameter.
- Internal condition: No visible or suspected run-flat damage.
- Tire age and wear: Remaining tread and service condition must justify repair.
- Pressure retention: The repaired tire must hold pressure after inflation and inspection.
- Sensor and foam condition: TPMS hardware and acoustic foam must remain serviceable.
A tire that looks repairable from the outside can have hidden belt or liner damage. The safest professional repair generally involves removing the tire, inspecting it internally, and installing an approved combination repair unit rather than relying on an external plug alone.
How Much Does a Tesla DIY Tire Change Cost?
A prepared owner typically spends $150-$450 for a basic jack, jack pads, torque wrench, socket, and inflation equipment, excluding the replacement wheel and tire. A complete spare assembly can raise the total initial investment to approximately $300-$900, depending on wheel size, tire brand, TPMS hardware, and whether the wheel is new or used.
| Purchase or service | Typical price range | One-time or recurring | What changes the price |
|---|---|---|---|
| Jack-pad kit | $15-$45 | One-time | Material, model fit, number of pads |
| Floor jack | $90-$250 | One-time | Lift rating, reach, construction |
| Torque wrench | $40-$150 | One-time | Accuracy, range, calibration |
| Plug and inflator kit | $50-$160 | Replaceable supplies | Compressor output and accessories |
| Mounted spare assembly | $150-$600 | One-time | Tire size, wheel, TPMS, condition |
| Tire replacement and balance | $180-$450 per axle or tire set | Recurring | Tire size, brand, alignment, local labor |
A tire shop may charge less than the cost of assembling a complete emergency kit, but the kit has value for owners who travel in remote areas or face long roadside waits. DIY equipment is economical only when the owner can use it safely and maintain it.
Will TPMS Reset After a Wheel Swap?
A Tesla may relearn compatible tire-pressure sensors after the replacement wheel is installed and driven, but the exact process depends on the model, sensor type, and software. A TPMS warning does not prove that the tire is damaged, and driving without verifying pressure is unsafe.
Set each tire to the door-placard pressure before driving. Then follow the touchscreen’s tire-service or wheel-configuration instructions if the vehicle requests a tire-size or wheel change. Some Tesla systems identify compatible sensors automatically after several minutes of driving above neighborhood speeds; others may require a service procedure or sensor replacement.
Aftermarket wheels can produce persistent warnings when sensors are absent, incompatible, incorrectly programmed, or damaged during tire mounting. A warning that remains after correct inflation and a reasonable drive requires tire-service diagnosis rather than repeated resets.
What Common DIY Mistakes Cause Problems?
The most expensive mistakes involve incorrect lifting, incorrect torque, and driving on damage that should have ended the trip. Each failure has a different recovery action.
| Failure mode | Typical symptom | Immediate response | Correct recovery |
|---|---|---|---|
| Incorrect lift point | Jack pad slips or underbody deforms | Stop raising immediately | Lower safely and inspect before driving |
| Loose wheel fastener | Vibration, clicking, steering pull | Stop in a safe place | Recheck seating and torque; inspect studs |
| Over-torqued fastener | Damaged nut, stud, or wheel | Do not force removal roadside | Have a tire shop remove and replace hardware |
| Plugged shoulder damage | Leak continues or sidewall bulges | Stop driving | Replace tire or obtain professional inspection |
| Wrong spare size | ABS or handling warning | Drive only if manufacturer permits | Install the specified assembly |
| TPMS mismatch | Sensor warning after swap | Verify pressure first | Program or replace compatible sensors |
One counterintuitive risk is under-torquing after a seemingly successful wheel change. Heavy EV curb weight and high motor torque do not loosen a correctly torqued fastener by themselves, but poor seating, contamination, or incorrect torque can allow joint movement that damages the wheel and hardware.
Another practical rule is to inspect the jack pad before every use. A cracked adapter can look acceptable on the ground and deform when it carries several hundred kilograms at one corner.
What Should Different Tesla Owners Carry?
Daily commuters usually benefit from a compact jack-pad set, plug kit, gloves, and compressor rather than a full spare. Road-trip owners gain more from a complete, verified spare assembly because a puncture in a remote area may exceed the repair limits of a plug.
Urban and suburban commuter
Carry four jack pads, a compressor, a tread-repair kit, a tire-pressure gauge, and roadside-assistance details. Use the plug only to address a central-tread puncture and arrange professional inspection promptly.
Long-distance or remote traveler
Carry a model-compatible mounted spare, jack pads, a rated jack, torque wrench, reflective warning equipment, and a way to protect the wheel during storage. Confirm that the spare clears the brakes and that its tire load and speed restrictions are understood before the trip.
Hands-off novice
Carry jack pads even if you do not plan to lift the car. Giving the correct adapters to a tow operator or mobile technician reduces the chance of an incorrect contact point, although the technician remains responsible for using approved lifting procedures.
Tesla owners should also save the Tesla app login, roadside phone option, vehicle identification number, tire size, and insurance towing information before a failure occurs. A dead phone battery is a more common roadside problem than a missing technical specification.
When Should You Avoid Changing the Tire Yourself?
Avoid DIY lifting when the Tesla is on a slope, soft shoulder, ice, gravel, active traffic lane, or unstable surface. Avoid DIY repair when the tire has sidewall damage, the wheel is bent, the car cannot maintain Park, or the correct jack pad and torque equipment are unavailable.
Call roadside assistance or a qualified mobile tire provider when:
- The tire is shredded or separated from the wheel.
- The wheel has visible cracks, bends, or missing material.
- The vehicle touched an obstacle or has steering damage.
- High-voltage warning messages appear after an impact.
- The jack cannot remain vertical and stable.
- A wheel nut or stud is stripped.
- You cannot confirm the replacement tire’s load and speed ratings.
- The vehicle is stopped where traffic creates an immediate hazard.
A tire failure after an impact can hide suspension, alignment, or battery-enclosure damage. A visually intact tire does not clear the vehicle for continued driving if the steering wheel is off-center, the car pulls sharply, or warning messages appear.
Frequently Asked Questions
Do Teslas come with a spare tire?
Most Tesla vehicles do not include a factory spare tire, jack, or lug-wrench kit. Owners who want independent roadside capability must purchase a compatible spare assembly and lifting equipment separately, while many drivers choose Tesla Roadside Assistance or a tire-repair and compressor kit instead.
Can you change a Tesla tire with a regular jack?
A regular floor jack can raise a Tesla only when it is used with the correct jack-pad adapter at an approved lift point. A bare jack saddle, improvised block, or contact with the battery tray can damage the underbody, so a conventional jack without Tesla-specific interface equipment is unsafe.
Can you rotate Tesla tires at home?
Tesla tires can be rotated at home when the tire sizes, tread direction, and manufacturer rotation pattern permit it. The owner needs four safe lifting points or suitable professional equipment, and every wheel fastener must be tightened to the current Tesla specification with a calibrated torque wrench.
How long can you drive on a plugged Tesla tire?
Drive only as far and as fast as the plug manufacturer or inspecting tire professional permits, because an external plug does not confirm internal tire integrity. The safest practice is to use a plug to reach inspection, then have the tire removed and assessed before treating the repair as durable.
Does Tesla Roadside Assistance replace a flat tire?
Tesla Roadside Assistance may provide help for a flat tire, towing, or transport under the applicable vehicle and regional terms, but it may not supply a permanent tire replacement at the roadside. Check the Tesla app and policy limits, including mileage, coverage period, and destination restrictions.
What happens if a Tesla tire loses pressure overnight?
First inspect for a puncture, valve leak, bead leak, or temperature-related pressure change, then inflate the tire to the door-placard value only if it is structurally undamaged. Do not drive on a visibly deflated tire, because the sidewall and wheel can sustain damage within a short distance.
The Bottom Line
Can you change a Tesla tire yourself? Yes, a prepared owner can safely swap a complete wheel assembly, provided the vehicle is on level ground, the correct Tesla jack pads engage the approved lift point, and the lug nuts receive the exact documented torque. A clean central-tread puncture may justify an emergency plug, but sidewall or impact damage requires professional replacement or inspection.
For most owners, the sensible setup is a compressor, pressure gauge, jack-pad kit, and roadside plan. Remote travelers should add a verified spare assembly and rated lifting equipment. If the scene, damage, or equipment is uncertain, Tesla Roadside Assistance is safer than risking battery, wheel, or personal injury.


