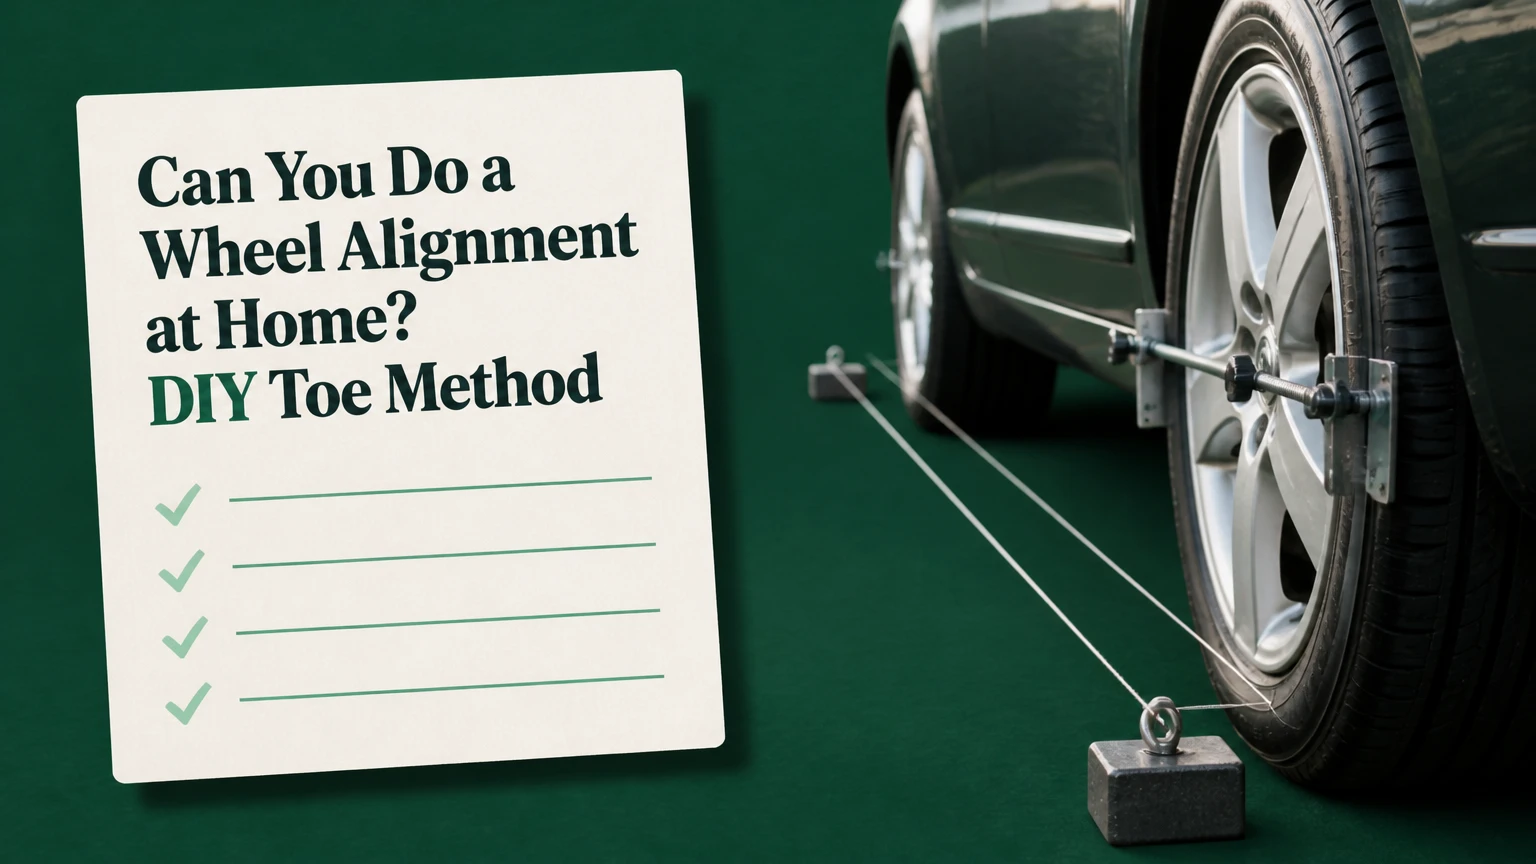
Yes, you can do a wheel alignment at home, but most home methods reliably measure and adjust only toe. A careful string or toe-plate setup can produce a useful toe measurement, while camber, caster, rear geometry, damaged components, and electronic steering calibration usually require vehicle-specific equipment and professional verification.
Key facts at a glance
A home alignment is primarily a toe-alignment procedure, not a complete four-wheel alignment.
String alignment measures the wheel’s relationship to the vehicle’s thrust line, not automatically the manufacturer’s specification.
Measure from consistent metal wheel-rim edges, because tire sidewalls and raised lettering distort readings.
Tire pressure, wheel runout, suspension play, steering-rack position, and a level floor determine repeatability.
A typical careful DIY setup takes 2-4 hours and costs $15-$250, depending on equipment already owned.
A professional alignment is the safer choice after collision damage, suspension replacement, major lowering, lifting, or uneven tire wear.
Can You Do a Wheel Alignment at Home?
A home wheel alignment is reasonable when the vehicle has sound suspension, adjustable front toe, accessible tie rods, and a level working surface. The practical DIY target is total front toe, with the steering wheel held centered and the result checked against the manufacturer’s specification in the service manual.
Home alignment is not automatically equivalent to a computerized alignment-rack measurement. A string can establish a geometric reference, but the operator must account for front-to-rear track-width differences, wheel runout, steering-center position, and the vehicle’s specified measuring condition.
The most important boundary is safety. Do not use a homemade alignment as permission to drive a vehicle with loose ball joints, bent suspension arms, damaged wheels, exposed tire cords, or an unknown collision history.
What Do Toe, Camber, and Caster Mean?
Toe describes the direction that the wheels point when viewed from above. Camber describes the wheel’s inward or outward tilt when viewed from the front, while caster describes the steering-axis angle when viewed from the side.
| Alignment angle | Viewing direction | Positive or inward condition | Common effect |
|---|---|---|---|
| Toe | Above the vehicle | Toe-in means wheel fronts are closer together | Scrubbing, feathering, poor straight-line efficiency |
| Toe | Above the vehicle | Toe-out means wheel fronts are farther apart | Nervous turn-in, inside-edge scrub, wandering |
| Camber | In front of the wheel | Negative camber tips the top inward | Cornering grip, possible inner-edge wear |
| Camber | In front of the wheel | Positive camber tips the top outward | Reduced cornering contact, possible outer-edge wear |
| Caster | Beside the vehicle | Positive caster places the steering axis top rearward | Self-centering and high-speed stability |
| Caster | Beside the vehicle | Negative caster places the steering axis top forward | Lighter steering and weaker self-centering |
Caster terminology deserves precision. Positive caster is not correctly described as the steering axis tilting toward the driver; on a typical vehicle, the upper part of the steering axis is displaced rearward relative to the lower part. Caster affects steering effort, return-to-center behavior, and tracking, but a basic string setup does not directly measure it.
Toe errors often create feathered tread blocks rather than one simple edge-wear pattern. The exact wear direction depends on the amount of toe, tire construction, driving conditions, camber, and suspension compliance.
Which Angles Can a Home Alignment Measure?
A home setup can measure front toe well enough for many practical repairs, can screen static camber, and usually cannot establish caster accurately. A professional rack adds rear toe, thrust angle, camber, caster, steering-axis inclination, and before-and-after printouts.
A digital angle gauge can estimate camber if the wheel hub or a verified wheel surface provides a repeatable reference. That measurement still does not prove that the camber is within the manufacturer’s loaded-vehicle condition or that the suspension is undamaged.
Rear alignment matters even on front-wheel-drive cars. Rear toe creates a thrust line, and the front wheels should be aligned to that line rather than blindly made parallel to the body or garage wall.
DIY methods compared
| Method | Typical cost | Main measurement | Typical setup time | Best use |
|---|---|---|---|---|
| String and ruler | $15-$40 | Front and rear rim-to-string distances | 60-120 minutes | Home toe adjustment |
| Toe plates | $80-$180 | Tire or wheel total toe difference | 20-45 minutes | Frequent track setup |
| Hub-mounted laser gauge | $150-$400 | Toe against a target or reference | 30-60 minutes | Repeatable enthusiast work |
| Professional 3D rack | $80-$150 per session | Four-wheel geometry and thrust angle | 45-90 minutes | Road vehicles and repairs |
Prices are typical U.S. consumer ranges and vary by region, vehicle size, and whether parts need repair. A laser or toe-plate kit reduces setup time, but it does not remove the need for correct specifications and a sound suspension.
What Tools and Conditions Are Required?
A reliable home toe alignment requires a level floor, stable reference strings, a tire-pressure gauge, a jack and certified jack stands, a tape measure or digital caliper, wrenches for tie-rod adjustment, and the manufacturer’s toe specification. Wheel chocks and slip plates improve safety and reduce measurement disturbance.
Use four jack stands only to support string lines, never to support a vehicle unless they are correctly rated and positioned at the vehicle’s approved support points. The car itself should rest on the ground or on purpose-built alignment turn plates during measurement.
Before starting
| Requirement | Typical specification | Why it matters |
|---|---|---|
| Tire pressure | OEM door-label pressure, often 30-36 psi | Changes ride height and tire shape |
| Floor | Level concrete, ideally within 3 mm across the wheelbase | Prevents gravity-related geometry errors |
| Measurement reference | Low-stretch string at hub height | Creates a stable parallel reference |
| Measurement tool | 0.5 mm-resolution caliper or ruler | Detects small toe changes |
| Vehicle load | OEM service-manual load condition | Matches the published alignment target |
| Adjustment access | Correct tie-rod wrench and torque wrench | Prevents damaged threads and loose nuts |
Inspect wheel bearings, tie-rod ends, ball joints, control-arm bushings, strut mounts, and steering components before measuring. A wheel that moves during a shake test cannot produce a trustworthy alignment reading.
How Does String Alignment Work?
String alignment compares each wheel rim with taut lines arranged parallel to the vehicle’s reference direction. Measuring the front and rear portions of a rim reveals whether that wheel points inward or outward relative to the string, but the string must be positioned correctly for the result to have meaning.
Step 1: Obtain the specification
Find the exact front and rear toe specification for the vehicle, including whether the manual lists total toe, individual toe, degrees, millimeters, or inches. Some manufacturers specify a tolerance around a preferred nominal value, and modified vehicles may require a different target approved by the suspension manufacturer.
Do not substitute a generic “slight toe-in” rule. A typical passenger-car target may be close to zero, but the correct value can differ substantially by model, tire, ride height, and drive system.
Checkpoint: You will know the target is usable when you have the nominal value, allowable range, units, and loading condition.
Common mistake: Using a specification for a different trim, wheel size, or model year.
Step 2: Prepare the vehicle
Set all four tires to the door-label pressure, remove unusual cargo, apply the specified fuel or load condition, and verify that wheel nuts are torqued. Park on the level surface, release the parking brake if safe, and chock the wheels that will remain stationary.
Roll the vehicle forward and backward several feet, then settle it with a light push. If the vehicle is on turn plates, center the plates before measurement. Keep the steering rack near its normal center rather than forcing the steering wheel against a lock.
Checkpoint: The tires sit naturally, the steering wheel is centered, and no suspension part has visible play.
Common mistake: Measuring immediately after lowering the vehicle from a jack, when tire scrub can hold the suspension in a false position.
Step 3: Build the string box
Place a taut string on each side at approximately hub height. Attach each string to stands ahead of and behind the vehicle, keeping the strings high enough to avoid touching the tires and low enough to compare with the wheel centers.
The strings must be parallel to the vehicle’s intended reference, but equal string-to-hub distances at the front and rear are not always correct. Front and rear track widths can differ, so calculate the required offset from the vehicle centerline or use a documented reference method.
Measure from the string to the same point at both front and rear wheel centers. Record the values rather than relying on visual judgment.
Checkpoint: Each string clears the tires, remains taut, and has a known relationship to the wheel-center line.
Common mistake: Assuming the front and rear hubs must be equally distant from the string. A different track width can make a correctly aligned wheel appear wrong.
Step 4: Measure each rim
Use the machined outer lip of the wheel, not the tire sidewall. Measure from the string to the forward and rearward rim edges at the same height, keeping the caliper or ruler square to the rim.
If the wheel has significant radial or lateral runout, rotate it and repeat the measurement. A bent wheel can create an apparent toe change even when the suspension has not moved.
For a given side, compare the front and rear rim-to-string distances. The sign depends on which side of the car the string occupies and how the reference is established, so label the geometry with a sketch instead of memorizing one universal positive-number rule.
A practical formula is:
rim-edge difference = rear rim-to-string distance minus front rim-to-string distance
Interpret that difference using your specific string layout, then compare the combined left-and-right result with the OEM total-toe target.
Checkpoint: Three repeated measurements agree within about 0.5-1.0 mm.
Common mistake: Measuring tire bulges, raised letters, or tread blocks. Tire sidewalls can differ by several millimeters around one circumference.
Step 5: Adjust the tie rods
Follow the vehicle service manual for tie-rod access, thread direction, jam-nut torque, and whether the steering rack must be supported. Make small changes, usually one-eighth to one-quarter turn at a time, and record every adjustment.
Adjust both sides deliberately. If one tie rod changes length, preserve steering-rack center by making a complementary change on the opposite side whenever the geometry allows. Moving only one side can produce the correct total toe with a crooked steering wheel and unequal steering lock.
Never loosen a jam nut with the vehicle unstable or place a wrench on a component that can transmit force into a rubber boot. After adjustment, tighten the jam nuts to the specified torque.
Checkpoint: The tie-rod threads remain engaged, jam nuts are torqued, and the steering wheel returns to the same centered position.
Common mistake: Raising the front wheels and adjusting while the suspension hangs. Ride height and bushing position change when the car returns to the ground.
Step 6: Settle and verify
Lower the vehicle, roll it forward and backward, and repeat the measurements. Perform at least two measurement cycles after the final adjustment. Check the steering wheel, tire clearance, jam nuts, and any disturbed fasteners before moving the vehicle.
A short road test on a quiet, straight road can reveal pulling, wandering, steering-wheel offset, or poor return-to-center. A road test cannot replace measuring toe or diagnosing a bent component.
Checkpoint: Repeated measurements remain inside the OEM tolerance and the vehicle tracks straight on a safe, crowned-road-aware test route.
Common mistake: Treating a road that slopes toward the curb as proof of a bad alignment. Test in both directions on the same road.
How Accurate Is a Home Alignment?
A careful string alignment can repeat within approximately 0.5-1.0 mm at the rim, but repeatability is not the same as absolute accuracy. A reference that is 2 mm out of parallel, a wheel with runout, or a suspension that was not settled can overwhelm the measuring tool’s resolution.
Manufacturers publish alignment tolerances in angular and linear units. Toe change at the tread depends on wheel diameter, so a millimeter measured at the rim should not be converted to degrees without using the correct measurement radius and geometry.
| Accuracy factor | Typical error source | Likely consequence | Control |
|---|---|---|---|
| String position | 1-3 mm reference offset | False toe reading | Measure hub references and track widths |
| Wheel runout | 1-2 mm lateral variation | Toe changes as wheel rotates | Average several rotational positions |
| Tire scrub | 2-5 mm temporary displacement | Inconsistent repeat readings | Roll and settle before every cycle |
| Tool resolution | 0.5-1.0 mm | Rounding at small toe targets | Repeat three readings |
| Suspension play | Variable, often above 1 mm | Impossible-to-hold alignment | Repair parts before adjustment |
For a race car that receives frequent setup changes, repeatability may matter more than a shop printout. For a daily vehicle carrying passengers on public roads, a professional four-wheel check has a better safety margin.
What Are the Main DIY Alignment Mistakes?
The most damaging home-alignment errors are incorrect reference geometry, measuring inconsistent surfaces, and adjusting toe before fixing worn parts. Each error can produce a convincing number while leaving the vehicle unsafe or the tires vulnerable to rapid wear.
- Using the body as the centerline: Body panels are not guaranteed to be symmetrical. Use wheel centers, chassis datum points, or a documented thrust-line method.
- Ignoring rear thrust angle: A rear axle pointing slightly left or right can make the car travel straight with the steering wheel displaced. Measure rear toe when the equipment and vehicle design permit.
- Centering the steering wheel only by appearance: The steering rack may not be centered when the cabin wheel looks straight. Confirm equal steering travel and follow the service manual.
- Forgetting wheel runout: Measure at repeatable rim locations and rotate the wheel. A bent rim can mimic a tie-rod problem.
- Changing toe to compensate for camber: Toe cannot correct a damaged control arm, incorrect ride height, or excessive camber. It may only hide the symptom temporarily.
- Skipping final torque checks: Loose tie-rod jam nuts can change toe immediately and create a loss-of-control hazard.
One counterintuitive rule matters: a reading can be mathematically consistent and still be wrong if both strings are parallel to the garage rather than to the vehicle reference. Geometry quality comes before measurement precision.
Which Home Method Should You Use?
String alignment offers the lowest cost and the most flexible reference, while toe plates offer faster setup and convenient repeat testing. Hub-mounted laser tools can improve repeatability, but professional equipment remains the strongest choice for four-wheel geometry and vehicle-specific diagnosis.
| User situation | Preferred method | Typical cost | Main limitation |
|---|---|---|---|
| One-time tie-rod replacement | String and ruler | $15-$40 | Slow reference setup |
| Weekend track adjustments | Toe plates | $80-$180 | Tire shape affects plate contact |
| Frequent competition setup | Hub-mounted laser | $150-$400 | Requires calibration and level targets |
| Daily-driver repair | Professional 3D rack | $80-$150 | Requires appointment and shop access |
| Lifted truck after suspension work | Home toe check, then shop | $15-$150 plus shop fee | Caster and rear geometry remain unresolved |
Toe plates that contact the tires are convenient, but tire sidewall bulges and wheel-to-tire mounting variation can affect readings. A rim-referencing system is preferable when the vehicle has stiff sidewalls, racing tires, or a precise near-zero toe target.
When Should You Skip Home Alignment?
Use a professional alignment shop when the vehicle has collision damage, an unknown ride-height change, worn steering or suspension parts, adjustable rear geometry, active suspension, or a steering-angle sensor that requires calibration. A shop is also appropriate when the vehicle pulls, the steering wheel remains off-center, or tires show rapid irregular wear after a home adjustment.
Situations requiring special care
After replacing tie rods: A home toe adjustment can make the vehicle temporarily drivable, but the replacement may alter steering-center position. Verify total toe and steering-angle calibration professionally when the vehicle uses electronic stability control procedures.
After lowering a car: Ride-height changes alter camber, caster, bump steer, and toe through suspension travel. A home toe setting cannot validate the complete new geometry.
After lifting a truck: Front toe may be adjustable at home, but caster correction, track-bar position, axle centering, and steering linkage angles often require specialized measurement.
After a pothole impact: Check the wheel, tire, bearing, control arm, and tie rod before alignment. A successful toe adjustment does not prove that the wheel or subframe is straight.
With uneven tire wear: Inspect alignment, inflation, rotation history, shocks, bushings, and tire construction. A professional inspection is usually more efficient than repeatedly changing toe.
How Much Does a Home or Professional Alignment Cost?
A basic home toe check typically costs $15-$40 when the owner already has a jack, stands, and hand tools; dedicated toe plates or laser equipment usually costs $80-$400. A typical U.S. professional four-wheel alignment costs about $80-$150 before repairs, with modified or damaged vehicles often costing more.
| Option | Equipment or service cost | Owner time | Capability |
|---|---|---|---|
| Basic string setup | $15-$40 | 2-4 hours | Front toe with careful geometry |
| Toe-plate kit | $80-$180 | 30-90 minutes | Fast total-toe comparison |
| Laser alignment kit | $150-$400 | 1-2 hours | Repeatable toe reference |
| Standard shop alignment | $80-$150 | 45-90 minutes | Four-wheel measurement and adjustment |
| Alignment plus repairs | $200-$1,000+ | 1-3 days | Parts, labor, and verification |
The lowest cash price is not always the lowest total cost. A $25 setup that produces 2 mm of unintended toe can wear expensive tires quickly, while a $100 shop measurement may identify a worn component before adjustment.
Can You Drive After a DIY Alignment?
Drive only after all fasteners are torqued, the tires are correctly inflated, the steering operates smoothly, and repeated measurements match the vehicle specification. Begin with a low-speed test in a safe area, then inspect the steering wheel position, pulling, vibration, tire clearance, and unusual noises.
Do not make a high-speed highway trip immediately after a first-time home alignment. Recheck the tie-rod jam nuts and toe after the test drive, especially if the initial adjustment followed a component replacement.
Tire balancing addresses wheel-and-tire vibration, not directional alignment. A balanced wheel can still point incorrectly, and an aligned wheel can still vibrate because of imbalance or radial-force variation.
Which Approach Fits Your Vehicle?
A stock daily driver generally benefits from a professional alignment, especially when the service price is close to the cost of a single replacement tire. The shop can compare all four wheels, identify thrust-angle problems, and provide a record of the final values.
A track or autocross car is the strongest candidate for home alignment. Frequent setup changes justify toe plates or a laser gauge, and the owner can record repeatable settings for different circuits, tires, and temperatures. The owner must still understand the manufacturer’s baseline and inspect fasteners before every event.
A lifted truck should use a hybrid process. A home toe check can reduce dangerous toe error before a shop visit, but caster, axle location, steering linkage, and altered suspension travel deserve professional measurement.
A vehicle with worn or recently damaged components should not be aligned first. Repair the mechanical cause, then measure the geometry.
FAQ
Can I align a car without lifting it?
Yes, front toe can be measured and adjusted with the vehicle resting on its tires, which usually produces more realistic ride-height geometry. The front tires need low-friction slip plates or a method that prevents tire scrub during adjustment. Never crawl beneath an unsupported vehicle, and follow the service manual for tie-rod access.
Do I need an alignment after replacing tires?
A tire replacement does not always require alignment if the old tires wore evenly and the vehicle tracks correctly, but checking alignment is sensible when installing new tires after a pothole impact or suspension repair. New tires make an existing toe error more expensive because uneven wear starts on fresh tread.
Can a bad wheel bearing change alignment readings?
Yes, a loose wheel bearing can allow the hub and wheel to move during measurement, producing changing toe or camber readings. A wheel bearing with detectable play should be repaired before alignment. Tightening or replacing the bearing after a previous measurement requires a complete recheck.
Why does the steering wheel remain crooked after toe adjustment?
A crooked steering wheel usually indicates that total toe was corrected without centering the steering rack, or that rear thrust angle was ignored. Recenter the rack according to the service procedure, divide the toe adjustment between both sides, and verify rear alignment rather than simply repositioning the steering wheel.
Can I adjust camber at home?
You can adjust camber at home only when the vehicle has a factory eccentric, adjustable control arm, slotted strut mount, or approved aftermarket component. A digital angle gauge can measure change, but the vehicle still needs a level surface, correct loading, and a specification. Do not bend suspension parts to obtain camber.
Does alignment fix a vehicle that pulls?
Alignment can correct pulling caused by toe, camber, caster, or thrust-angle differences, but tire conicity, unequal pressure, brake drag, worn bushings, and road crown can produce the same symptom. Swap front tires side to side where permitted as a diagnostic step, inspect brakes and suspension, and use a professional printout if the cause remains unclear.
The Bottom Line
You can do a wheel alignment at home when the goal is a careful front-toe adjustment on a mechanically sound vehicle. Use the manufacturer’s specifications, a properly established string or toe-plate reference, repeated measurements, correct tie-rod torque, and a controlled road test.
A home method is not a substitute for full camber, caster, rear-thrust-angle, collision, or electronic steering diagnosis. For a daily driver, lifted truck, lowered vehicle, or car with irregular tire wear, paying for a professional four-wheel alignment is usually the safer decision.


