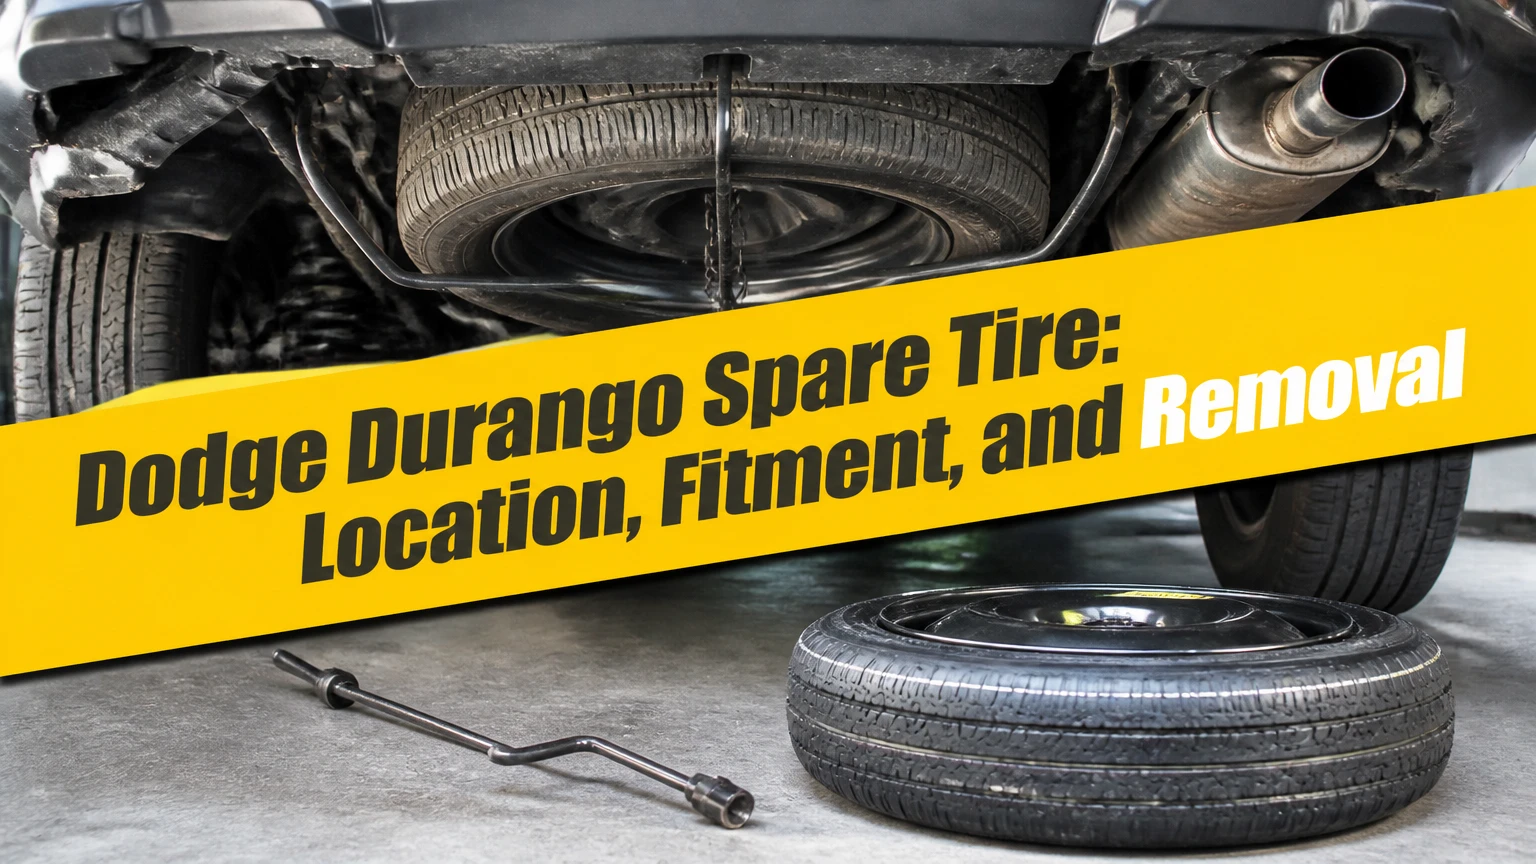
The Dodge Durango spare tire is usually mounted beneath the rear cargo area and lowered with a cable-operated hoist accessed through the cargo floor. Standard Durango trims commonly use a compact spare, while SRT and Hellcat versions may provide an inflator and sealant kit instead; the exact wheel, pressure, torque, and brake clearance depend on model year and trim.
Key Facts at a Glance
- Most Dodge Durango spare tires sit outside the vehicle, below the rear cargo floor, rather than inside the luggage compartment.
- A cargo-area access opening lets the factory jack handle turn the underbody hoist from above.
- A temporary compact spare is generally limited to 50 mph and emergency use, but the owner’s manual and tire sidewall control.
- The frequently quoted 130 ft-lb lug-nut value is not universal across Durango years; use the vehicle’s specification label or manual.
- SRT and Hellcat brake packages can prevent a standard Durango spare wheel from fitting the front axle.
- A cable hoist can corrode from road salt, so test the spare-lowering mechanism before a long trip.
Where Is the Dodge Durango Spare Tire?
The Dodge Durango spare tire is normally stored under the rear of the vehicle, centered or slightly forward of the rear bumper, with the wheel held against the chassis by a cable hoist. The jack, lug wrench, and extension rods are usually inside the rear cargo area, beneath a lift-up floor panel or in a side storage compartment.
The exact access cover differs by generation. First-generation Durangos from 1998-2003, second-generation models from 2004-2009, and third-generation models from 2011 onward can use different tool bags, floor openings, and hoist drives. A plastic cap or marked opening near the rear cargo threshold commonly covers the drive socket, but the owner’s manual remains the authority for a particular vehicle.
Before loading luggage for a trip, open the rear hatch and identify four items:
- The jack and lug wrench.
- The extension rods or jack-handle sections.
- The hoist access opening.
- The spare’s size and inflation label.
A missing tool kit creates a serious problem because the tire cannot normally be released by reaching under the vehicle and unbolting it. The hoist must be lowered from inside, unless corrosion or damage requires a repair procedure.
How Does the Durango Spare-Tire Hoist Work?
A Dodge Durango hoist winds a steel cable around a drum and uses a metal retainer to hold the spare wheel. Turning the drive socket counterclockwise unwinds the cable, allowing the tire to descend; the retainer then passes through the wheel’s center opening after the tire lies flat.
The cable retainer is not the same as a wheel stud. It supports the stored tire vertically against the vehicle, then releases through the center hole when tilted into the correct position. Dirt, salt, and water collect around the exposed mechanism, which explains why an apparently intact cable can still have a seized drum.
What Tools and Safety Checks Are Needed?
Lowering a Durango spare normally requires the factory jack-handle assembly, lug wrench, wheel chock, gloves, and a flashlight. The job typically takes 15-25 minutes when the hoist works freely, but a corroded cable can turn a tire change into a roadside recovery.
Before You Start
| Item | Typical specification | Why it matters |
|---|---|---|
| Factory jack handle | 1 assembled extension tool | Reaches the cargo-floor drive socket |
| Lug wrench | Vehicle-supplied cross or L-shaped wrench | Removes the wheel nuts |
| Wheel chock | 1 solid chock, approximately 4-6 inches | Prevents movement on a slope |
| Gloves and eye protection | 1 pair each | Protects against rust flakes and road debris |
| Flashlight | 300-500 lumens typical | Shows cable and retainer position |
| Level working area | At least 2 m beside vehicle | Provides jack clearance and escape room |
Park on the firmest level surface available, select Park, apply the parking brake, and switch on the hazard lamps. If the vehicle is on a traffic lane, call roadside assistance instead of working close to moving traffic. A jack supports a vehicle for lifting, not for crawling underneath it.
Loosen the flat wheel’s lug nuts slightly before raising the Durango. Do not remove them fully until the tire is off the ground and the vehicle is stable on the jack.
How Do You Lower and Remove the Spare?
To remove a Durango spare, expose the hoist drive socket, assemble the extension handle, turn counterclockwise until the cable is slack, pull the tire from beneath the bumper, and tilt the retainer through the wheel center. A free hoist usually takes several dozen turns and requires no access beneath the lifted vehicle.
Step 1: Locate the Factory Tools
Open the liftgate and raise the rear cargo floor using its handle. Inspect the main storage well and the side trim compartment, because the jack and tool pouch location varies by year, seating configuration, and equipment package.
Remove loose cargo before beginning. A tool pouch hidden beneath luggage is easy to overlook during a nighttime puncture.
Success checkpoint: The jack, lug wrench, and every extension section are visible and assembled on the cargo floor.
Common mistake: Searching only beneath the vehicle and assuming the tools are missing.
Step 2: Expose the Hoist Drive
Find the access cap or plug in the cargo floor, commonly near the rear latch or centerline. Remove the cap carefully with a trim tool or a flat screwdriver wrapped in tape, then inspect the square or shaped drive socket.
Some vehicles use a security-style drive that will not accept a generic extension. Do not force an oversized screwdriver into the socket, because rounding the drive can make a later hoist replacement more difficult.
Success checkpoint: The extension tool seats fully in the drive socket without rocking.
Common mistake: Turning the tool before it is fully engaged, which damages the socket.
Step 3: Lower the Cable
Turn the assembled handle counterclockwise while keeping the tool aligned vertically. Continue until the tire reaches the ground and the cable has enough slack for the retainer to move through the wheel.
A compact spare can take less effort to lower than a full-size wheel, but the number of rotations depends on cable length and hoist design. Keep hands clear of pinch points around the drive socket.
Success checkpoint: The tire lies flat on the ground and the cable no longer pulls tightly on the wheel.
Common mistake: Stopping when the tire first touches the pavement, before enough slack exists.
Step 4: Pull the Tire Out
Crouch beside the rear bumper and pull the spare toward the rear of the vehicle. Avoid placing your torso directly beneath the chassis while the cable remains tensioned.
Mud and stones can prevent a wide full-size tire from sliding out easily. Rotate the wheel only after confirming that the cable is slack and the retainer is not trapped against the suspension.
Success checkpoint: The wheel is clear of the bumper and accessible from the side.
Common mistake: Dragging the tire sideways while the retainer remains under tension.
Step 5: Release the Retainer
Tilt the metal retainer so its narrow dimension aligns with the wheel’s center hole, then withdraw the retainer and cable from the wheel. Place the retainer on a clean surface where dirt cannot enter the mechanism.
The valve stem generally faces downward when the spare is stored under the Durango. That orientation exposes the inflation valve for inspection after lowering and prevents the wheel face from sitting against the underbody.
Success checkpoint: The cable and retainer are fully separated from the wheel.
Common mistake: Pulling forcefully without rotating the retainer through the center opening.
Step 6: Install the Spare Wheel
Place the spare on the hub, install the lug nuts by hand, and lower the Durango until the tire contacts the ground enough to prevent rotation. Tighten the nuts in a crisscross sequence, then lower the vehicle completely and torque the nuts to the year-specific specification.
The National Highway Traffic Safety Administration states, “Tires are the only thing that connects your vehicle to the road.” That principle matters during a spare installation because an incorrectly seated wheel or under-tightened lug nut can cause a wheel-loss event.
Success checkpoint: The wheel sits flush against the hub and every lug nut turns smoothly by hand.
Common mistake: Using an impact wrench for final tightening without a torque wrench.
Which Spare Type Fits a Durango?
A compact spare, full-size spare, repair kit, or performance-specific wheel can fit different Durango use cases, but diameter, width, load rating, bolt pattern, center bore, brake clearance, and drivetrain compatibility must all match. The label on the existing wheel is more reliable than a generic online listing.
| Spare option | Typical specification | Main advantage | Main limitation |
|---|---|---|---|
| Compact temporary spare | T135/T145-series tire, often 17- or 18-inch wheel | 50 mph emergency mobility | Limited distance, traction, and towing ability |
| Full-size matching spare | Same tire size and load rating as road tires | Normal rolling diameter | Heavy, expensive, and sometimes unavailable underneath |
| Different full-size spare | Matching bolt pattern with approved diameter | Useful for selected trims | May alter handling or fail brake clearance |
| Sealant and inflator kit | 12-volt compressor plus sealant cartridge | Low weight and no wheel storage | Cannot repair sidewall cuts or a separated tire |
The AI Overview’s T145/85R18 example should not be treated as a universal Durango specification. Some years and packages use different compact-spare dimensions, and an aftermarket wheel can have the wrong offset even when its diameter appears correct.
What Must Be Checked Before Buying?
Match the replacement against the driver-door tire placard, owner’s manual, wheel casting, and brake package. Confirm the bolt pattern, center bore, offset, load rating, tire diameter, lug-seat type, and clearance around the brake caliper.
| Fitment check | What to verify | Failure if ignored |
|---|---|---|
| Bolt pattern | Correct number and spacing of wheel studs | Wheel will not seat on the hub |
| Center bore | Hub diameter matches wheel bore | Vibration or installation blockage |
| Offset | Approved position relative to suspension | Caliper, strut, or fender interference |
| Load rating | Equal to or above vehicle requirement | Overloaded tire or wheel |
| Brake clearance | Caliper-to-spoke gap, especially SRT | Wheel cannot rotate or mount |
| Tire diameter | Close to the other axle tire | ABS, AWD, and differential problems |
A tire shop can measure brake clearance with a template, but a test fit is stronger evidence. Never assume a 2011-2023 Durango wheel fits a 2024-2026 vehicle, or that a civilian wheel fits a Pursuit or SRT model, without checking the exact part number.
How Fast and How Far Can You Drive?
A Durango compact spare is typically limited to 50 mph and the shortest practical distance needed to reach tire service. The 50-mile figure often repeated in general tire guidance is not a universal Dodge specification, so the sidewall and owner’s manual determine the enforceable limit.
| Operating condition | Temporary-spare guidance | Reason |
|---|---|---|
| Maximum speed | 50 mph or sidewall limit, whichever is lower | Heat and handling control |
| Intended distance | Direct trip to repair facility | Temporary tread and construction |
| Highway cruising | Avoid when another route exists | Reduced stability and wet grip |
| Towing | Do not tow with compact spare | Altered braking and load behavior |
| AWD operation | Minimize distance and speed | Diameter mismatch can load drivetrain |
| Tire pressure | Sidewall or vehicle manual value | Compact spares often require high pressure |
Compact spares have narrower tread, different construction, and a smaller contact patch than road tires. Michelin’s consumer guidance similarly treats temporary spares as short-term equipment rather than a replacement tire, and it recommends replacing or repairing the damaged road tire promptly.
Do not use cruise control, aggressive cornering, hard braking, or off-road driving with a temporary spare. If the punctured tire is on the front of an AWD or high-performance Durango, consult the manual or a Dodge dealer before selecting an axle arrangement.
What Changes on SRT, Hellcat, and Pursuit Models?
Dodge Durango SRT and Hellcat models may replace the spare wheel with a tire repair kit because large performance brakes, wheel sizes, and weight targets complicate underbody spare fitment. A sealant compressor can handle a small tread puncture, but it cannot solve a sidewall rupture, bent wheel, bead failure, or two-tire puncture.
Performance owners should confirm three separate issues:
- Whether the vehicle was delivered with a wheel or a repair kit.
- Whether the supplied or purchased wheel clears the front Brembo calipers.
- Whether a temporary tire’s diameter and load rating are acceptable for the AWD system.
A narrower wheel that clears the rear brakes may not clear the front brakes. One practical emergency strategy is to move a compatible rear road wheel to the front and install the smaller spare on the rear, but only when the owner’s manual, wheel dimensions, and brake clearance permit that arrangement.
Oversized off-road tires can also exceed the diameter or width available in the factory hoist. A hitch-mounted carrier, interior cargo mount, or roof solution may be required, although each changes departure angle, payload, visibility, or cargo capacity.
What Are the Correct Pressure and Lug-Torque Values?
The correct Durango spare pressure is printed on the spare tire sidewall or specified in the vehicle documentation, while lug torque is determined by model year, wheel, and trim. Many compact spares require approximately 60 psi, but using 60 psi blindly is unsafe if the installed tire specifies another value.
The 130 ft-lb figure should not be presented as a universal Durango torque value. Published owner manuals and service specifications vary, and some Durango applications use values around 100 ft-lb or another year-specific setting. Confirm the number in the glovebox manual, driver-door label, or official Dodge service information.
| Item | Typical range or limit | Authority to use |
|---|---|---|
| Compact-spare pressure | Often 60 psi, sometimes different | Spare sidewall and manual |
| Road-wheel lug torque | Commonly about 100-130 ft-lb | Year-specific manual |
| Compact-spare speed | Usually 50 mph | Spare sidewall and manual |
| Tire age inspection | Annually, plus before trips | DOT date and condition |
| Retorque check | After approximately 25-50 miles | Wheel service practice |
Check pressure with a gauge at least every six months and before severe-weather travel. A compact spare that has sat for ten years may have cracking, corrosion, or an expired rubber compound even if its tread appears unused.
How Do You Fix a Stuck Durango Spare-Tire Winch?
A stuck Durango spare-tire winch usually results from corrosion in the exposed hoist, a damaged drive socket, or cable binding around the drum. Penetrating oil and controlled load relief are safer first responses than jumping on the tire or cutting a cable under tension.
Use this escalation sequence:
- Confirm the tool is the correct size and fully seated.
- Support the tire lightly with a floor jack or a second person’s controlled lift.
- Apply penetrating oil to the visible hoist and cable entry point.
- Wait 15-60 minutes, then work the handle through short forward and reverse movements.
- Inspect whether the cable is twisted, frayed, or wrapped unevenly.
- Stop if the cable strands separate or the body must be placed beneath the vehicle.
The often-repeated “bounce” method can release a light bind, but uncontrolled jumping creates crush and cable-snap hazards. A professional shop should cut or replace a seized hoist after securing the tire with a separate support system.
Do not drive with a tire loosely hanging from a damaged cable. Replace a frayed cable, bent retainer, or rusted hoist rather than trusting a temporary repair.
How Much Does a Replacement Spare Setup Cost?
A typical Durango compact-spare wheel costs about $100-$250, a complete wheel-and-tool kit often costs $400-$600, and hoist replacement commonly totals $270-$500 including one to two hours of labor. Prices vary by year, OEM availability, wheel finish, tire age, and whether the vehicle needs a performance-compatible wheel.
| Repair or purchase | Typical parts cost | Typical installed total |
|---|---|---|
| Compact spare wheel and tire | $150-$350 | $180-$425 |
| Full-size matching spare | $300-$700 | $350-$800 |
| Jack and tool kit | $100-$250 | $100-$300 |
| Hoist or carrier assembly | $70-$200 | $270-$500 |
| Hoist with seized hardware | $150-$350 | $350-$700 |
| Sealant and compressor replacement | $60-$180 | $60-$220 |
Ask a seller for the tire’s DOT date, not only its tread depth. A cheap unused spare with an old manufacturing date may need replacement before it becomes dependable emergency equipment.
How Should You Store and Maintain the Spare?
Store the underbody spare with the valve stem facing downward, the retainer centered, and the cable tight enough to prevent movement without crushing the tire. Inspect pressure, tread, sidewalls, wheel corrosion, hoist operation, and tool completeness at least twice each year.
A useful maintenance routine takes five minutes:
- Lower the wheel fully once each year.
- Read the sidewall pressure while the tire is accessible.
- Inspect the DOT date and sidewall for cracking.
- Clean mud from the retainer and cable.
- Lubricate the hoist only with a product suitable for its mechanism.
- Confirm the jack handle fits the drive socket.
- Raise the wheel until it is secure, then check that it does not rattle.
The underbody location protects cargo space but exposes the wheel to salt spray and standing water. Northern owners should inspect the hoist after winter, while coastal owners should look for galvanic corrosion around the wheel and retainer.
What Should You Do After Installing It?
After installing a Durango spare, drive directly to a tire professional, keep speed below the lowest stated limit, and restore the correct road tire as soon as possible. Check that the spare does not trigger unusual vibration, steering pull, warning lights, or contact with suspension components.
Recheck lug torque after the first 25-50 miles if the wheel installer or manual recommends it. Repair or replace the original tire, then return the spare to its carrier only after checking its pressure and confirming that the hoist locks securely.
Should You Use a Repair Kit Instead?
Use the factory repair kit only for a small tread puncture that sealant instructions permit, with enough battery power to run the compressor. Do not inject sealant into a sidewall tear, a tire that has been driven flat, or a wheel with visible structural damage.
Sealant can also interfere with some tire-pressure sensors and may impose a mileage limit printed on the cartridge. Tell the tire shop that sealant was used so technicians can handle the wheel and sensor correctly.
Frequently Asked Questions
Does every Dodge Durango come with a spare tire?
No. Equipment varies by model year, trim, performance package, and market. Standard versions often have an underbody compact spare, while some SRT and Hellcat vehicles use a compressor and sealant kit. Check the build sheet, cargo compartments, and vehicle manual rather than relying on trim-level assumptions.
Can a Durango spare fit a Jeep Grand Cherokee?
Sometimes, but shared platform history does not guarantee fitment. Bolt pattern, center bore, offset, tire diameter, brake clearance, and load rating must match the specific Durango. A wheel that mounts physically can still contact a caliper or create an unsafe tire-diameter mismatch.
Can I put a full-size spare under the Durango?
A full-size spare may fit if its diameter and width match the factory carrier clearance. Large performance or off-road tires can exceed the hoist space, and a heavy wheel may require a different carrier. Test-fit the complete inflated assembly before depending on underbody storage.
Why is the spare tire pressure so high?
Compact spare tires use small, stiff constructions that require high inflation pressure to carry the vehicle’s load and maintain shape. Pressure commonly approaches 60 psi, but the exact value belongs to the tire sidewall or manual. Do not substitute the pressure listed for the normal road tires.
Does a temporary spare disable AWD?
A temporary spare does not automatically disable every Durango AWD system, but its smaller rolling circumference can create speed differences that stress drivetrain components. Keep the trip short, drive slowly, and follow the manual’s axle-placement instructions. Ask Dodge service for guidance if the warning light appears.
Is a tire plug better than a Durango spare?
A professionally repaired puncture in the repairable tread area is usually preferable to prolonged compact-spare use. A plug-only roadside repair may be inappropriate, especially near the shoulder or after driving on a flat tire. Have the tire removed and internally inspected before choosing a permanent repair.
Conclusion
The Dodge Durango spare tire is usually beneath the rear cargo floor, released through an interior hoist socket and retained by a cable bracket. Verify the exact pressure, torque, wheel size, AWD restrictions, and brake clearance for the model year before driving, then maintain the spare and test the winch before an emergency occurs.


