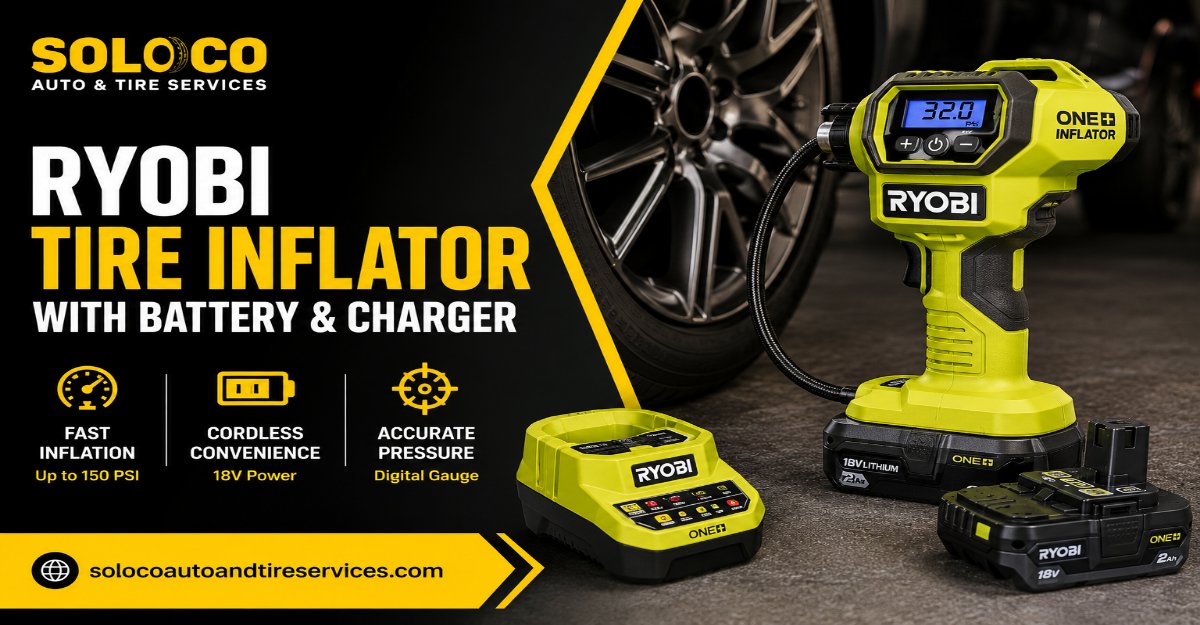
The Ryobi Tire Inflator Kit (with Battery and Charger) is a portable, cordless 18V power tool engineered to pump vehicle tires, bicycle tires, sports equipment, and inflatables using Ryobi’s interchangeable ONE+ battery ecosystem. It delivers high-pressure pneumatic output up to 150 PSI, featuring digital auto-shutoff precision and zero tethering to a 12V vehicle auxiliary power outlet.
+-------------------------------------------------------+
|                KEY FACTS AT A GLANCE                  |
+-------------------------------------------------------+
| • Voltage Platform: Ryobi ONE+ 18V Lithium-Ion        |
| • Maximum Pressure: 150 PSI (Handheld & Dual-Function)|
| • Standard Kit Inclusions: Tool, 2.0 Ah or 4.0 Ah     |
|   battery, standard 18V charger                       |
| • Typical Kit Cost: $79 to $149 USD                   |
| • Warranty: 3-Year Limited Manufacturer Warranty      |
+-------------------------------------------------------+
The Three Ryobi Inflator Kit Configurations
Choosing the right Ryobi tire inflator kit requires matching your primary inflation tasks to the tool’s pneumatic design. Ryobi manufactures three distinct configurations on the 18V ONE+ platform, distributed as ready-to-use kits containing a battery and a charger.
1. Ryobi 18V ONE+ Handheld Digital Inflator Kit (Best for Roadside Emergencies)
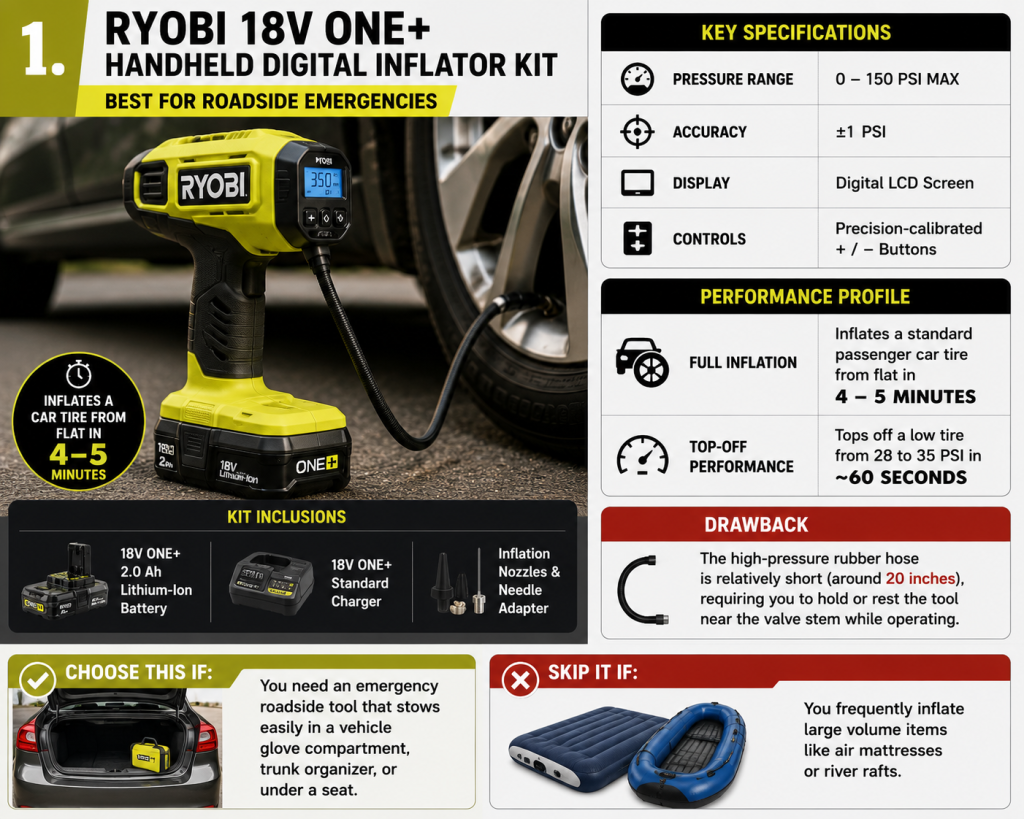
The Handheld Digital Inflator (Model P737 or P747 depending on regional generation) is built with a pistol-grip architecture optimized entirely for high-pressure, low-volume applications like vehicle tires, trailers, and sports balls.
- Key Specifications: Delivers 0 to 150 PSI max capacity; digital LCD screen with precision-calibrated plus and minus buttons accurate to plus or minus 1 PSI.
- Kit Inclusions: Frequently bundled with a compact 2.0 Ah Lithium-Ion battery and an 18V standard charger.
- Performance Profile: Fully inflates a standard passenger car tire from flat in approximately 4 to 5 minutes, or tops off a low tire from 28 to 35 PSI in roughly 60 seconds.
- Drawback: The high-pressure rubber hose is relatively short (around 20 inches), requiring you to hold or rest the tool near the valve stem while operating.
- Choose this if: You need an emergency roadside tool that stows easily in a vehicle glove compartment, trunk organizer, or under a seat. Skip it if you frequently inflate large volume items like air mattresses or river rafts.
2. Ryobi 18V ONE+ Dual-Function Inflator/Deflator Kit (Best for Camping and Recreation)
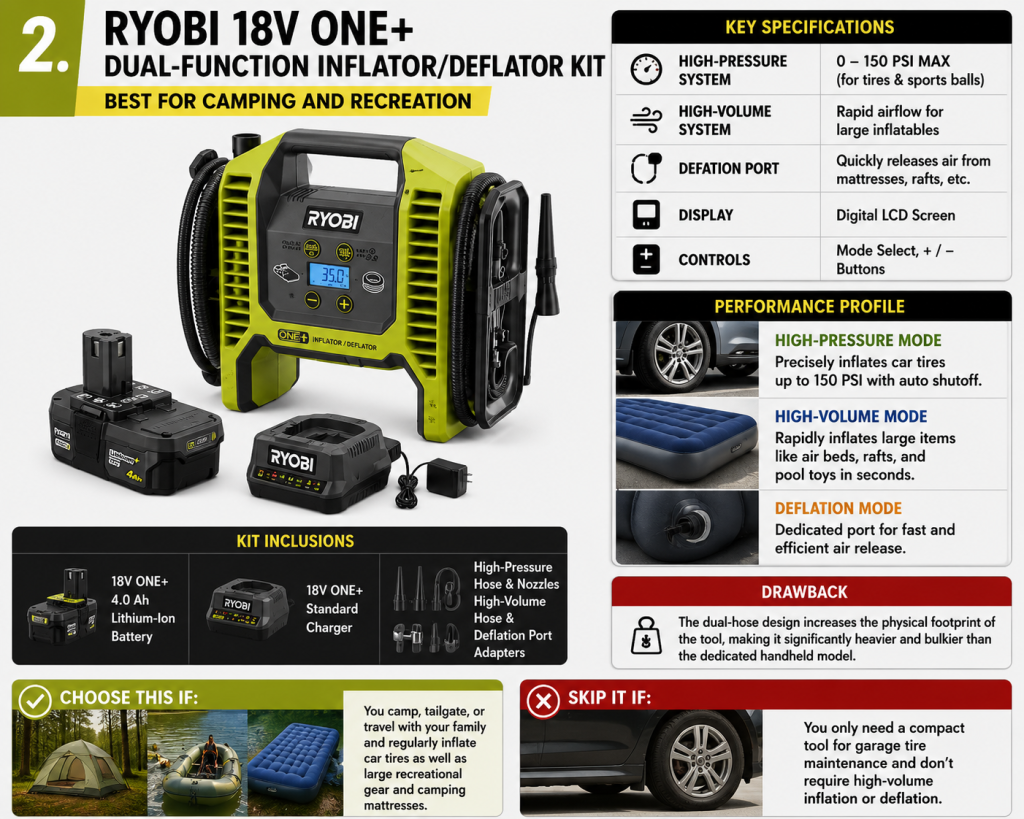
The Dual-Function Inflator (Model P738) bridges the gap between automotive maintenance and outdoor recreation by housing two independent pneumatic systems within a single chassis.
- Key Specifications: High-pressure hose delivers up to 150 PSI for automotive tires; high-volume hose delivers rapid airflow with a dedicated deflation port for air beds and rafts.
- Kit Inclusions: Usually sold as a kit featuring a higher-capacity 4.0 Ah battery and charger to sustain the runtime demands of high-volume inflation.
- Performance Profile: Automatically switches between high-pressure mode for precision PSI targets and high-volume mode for clearing large chambers in seconds.
- Drawback: The dual-hose layout increases the physical footprint of the tool, making it significantly heavier and bulkier than the dedicated handheld model.
- Choose this if: You are a camper, tailgater, or family motorist who regularly transitions between inflating car tires and blowing up large recreational watercraft or camping mattresses. Skip it if you only need a compact tool strictly for garage tire upkeep.
3. Ryobi 18V ONE+ Cordless Analog Power Inflator (Best for Budget-Conscious Utility)
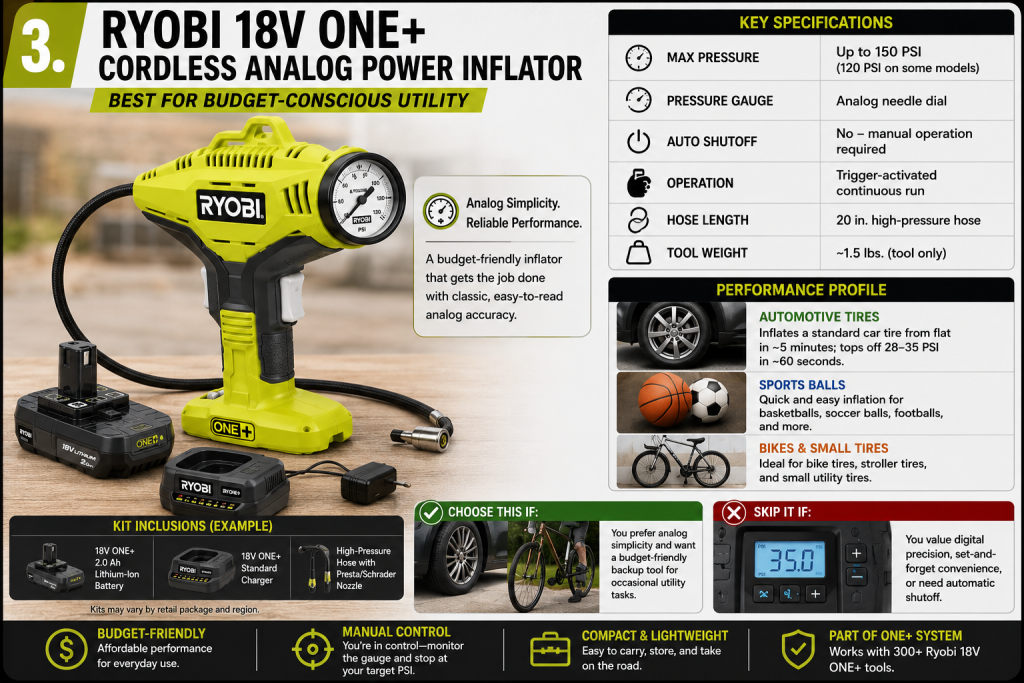
The base model analog inflator represents the legacy iteration of Ryobi’s cordless air delivery system, relying on a mechanical dial gauge rather than a programmable digital display.
- Key Specifications: Operates up to 120 or 150 PSI max capacity; mechanical analog needle gauge without automatic motor shutoff.
- Kit Inclusions: Available in entry-level kits with a basic 1.5 Ah or 2.0 Ah battery.
- Performance Profile: Direct trigger pull activates the internal piston continuously until the user manually releases the switch upon viewing the analog dial.
- Drawback: Lacks digital programming and automatic cut-off, meaning you must actively monitor the analog gauge to prevent over-inflation.
- Choose this if: You prefer analog simplicity and want a budget-friendly backup tool for occasional utility tasks. Skip it if you value set-and-forget digital precision.
How the 18V Piston and Motor Assembly Work
The Ryobi tire inflator converts chemical energy stored in its 18V lithium-ion battery into mechanical kinetic energy, then into compressed pneumatic pressure.
[18V Battery] --> [Electric Motor] --> [Reciprocating Piston] --> [Air Compression] --> [Valve Chuck]
- The Motor: Inserting a charged ONE+ battery into the base terminal completes an electrical circuit, sending current to a high-torque DC motor inside the housing.
- The Piston: The motor drives an eccentric crankshaft attached to a reciprocating piston inside a sealed alloy cylinder.
- Compression: As the piston travels upward within the cylinder, ambient air drawn through intake vents is compressed against increasing atmospheric resistance.
- Delivery: Compressed air flows through internal check valves, into a flexible rubber delivery hose, and out through a twist-on or thumb-lock chuck attached directly to the tire valve stem.
- Auto-Shutoff: An internal digital pressure transducer samples line pressure in real time. Once the pre-set PSI threshold is achieved, the internal microprocessor cuts current to the motor instantly, preventing over-inflation.
Step-by-Step Operating and Calibration Guide
Operating a cordless Ryobi tire inflator requires following strict mechanical procedures to protect internal valve components and ensure accurate pressure delivery.
+-------------------------------------------------------+
|                 OPERATING CHECKLIST                   |
+-------------------------------------------------------+
| 1. Charge and seat the 18V ONE+ battery pack          |
| 2. Inspect tire valve core and clean thread debris    |
| 3. Connect valve chuck securely without cross-threading|
| 4. Power on display and set target PSI                |
| 5. Pull trigger and monitor automated cutoff          |
+-------------------------------------------------------+
Step 1: Charge and Seat the 18V ONE+ Battery
Slide your Ryobi lithium-ion battery onto the charger until the green LED indicator displays solid illumination, signaling a 100 percent charge. Slide the charged battery pack firmly into the base of the inflator until the side latches click into place, securing the electrical contacts against vibration.
Step 2: Inspect Valve Cores and Clear Debris
Remove the valve stem cap from your tire, sports ball, or inflatable. Inspect the brass valve core for moisture, road salt, or dirt accumulation. Wiping the threads clean prevents debris from jamming the valve stem or stripping the internal threads of the inflator chuck.
Step 3: Connect the Valve Chuck Securely
Push the twist-on or thumb-lock chuck straight onto the valve stem. Ensure the rubber gasket inside the chuck seats flush against the rim of the valve to prevent atmospheric air leakage. If you hear a hissing sound while connected, the chuck is crooked; disconnect and reseat it.
Step 4: Power On and Set Target Pressure
Press the power button to activate the digital LCD screen. Use the plus and minus buttons to program your specific target PSI (pounds per square inch). For standard passenger cars, this is typically between 32 and 36 PSI, verified against the placard located inside the driver-side door jamb.
Step 5: Initiate Inflation and Monitor Automatic Cutoff
Pull the trigger switch to start the motor. The internal piston will engage, and the digital display will climb in real time to show current tire pressure. The tool will automatically cease operation the exact moment your pre-set PSI target is reached.
Step 6: Disconnect Quickly to Prevent Pressure Loss
Release the valve chuck rapidly with a firm twist or flip of the thumb-lock lever to minimize air loss during removal. Screw the protective valve stem cap back onto the tire immediately to shield the core from dust and moisture.
Performance Metrics, Kit Pricing, and Runtime Benchmarks
Evaluating the real-world value of a Ryobi tire inflator kit requires looking closely at battery capacity, thermal duty cycles, and financial investment.
| Performance Metric | 2.0 Ah Battery Kit | 4.0 Ah Battery Kit |
| Full Inflation (0 to 32 PSI) | ~3.5 to 4 standard tires | ~7 to 8 standard tires |
| Top-Off (28 to 35 PSI) | ~12 to 15 top-offs | ~25 to 30 top-offs |
| Continuous Run Limit | 10 minutes max runtime | 10 minutes max runtime |
| Cool-Down Requirement | 5 minutes minimum | 5 minutes minimum |
| Approximate Kit Cost | $79 to $99 USD | $119 to $149 USD |
Battery Capacity Realities
A 2.0 Ah battery provides enough stored energy for emergency roadside top-offs or seasonal bicycle maintenance. However, if you maintain multiple vehicles, trailers, or large recreational items, upgrading to a kit featuring a 4.0 Ah (or higher) lithium-ion battery eliminates thermal fatigue and reduces frequency of re-charges.
Thermal Management and Duty Cycles
Cordless inflators generate substantial heat due to rapid air compression within a tight mechanical housing. Running any portable 18V inflator continuously for more than 10 minutes risks overheating the motor windings and melting internal plastic seals. Always observe a strict 5-minute cooling interval between multi-tire maintenance sessions.
Critical Operational Pitfalls and Maintenance Rules
Avoiding common operational mistakes extends the lifespan of your Ryobi inflator and protects your vehicle’s tire hardware.
- Exceeding Continuous Duty Limits: Running the inflator past 10 minutes without a cool-down break leads to thermal overload, tripping internal circuit protection or burning out the motor armature.
- Yanking the Delivery Hose: Pulling the entire weight of the tool by its rubber hose strains internal brass fittings, resulting in pneumatic leaks and permanent loss of pressure delivery.
- Cross-Threading Valve Stems: Forcing a twist-on chuck onto dirty or angled valve threads strips the delicate brass threads of the stem, causing air to bleed out while pumping.
- Leaving Batteries in Extreme Temperatures: Storing your lithium-ion battery inside a scorching vehicle trunk during summer months permanently degrades chemical cell capacity and shortens total service life.
- Ignoring Moisture Buildup: Operating the tool in damp environments or rainy conditions without protecting the battery terminal interface can cause terminal corrosion and electrical shorting.
Troubleshooting Common Operational Issues
When a cordless inflator fails to perform, systematic troubleshooting can isolate electrical, mechanical, or pneumatic faults.
Tool Fails to Power On
If pulling the trigger produces no response or screen illumination, check the battery seating. Pull the battery out and re-insert it until the latches click. If the battery charge indicator lights show zero bars, place the pack onto your 18V charger to restore voltage.
Motor Runs but Tire Pressure Does Not Increase
If the motor is operating audibly but the digital gauge remains at zero, check the valve chuck connection. Air is likely escaping around the stem because the rubber gasket is unseated or worn out. Inspect the gasket for cracks and replace it if necessary.
Digital Gauge Displays Inaccurate Readings
If the pressure reading appears erratic or fails to match an independent handheld pressure gauge, turn off the inflator, disconnect the hose completely, and reconnect it to the valve stem to allow the internal microprocessor to recalibrate its zero-pressure baseline.
Tool Stops Immediately Upon Activation
If the inflator starts for half a second and cuts off, your tire’s current internal pressure likely already equals or exceeds the target PSI programmed into the digital screen. Increase your target PSI setting or deflate the tire slightly before attempting to top it off.
Frequently Asked Questions
Can a Ryobi tire inflator handle heavy-duty truck tires?
Ryobi handheld inflators are engineered for standard passenger vehicles, SUVs, light trucks, and bicycle tires up to 150 PSI. While they can top off larger light truck tires (such as C-load or D-load ratings), they struggle with high-capacity E-load heavy-duty truck tires or commercial vehicle tires, which require substantial volume and prolonged running times that exceed thermal duty limits.
Do I need to buy a kit if I already own Ryobi tools?
If you already own Ryobi 18V ONE+ power tools, purchasing a complete kit bundled with a battery and charger is unnecessary and financially inefficient. Instead, buy the bare tool (tool-only version) and power it using your existing battery inventory, directing your savings toward higher-capacity 4.0 Ah or 6.0 Ah packs.
How accurate is the digital pressure gauge on Ryobi inflators?
The digital pressure sensors integrated into Ryobi handheld inflators maintain an accuracy tolerance of plus or minus 1 PSI. For standard driving applications, this level of precision is more than adequate. For racing, specialized cycling, or exact pressure tuning, verify your final pressure using a dedicated analog or digital calibration gauge.
How long does an 18V battery take to charge?
Charging times vary based on the battery capacity bundled in your kit. A standard compact 2.0 Ah battery typically charges from depleted to 100 percent in roughly 45 to 60 minutes using a standard Ryobi 18V charger, whereas a larger 4.0 Ah battery requires approximately 90 to 120 minutes.
Can the dual-function inflator deflate air mattresses quickly?
Yes, the dual-function model features a dedicated high-volume deflation port. By attaching the thick hose to the intake/deflation side of the internal blower, you can extract air from large camping mattresses, pool rafts, and inflatable boats in under a minute, collapsing them flat for compact storage.


