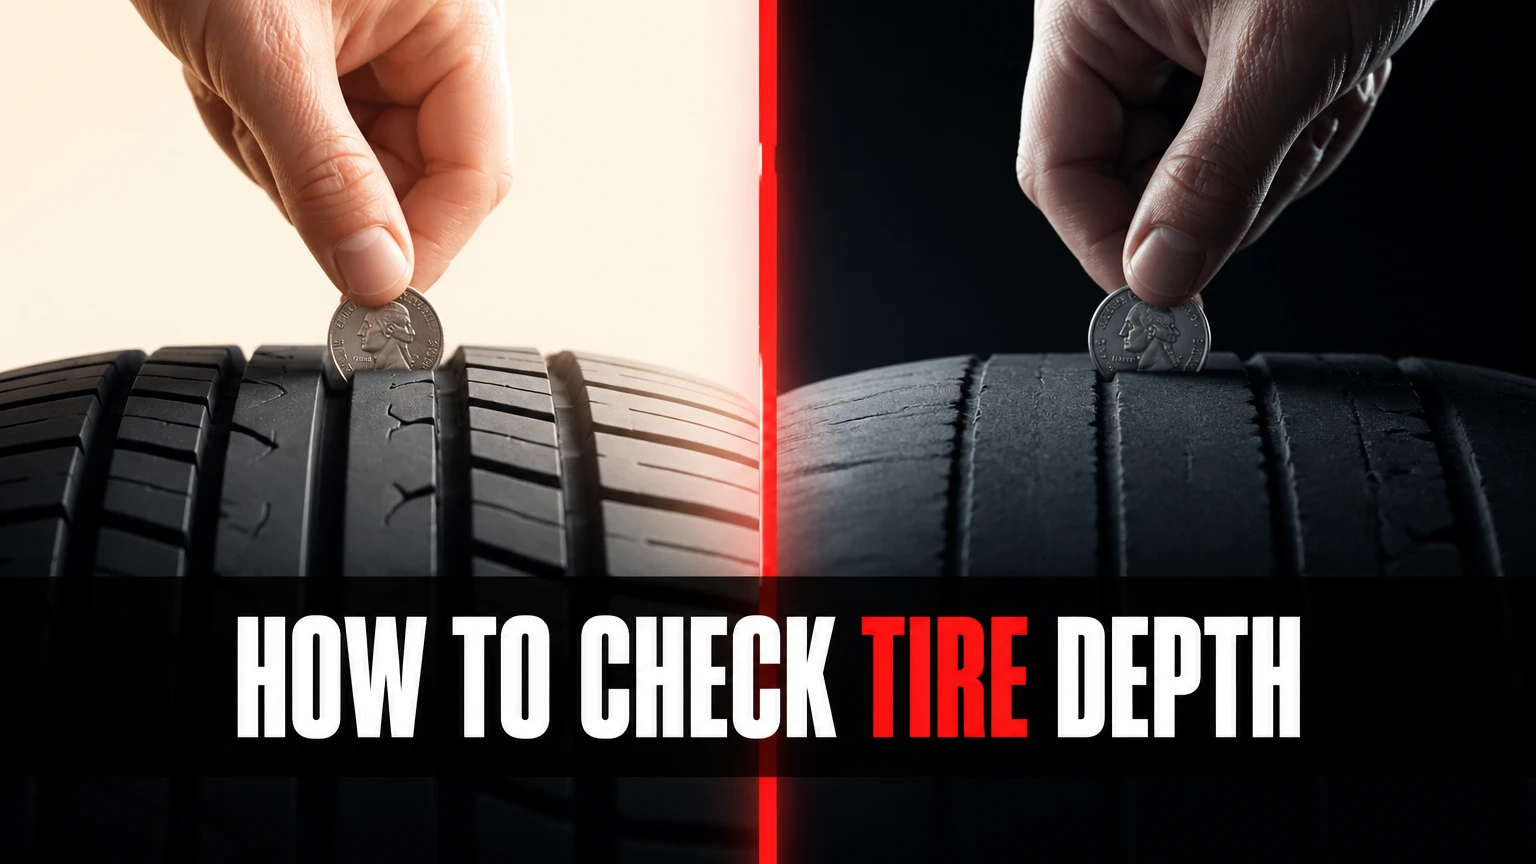
Checking your tire tread depth ensures maximum road safety, optimal wet-weather traction, and legal compliance. By completing six structured steps in under 15 minutes using a standard depth gauge or coin, you can accurately diagnose tire wear, identify dangerous alignment issues, and prevent hydroplaning before it compromises your drive.
Before You Start
- Time Required: 10 to 15 minutes
- Difficulty Level: Beginner
- Cost Range: $5 to $15 (for a manual or digital tread depth gauge); Free (if using standard pocket coins)
- Tools and Materials:
- Tire tread depth gauge (1 count, manual sliding pin or digital LCD)
- Flashlight or smartphone light (1 count, essential for dark wheel wells)
- Standard US penny (1 count, optional backup test)
- Standard US quarter (1 count, optional backup test)
- Notepad, smartphone notes app, or vehicle maintenance log
- Prerequisite Conditions: Vehicle parked on a solid, level surface with the engine off and parking brake fully engaged. Tires should be cool to the touch (driven less than 2 miles recently) for maximum reading accuracy.
Step 1: Prepare Vehicle and Workspace
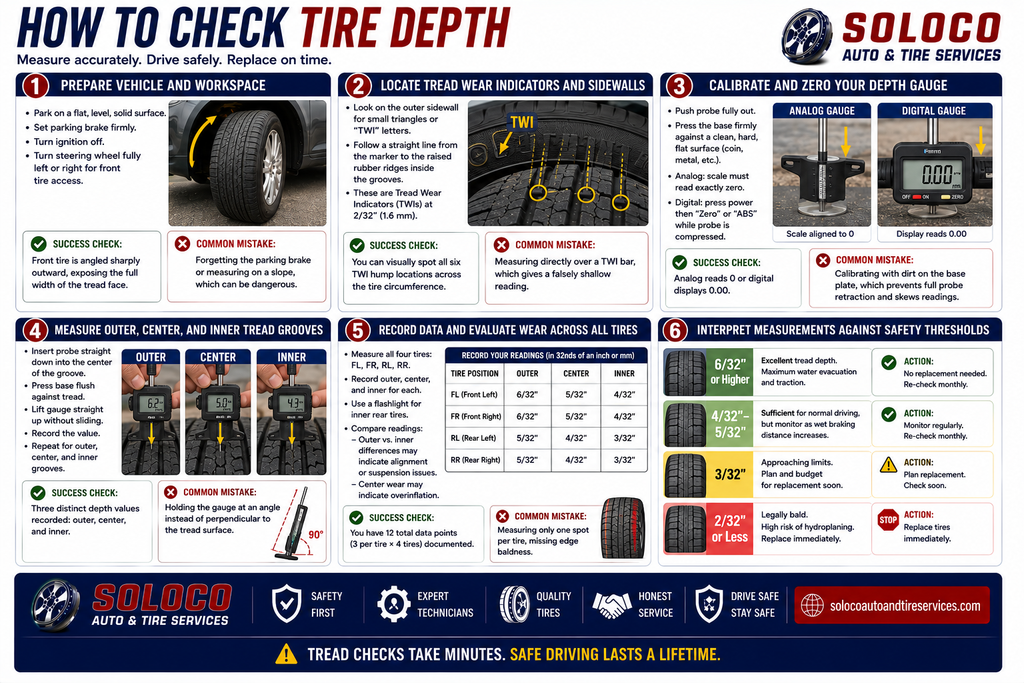
Park your vehicle on a flat, level, solid surface and secure it completely before starting the physical inspection. Set your parking brake firmly to prevent any accidental rolling, and turn your ignition off. To gain unobstructed access to the front tires, turn your steering wheel fully to the left or right depending on which side you plan to measure first. This angles the front rubber outward, creating a large, clear working window between the fender and the tire tread.
- Success Check: You’ll know it worked when the front tire is angled sharply outward, exposing the full width of the tread face without obstruction from the steering knuckle or wheel well liner.
- Common Mistake: Forgetting to set the parking brake or attempting to measure while the vehicle rests on a slope, which creates a safety hazard if the vehicle shifts.
Step 2: Locate Tread Wear Indicators and Sidewalls
Examine the outer sidewall of your tire to locate the small molded triangle symbols or the letters “TWI” embossed near the outer edge of the tread. Follow an imaginary straight line from these triangle markers across the face of the tire to find the raised rubber ridges hidden inside the main longitudinal grooves. These are your Tread Wear Indicators, which sit at precisely 2/32″ of an inch above the base of the groove. Avoid placing your measuring instrument directly on top of these raised bars during your primary depth checks.
- Success Check: You’ll know it worked when you can visually spot all six TWI hump locations across the circumference of the tire tread.
- Common Mistake: Measuring directly over a TWI bar, which results in a falsely shallow reading that makes healthy tires appear completely worn out.
Step 3: Calibrate and Zero Your Depth Gauge
Push the metal probe of your tread depth gauge completely out until the base collar rests against the sliding scale housing. Press the flat reference base of the gauge firmly against a clean, hard, flat surface such as a coin or a piece of metal to ensure the probe retracts fully. Check that the sliding scale reads exactly zero (0/32″ or 0.0mm). If you are using a digital depth gauge, press the power button and then press the “Zero” or “ABS” button while the probe is fully compressed against your flat reference surface.
- Success Check: You’ll know it worked when the analog scale alignment line rests perfectly on zero or the digital screen displays an exact 0.00 reading.
- Common Mistake: Calibrating the gauge while debris or dirt is trapped on the bottom of the base plate, which prevents full probe retraction and skews every subsequent measurement.
Step 4: Measure Outer, Center, and Inner Tread Grooves
Insert the metal gauge probe straight down into the center of the outermost deep tread groove, making sure not to touch a TWI bar. Push the flat base of the gauge flush against the rubber tread blocks with firm, steady pressure. Carefully lift the gauge away from the tire by gripping the outer housing without sliding the metal pin or altering the digital readout. Record this outer measurement in 32nds of an inch (or millimeters), then repeat this exact extraction process in the middle groove and the innermost groove of the same tire.
- Success Check: You’ll know it worked when you have three distinct, consistent numerical depth values recorded for a single tire corresponding to its outer, center, and inner tracks.
- Common Mistake: Holding the gauge at an angle instead of keeping the probe perpendicular to the tread surface, which yields artificially inflated depth readings.
Step 5: Record Data and Evaluate Wear Across All Tires
Move systematically around the vehicle to measure all remaining tires, using your flashlight to inspect inner rear grooves hidden deep within the dark wheel wells. Log the outer, center, and inner measurements for the front-left, front-right, rear-left, and rear-right positions in your notepad. Compare the three numbers across each individual tire: significant discrepancies between the outer and inner grooves indicate an alignment issue or improper suspension geometry, while excessive wear exclusively in the center points to chronic overinflation.
- Success Check: You’ll know it worked when you have a complete matrix of 12 total data points (three measurements per tire across four tires) cleanly documented.
- Common Mistake: Measuring only one random spot per tire, which completely misses localized edge baldness caused by negative camber or bad ball joints.
Step 6: Interpret Measurements Against Safety Thresholds
Evaluate your recorded numbers against industry-standard safety benchmarks to determine whether your tires are ready for replacement. A measurement of 6/32″ or higher indicates excellent remaining tread depth with maximum water evacuation capability. Readings between 4/32″ and 5/32″ show sufficient rubber for normal driving, but require monthly monitoring as wet-weather braking distances begin to increase. A reading of 3/32″ means your tires are approaching their limits and you should budget for replacement soon. Any measurement of 2/32″ or less means your tires are legally bald, highly susceptible to hydroplaning, and must be replaced immediately.
- Success Check: You’ll know it worked when you have a definitive, data-backed maintenance decision for your vehicle’s rubber status.
- Common Mistake: Waiting until 2/32″ for winter or rainy driving conditions, ignoring the fact that modern safety experts recommend replacement at 4/32″ for wet roads.
Common Mistakes and How to Fix Them
- Debris Interference: Trapped pebbles, road glass, or hardened mud inside the tread grooves will block the gauge probe. Fix: Use a flathead screwdriver or key tip to clear out foreign objects from the groove before inserting your gauge.
- Tilted Gauge Placement: Tilting the probe relative to the tire block surface creates a diagonal measurement path that reads deeper than reality. Fix: Rest the wide base flat across two adjacent tread blocks and keep the pin strictly vertical.
- Ignoring Inner Edge Wear: Front-wheel drive vehicles often wear out the inner shoulder of front tires first due to factory alignment settings. Fix: Always reach your hand deep behind the inner sidewall to take that third inner measurement.
- Gauge Stickiness: Older analog gauges collect moisture and road grime inside the metal sleeve, causing the pin to stick midway. Fix: Wipe the probe with a dry microfiber cloth and apply a tiny drop of dry lubricant if necessary.
Variations: How the Process Changes for Alternate Situations
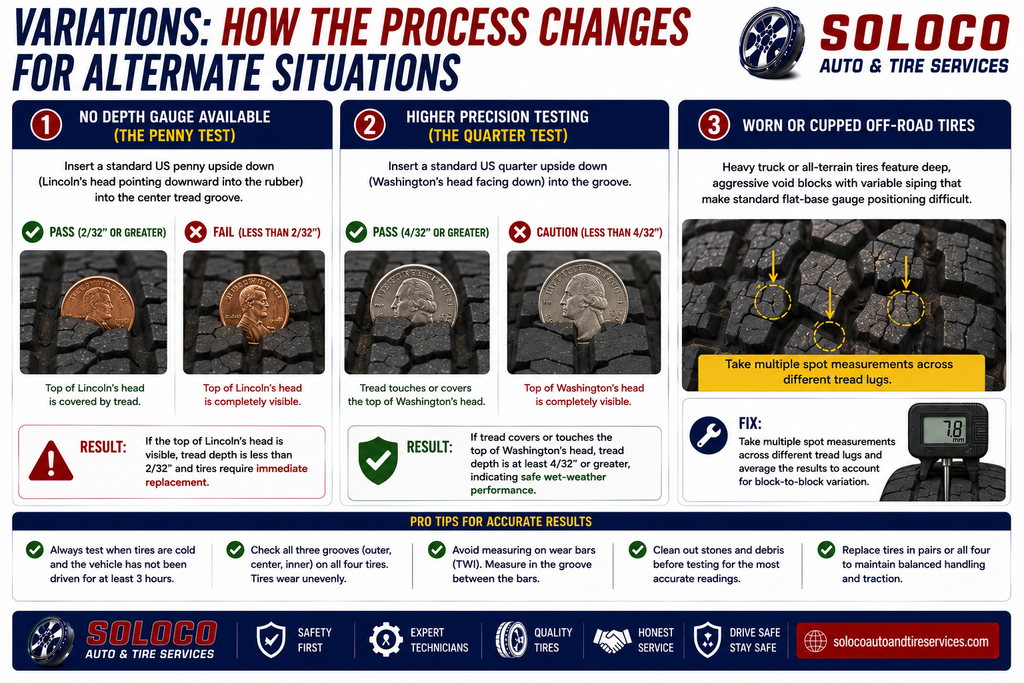
- No Depth Gauge Available (The Penny Test): Insert a standard US penny upside down (Lincoln’s head pointing downward into the rubber) into the center tread groove. If the top of President Lincoln’s head is completely visible above the tread rubber, your tread depth is less than 2/32″ and your tires require immediate replacement.
- Higher Precision Testing (The Quarter Test): Insert a standard US quarter upside down with Washington’s head facing down into the groove. If the tread touches or covers the top of Washington’s head, your tread depth is at least 4/32″ or greater, indicating safe wet-weather performance.
- Worn or Cupped Off-Road Tires: Heavy truck or all-terrain tires feature deep, aggressive void blocks with variable siping that make standard flat-base gauge positioning difficult. Fix: Take multiple spot measurements across different tread lugs and average the results to account for block-to-block variation.
How Long Does It Take / What Does It Cost
- Time Investment: A thorough inspection of all four tires across all three groove positions takes roughly 10 to 15 minutes for beginners, reducing to 5 minutes once familiar with the workflow.
- Financial Cost: Standard manual dial or sliding pocket gauges cost between $5 and $8 at any auto parts store. Digital LCD depth gauges typically cost $10 to $18. Using household coins for the backup penny or quarter test costs $0.00.
Frequently Asked Questions
How often should I check my tire tread depth?
You should inspect your tire tread depth manually at least once every month, as well as immediately before taking any long-distance road trips. Regular monthly checks help you catch slow alignment wear, uneven inflation patterns, and premature shoulder degradation long before safety or legal limits are breached.
Can I check tire depth while the tires are hot?
Yes, you can check tread depth when tires are hot after driving, but be aware that rubber expands slightly under heat and friction. For absolute maximum precision and calibration consistency, always perform your measurements when the vehicle has been parked for at least three hours and the tires are completely cold.
Why do I need to measure three different grooves per tire?
Measuring outer, center, and inner grooves reveals critical mechanical issues that a single center measurement misses. Inner edge baldness points to excessive negative camber or worn suspension control arm bushings, while center wear indicates chronic tire overinflation. Tracking all three spots provides a complete health diagnosis.
What is the legal minimum tire tread depth?
In most jurisdictions, the legal minimum tread depth for passenger cars and light trucks is 2/32 of an inch (approximately 1.6 millimeters). Once your tread wears down to this threshold across any major groove, the tire fails safety inspections, loses all water channeling ability, and must be replaced immediately.
Are digital tread depth gauges better than manual ones?
Digital gauges offer superior readability with instant LCD output in both inch fractions and millimeters, making them ideal for users with minor vision impairments. However, manual sliding-pin gauges require no batteries, withstand harsh trunk storage conditions, and provide reliable mechanical accuracy for decades if kept clean.


