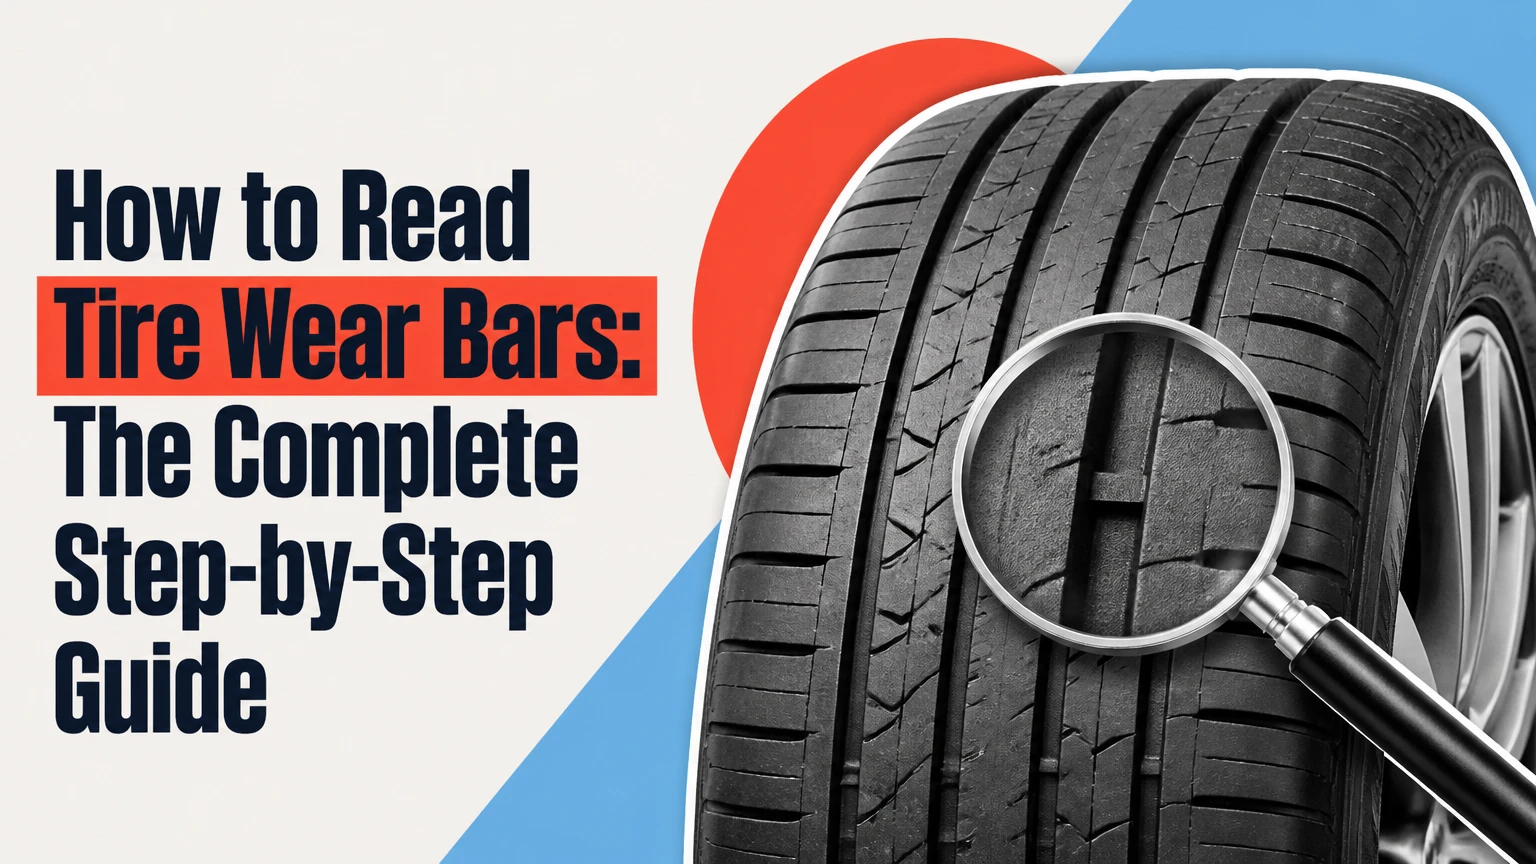
Inspecting your tires regularly ensures your vehicle maintains traction, braking efficiency, and hydroplaning resistance in adverse weather. This comprehensive guide details how to read tire wear bars across five systematic steps, taking 10 to 15 minutes total. Mastering this inspection requires understanding cold tire specifications, locating tread wear indicators, and verifying tread depth across multiple points. The single factor that most determines inspection accuracy is cleaning accumulated road grime from the primary tread grooves before assessing flushness.
Before You Start
- Time Required: 10 to 15 minutes for all four tires.
- Difficulty Level: Beginner.
- Typical Cost: $0 (using household items) to $15 (if purchasing a dedicated manual tread depth gauge).
- Tools and Materials Checklist:
- Flashlight or smartphone tactical light (1 unit)
- Clean microfiber cloth or cotton rag (1 unit)
- Digital or manual tire tread depth gauge (1 unit, optional for precision backup)
- Standard tire pressure gauge (1 unit)
- Prerequisite Conditions: Vehicle must be parked on flat, level asphalt or concrete, with the engine turned off and tires completely cold (parked for a minimum of 3 consecutive hours with no direct solar radiation heating one side).
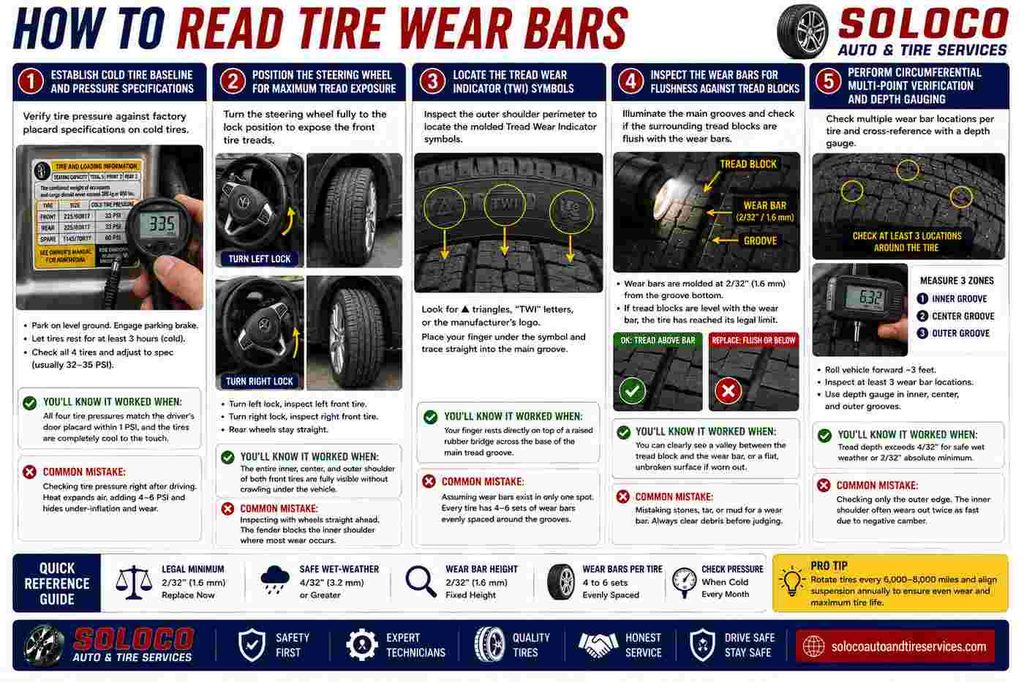
Step 1: Establish Cold Tire Baseline and Pressure Specifications
Step 1: Verify tire pressure against factory placard specifications on cold tires.
Park your vehicle on level ground, engage the emergency parking brake firmly, and allow the tires to rest for at least 3 hours. Unscrew the valve stem caps on all four tires and use your tire pressure gauge to measure internal pressure. Compare your readings against the official factory specification located on the white-and-yellow placard affixed to the driver’s side door jamb (not the maximum pressure rating stamped on the tire sidewall). Adjust pressures using an air compressor until every tire matches the manufacturer’s exact target (typically between 32 to 35 PSI for standard passenger vehicles).
- You’ll know it worked when: All four tire pressure readings match the driver’s door placard within 1 PSI, and the tires are completely cool to the touch.
- Common Mistake: Checking tire pressure immediately after highway driving. Friction generates internal heat that expands air, falsely inflating PSI readings by 4 to 6 PSI and masking underlying under-inflation wear patterns.
Step 2: Position the Steering Wheel for Maximum Tread Exposure
Step 2: Turn the steering wheel fully to the lock position to expose the front tire treads.
Start the vehicle ignition briefly, turn the steering wheel completely to the left until it locks, and turn off the engine. This articulates the front wheels outward, exposing the inner tread blocks and main grooves of both front tires to unobstructed line-of-sight inspection. Once the front tires are checked, restart the vehicle, turn the steering wheel fully to the right lock position, and repeat the visibility setup for the opposite side. Leave the rear wheels in their straight-ahead alignment.
- You’ll know id worked when: The entire inner shoulder, center ribs, and outer shoulder of both front tires are fully visible without requiring you to crawl underneath the vehicle body.
- Common Mistake: Attempting to inspect front tires while the wheels point straight ahead. The vehicle fender well blocks visual access to the critical inner shoulder where alignment wear most frequently occurs.
Step 3: Locate the Tread Wear Indicator (TWI) Symbols on the Sidewall
Step 3: Inspect the outer shoulder perimeter to locate the molded Tread Wear Indicator symbols.
Scan the upper sidewall region of the tire, just where the sidewall transitions into the tread pattern, looking for small molded triangles (▲), raised letter abbreviations reading “TWI”, or the manufacturer’s corporate logo. These symbols act as directional signposts. Place your index finger directly beneath one of these symbols on the outer sidewall and trace your finger straight across the shoulder rib and into the primary circumferential tread grooves.
- You’ll know it worked when: Your finger rests directly on top of a raised rubber bridge running perpendicular or slightly angled across the base of the main tread groove.
- Common Mistake: Assuming wear bars exist in only one spot. Every passenger tire features between 4 and 6 sets of wear bars distributed evenly around the interior circumference of the main grooves.
Step 4: Inspect the Wear Bars for Flushness Against Tread Blocks
Step 4: Illuminate the main grooves with a flashlight and check if the surrounding tread blocks are flush with the wear bars.
Hold your flashlight parallel to the tire tread surface to cast shadows across the interior grooves. Examine the raised rubber ridges (the wear bars) running between the deep tread channels. These bars are molded at a fixed height of 2/32 of an inch (1.6 mm) from the bottom of the groove. Compare the height of the surrounding rubber tread blocks to the top surface of the wear bar. If the adjacent tread blocks have worn down so that their surface is completely level, flat, and continuous with the wear bar, the tire has reached its legal safety limit.
- You’ll know it worked when: You can clearly distinguish whether a distinct valley exists between the tread block and the wear bar, or if the surface forms a flat, unbroken plane.
- Common Mistake: Mistaking small stones, road tar, or dried mud lodged in the groove for a wear bar. Always clear debris before making your final judgment.
Step 5: Perform Circumferential Multi-Point Verification and Depth Gauging
Step 5: Check at least three distinct wear bar locations per tire and cross-reference with a depth gauge.
Roll the vehicle forward approximately 3 feet to expose the lower and rearward sections of the tire circumference. Inspect at least two additional wear bar locations spaced evenly around the tire. To confirm precision, insert the metal probe of your tread depth gauge directly into the center main groove (away from the wear bar), press the base flat against the tread block, and record the exact millimeter or 32nd-inch reading. Repeat this measurement on the inner, center, and outer circumferential grooves.
- You’ll know it worked when: You have verified consistent tread depth across all inspection zones, confirming that readings exceed 4/32 of an inch for safe wet-weather driving or 2/32 of an inch absolute minimum.
- Common Mistake: Inspecting only the outer visible edge of the tire while ignoring the inner shoulder, which often wears out twice as fast due to negative camber alignment settings.
Common Mistakes and How to Fix Them
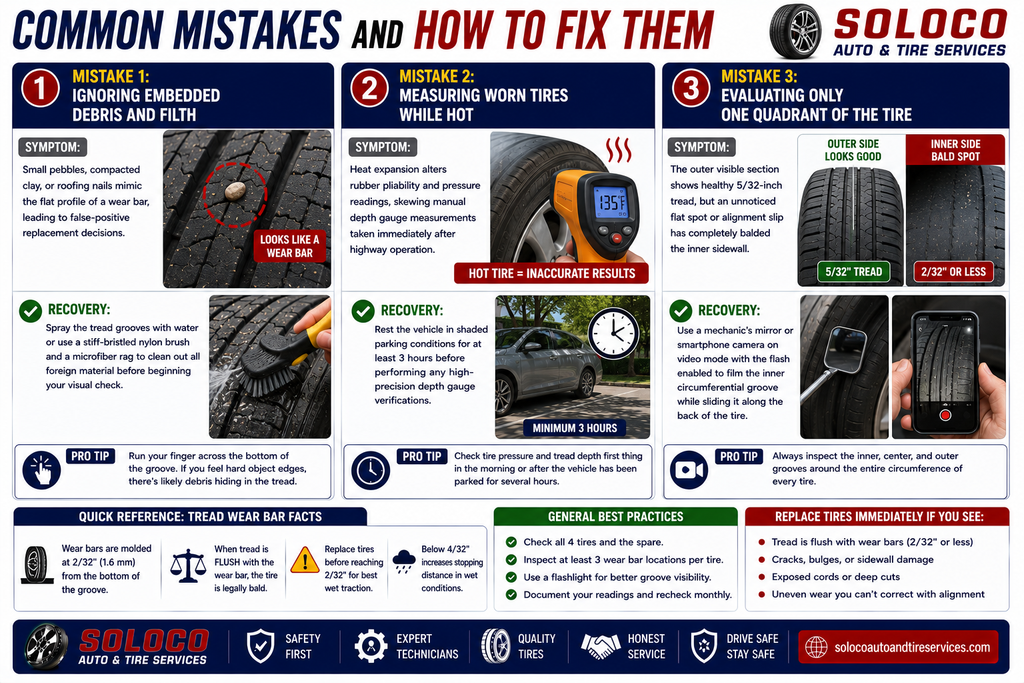
Mistake 1: Ignoring Embedded Debris and Filth
- Symptom: Small pebbles, compacted clay, or roofing nails mimic the flat profile of a wear bar, leading to false-positive replacement decisions.
- Recovery: Spray the tread grooves with water or use a stiff-bristled nylon brush and a microfiber rag to clean out all foreign material before beginning your visual check.
Mistake 2: Measuring Worn Tires While Hot
- Symptom: Heat expansion alters rubber pliability and pressure readings, skewing manual depth gauge measurements taken immediately after highway operation.
- Recovery: Rest the vehicle in shaded parking conditions for at least 3 hours before performing any high-precision depth gauge verifications.
Mistake 3: Evaluating Only One Quadrant of the Tire
- Symptom: The outer visible section shows healthy 5/32-inch tread, but an unnoticed flat spot or alignment slip has completely balded the inner sidewall.
- Recovery: Use a mechanic’s mirror or smartphone camera on video mode with the flash enabled to film the inner circumferential groove while sliding it along the back of the tire.
Variations: How the Process Changes for Different Situations
Variation 1: Checking Performance and Low-Profile Tires
- Context: Sports cars running ultra-high-performance (UHP) summer tires with shallower initial tread depths (often starting at 8/32 or 9/32 inch instead of 10/32 or 11/32 inch).
- Adjustment: Pay strict attention to secondary wet-weather sipes. Because UHP tires have wider drainage blocks and softer rubber compounds, hydroplaning risk spikes significantly once tread reaches 4/32 inch, long before legal 2/32-inch wear bars are fully flush. Replace these tires preemptively when depth hits 3/32 inch.
Variation 2: Inspecting Winter and Snow Tires
- Context: Dedicated winter tires designed with specialized snow wear indicators (often molded at 4/32 of an inch or 6/32 of an inch depending on regional regulations).
- Adjustment: Look for the secondary snowflake symbol or a higher secondary wear bar. When winter tires wear down to 4/32 inch, they lose their ability to pack snow into the tread blocks for snow-on-snow traction, rendering them ineffective in deep winter conditions even though they remain legal for summer driving.
Variation 3: Evaluating Lifted Trucks and Oversized All-Terrain Tires
- Context: Heavy off-road or mud-terrain tires with aggressive, deep tread voids (starting at 15/32 to 18/32 inch).
- Adjustment: Wear bars on mud-terrain tires are often deeply recessed and harder to locate. Use a digital tread depth gauge inserted into the center lugs rather than relying solely on visual flushness, as uneven block chunking from rocky terrain can distort visual wear bar estimation.
How Long Does It Take and What Does It Cost?
- Time Investment: A thorough inspection of all four tires takes between 10 and 15 minutes for an experienced DIYer, or roughly 3 minutes per tire.
- Financial Investment: $0 if utilizing a flashlight, rag, and visual inspection. A professional-grade digital tread depth gauge costs between $10 and $20, while professional tire inspections performed during routine oil changes at service centers are frequently complimentary.
Frequently Asked Questions
What exact depth do tire wear bars indicate?
Tire wear bars are molded to a precise height of 2/32 of an inch (1.6 mm). When your tread blocks wear down until they are completely flush with these raised bars, your tires have reached the legal safety limit mandated by traffic safety authorities across North America and Europe, requiring immediate replacement.
Can I drive safely once my tires reach the wear bars?
No. Driving on tires that have reached the wear bars severely compromises stopping distance on wet or slick roads. At this stage, the tread can no longer channel water away from the contact patch, creating an extreme risk of hydroplaning, loss of steering control, and legal citations for operating unsafe equipment.
Why are my wear bars exposed on only one side of the tire?
Uneven wear bar exposure indicates mechanical misalignment, improper tire inflation, worn suspension components (such as struts or ball joints), or bent control arms. If the inner edge is flush while the outer edge has plenty of tread, schedule a professional four-wheel alignment and suspension check immediately.
How do I check tire tread if I do not have a depth gauge?
You can use the traditional coin verification method. Insert a standard coin (such as a US quarter with Washington’s head facing down, or a penny with Lincoln’s head down) into the center tread groove. If the top of the President’s head is visible above the tread, your tread depth is below 4/32 inch (quarter test) or 2/32 inch (penny test), signaling that replacement is required.
How often should I check my tire wear bars?
Inspect your tire wear bars and check tire pressures at least once every month, as well as before embarking on any long-distance road trips. Regular monthly checks catch alignment issues early, maximizing overall tire lifespan and preventing unexpected blowouts.


