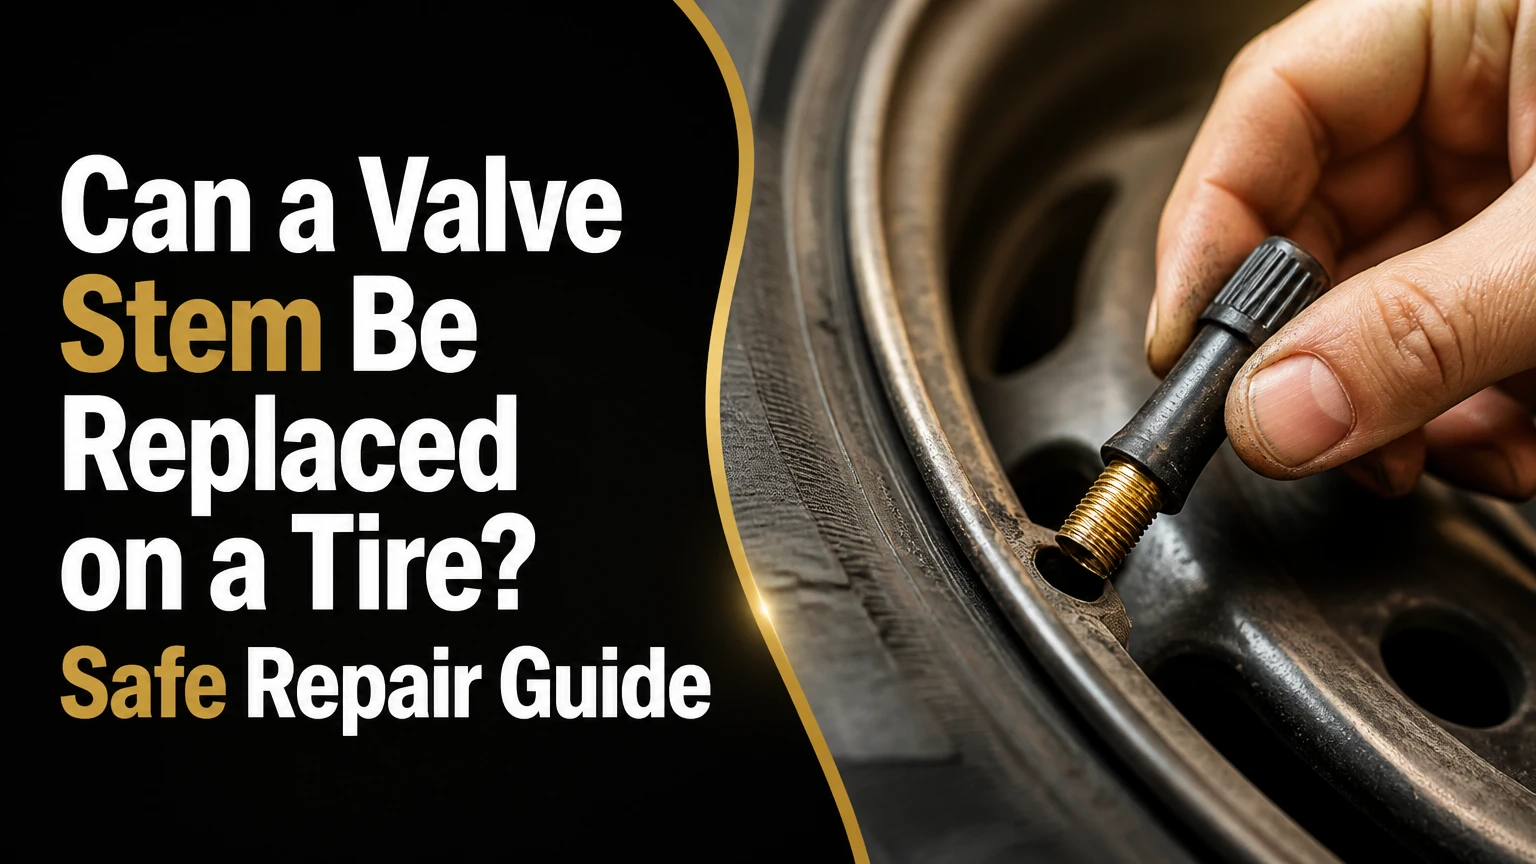
Yes, a tire valve stem can be replaced without replacing the entire tire when the tire casing, bead, and wheel remain serviceable. A standard rubber stem usually costs about $10-$30 installed, while a TPMS stem repair or sensor replacement can cost approximately $15-$150, depending on the vehicle and parts required.
Key facts
A complete valve stem replacement normally requires fully deflating the tire and unseating part of the bead from the wheel.
Replacing a leaking Schrader valve core is different from replacing the stem body.
Direct TPMS wheels may use a replaceable seal-and-stem kit or an integrated sensor assembly.
A new rubber grommet, O-ring, or crush washer should be installed whenever a bolt-on or TPMS stem is serviced.
Typical installed cost ranges from $10-$30 for a standard rubber stem and $60-$150 for many complete TPMS sensors.
A valve stem leak does not automatically mean the tire needs replacement, but a damaged bead, cracked wheel, or unsafe tire may change the decision.
Can a Valve Stem Be Replaced on a Tire?
A valve stem can be replaced on a tire, and the repair is routine when performed with the correct stem for the wheel. The tire generally stays on the vehicle only until the wheel is removed; the tire bead must usually be separated from the rim sufficiently to reach the stem’s inner retaining area.
The valve stem is the small passage through which air enters a tubeless tire. Most passenger vehicles use a Schrader valve core, a spring-loaded insert that opens when the center pin is pressed and closes when released. The core is removable, but the stem body is sealed to the rim through a rubber base, grommet, or O-ring.
The repair does not ordinarily require replacing the tire. A technician should still inspect the tire for sidewall damage, bead damage, punctures, age-related cracking, and irregular wear before deciding that a stem-only repair is appropriate.
What is the difference between a valve core and a valve stem?
A valve core is the small threaded insert inside the stem, while the valve stem is the body secured through the wheel. A leaking core can often be replaced in minutes without breaking the tire bead; a leaking stem base requires access to the wheel’s inner surface.
| Component | Location | Typical repair | Bead access required |
|---|---|---|---|
| Schrader valve core | Inside the stem | Remove and install a new core | No |
| Rubber snap-in stem | Through the rim hole | Pull out and replace stem | Usually yes |
| Metal bolt-on stem | Through the rim hole | Replace seal, nut, or stem | Usually yes |
| TPMS stem and sensor | Inside or through the rim | Install service kit or sensor | Yes |
A soapy-water test distinguishes the two common failures. Bubbles at the center pin indicate a core problem; bubbles around the stem base indicate a seal, stem, or rim-hole problem.
How Does a Valve Stem Seal a Tire?
A tire valve stem uses two separate sealing areas: the valve core seals air inside the passage, and the stem base seals the passage against the wheel rim. Both seals must remain intact because a perfect core cannot compensate for a damaged base grommet.
When an air chuck presses the Schrader core pin, the spring-loaded internal seal moves away from its seat and allows compressed air into the tire. Releasing the chuck lets the spring return the seal to its closed position. The valve cap is a secondary contamination barrier, not the primary pressure seal.
The stem base passes through a precisely sized hole in the wheel. A rubber snap-in stem relies on an elastic interference fit, while a metal or TPMS stem commonly uses an external nut compressing a grommet or O-ring. Dirt, corrosion, incorrect torque, or a reused seal can create a slow leak.
Why do valve stems leak?
Valve stems leak because the core, rubber body, base seal, wheel hole, or attached TPMS hardware has deteriorated or been damaged. Road salt, ultraviolet exposure, tire service, curb impact, chemical contamination, and corrosion around the rim hole are common causes.
A valve stem can leak suddenly after impact, but many failures release only a few pounds per square inch over several days. Cold weather can make the pressure loss more noticeable because tire pressure decreases as temperature falls, even when the stem itself has not failed.
The Tire Industry Association recommends inspecting valve stems during tire service because valve components age alongside the tire. A practical shop rule is to replace a conventional rubber stem whenever a tire is removed for replacement, especially when the existing stem shows cracking, hardening, or distortion.
Which Valve Stem Does a Tire Use?
The correct valve stem depends on the wheel hole, tire pressure, vehicle system, and whether the wheel contains direct TPMS hardware. A replacement must match the vehicle application, rim design, pressure rating, sensor interface, and manufacturer requirements.
| Stem type | Typical application | Typical service life | Typical installed cost |
|---|---|---|---|
| Rubber snap-in, TR413-style | Passenger cars and light vehicles | 3-5 years or one tire cycle | $10-$30 |
| Heavy-duty rubber snap-in | Selected light trucks and moderate-pressure service | 3-5 years | $12-$35 |
| Metal bolt-on | High-pressure, commercial, trailer, and specialty wheels | 5-10 years with seal service | $20-$45 |
| TPMS service stem | Direct TPMS sensor with replaceable hardware | Seal: 3-5 years; sensor: 5-10 years | $15-$40 for kit |
| Complete TPMS sensor | Direct TPMS sensor body is damaged or non-serviceable | 5-10 years, battery dependent | $60-$150 |
These are typical consumer repair ranges in the United States, not universal prices. Labor rates, vehicle access, tire size, wheel material, sensor brand, and regional taxes can change the total.
Are rubber or metal stems better?
Rubber stems are generally better for ordinary passenger vehicles because they flex during minor impacts and cost less. Metal bolt-on stems are better for applications that require higher pressure or a specific sensor and wheel design, but their rigid bodies can be damaged by impact or incorrect installation.
| Decision factor | Rubber snap-in | Metal bolt-on | TPMS service stem |
|---|---|---|---|
| Typical pressure range | Passenger-car applications | Often 65 PSI and above, only if specified | Vehicle-specific |
| Impact flexibility | High | Low | Low to moderate |
| UV resistance | Lower | High | Depends on stem material |
| Seal replacement | Replace whole stem | Replace O-ring or grommet | Replace service kit |
| Corrosion concern | Rim hole corrosion | Metal-to-metal corrosion | Aluminum hardware compatibility |
| Best choice | Daily commuting | High-pressure specified wheels | Direct TPMS vehicles |
A metal stem is not automatically safer for every vehicle. Installing a stem with the wrong diameter, pressure rating, sensor angle, or nut specification can produce a leak or interfere with the tire.
Can a Leaking Valve Be Fixed Without Replacing the Stem?
A leaking valve can be fixed without replacing the stem when the leak comes from the removable Schrader core rather than the stem base. A new core usually costs about $1-$5 and can be installed with a valve-core tool after the tire is deflated or while the wheel remains mounted, depending on the tool and access.
First, remove the valve cap and apply soapy water to the center pin. Bubbles forming at the pin indicate a defective or loose core. Tightening the core gently may stop the leak, but a damaged core should be replaced rather than repeatedly tightened.
A complete stem replacement is required when bubbles appear around the base, the rubber is cracked, the metal is bent, the retaining hardware is corroded, or the TPMS seal has failed. A shop may also recommend replacing a stem when a tire is already dismounted, because the incremental part cost is small compared with future bead-breaking labor.
Can a valve stem be replaced without removing the tire?
A complete valve stem cannot normally be replaced safely without removing the wheel and unseating the tire bead from the rim. Some emergency tools pull a stem through the rim from outside, but using them without proper bead control can damage the stem, bead, rim finish, or TPMS sensor.
The tire does not necessarily need to be removed completely from the wheel. A tire machine can break the bead on one side near the valve, allowing access while the opposite bead remains mounted. Professional technicians use this method when the tire and wheel are otherwise sound.
A core-only repair is the exception. Because the core is accessible from outside, replacing it does not require bead separation.
How Is a Tire Valve Stem Replaced?
A tire valve stem is replaced by removing the wheel, exhausting all air, separating the bead from the rim, removing the old stem or TPMS hardware, installing a matched new part, reseating the bead, and checking for leaks. The job commonly takes 10-25 minutes in a tire shop, excluding waiting time and any sensor programming.
What tools and parts are required?
A safe replacement requires a vehicle lifting system, a valve-core tool, bead-breaking equipment, tire lubricant, a stem puller or installation tool, compressed air, leak-test solution, and the exact replacement stem or TPMS service kit.
| Item | Typical quantity or specification | Purpose |
|---|---|---|
| Replacement stem or service kit | 1 per wheel | Provides the new sealing hardware |
| Valve-core tool | 1 | Removes and installs the Schrader core |
| Tire lubricant | 10-20 mL per bead area | Reduces bead and rim damage |
| Torque wrench | Manufacturer setting | Prevents bolt-on seal failure |
| Soapy-water solution | 100-200 mL | Detects bubbles after inflation |
| Bead breaker or tire machine | 1 machine | Separates bead from rim safely |
| Compressed-air supply | Shop-grade capacity | Reseats bead and inflates tire |
Never use flammable starting fluid, ether, or an improvised explosive method to seat a bead. Tire manufacturers and the Occupational Safety and Health Administration treat tire inflation and bead seating as hazardous operations because a wheel or tire can release stored energy violently.
Step 1: Remove and secure the wheel
Park on a stable surface, loosen the lug nuts slightly, lift the vehicle at the manufacturer-designated point, and support it with rated jack stands. Remove the wheel and identify whether the stem is rubber, metal, or connected to a TPMS sensor.
Checkpoint: The wheel is fully supported and the stem type is identified before air is released.
Common mistake: Working under a vehicle supported only by a jack.
Step 2: Deflate the tire completely
Remove the valve cap and use a valve-core tool to extract the core. Confirm that airflow has stopped before breaking the bead, because trapped pressure can eject the bead or tool unexpectedly.
Checkpoint: No pressure remains, and the tire sidewalls can be pressed inward without resistance.
Common mistake: Removing only the valve cap and assuming the tire is deflated.
Step 3: Break the bead near the stem
Apply approved tire lubricant and press the sidewall away from the rim lip with a bead breaker or tire machine. Keep the tool away from the TPMS sensor, which may be mounted close to the valve hole inside the wheel.
Checkpoint: The bead separates from the rim around the stem without cutting rubber or contacting the sensor.
Common mistake: Driving a pry bar deeply into the tire and striking the sensor.
Step 4: Remove the old stem or sensor hardware
For a snap-in stem, cut or pull the old rubber base from the rim hole after the bead is clear. For a bolt-on or TPMS stem, remove the retaining nut with the correct socket and support the sensor so its housing does not twist.
Checkpoint: The rim hole is open, clean, and free of old rubber or seal fragments.
Common mistake: Reusing a deformed grommet because it appears visually intact.
Step 5: Inspect and clean the rim hole
Remove loose corrosion and debris with a suitable non-damaging brush. Deep pitting, a sharp burr, a cracked wheel, or an enlarged hole requires wheel evaluation before installing another stem.
Checkpoint: The sealing surface is smooth enough to support continuous contact around the entire hole.
Common mistake: Scraping an aluminum wheel aggressively and enlarging the hole.
Step 6: Install the matched replacement
Lubricate the new rubber stem and pull it through the hole with the correct tool until the base seats. Install a TPMS grommet, washer, and retaining nut in the manufacturer’s order, then torque the nut to the vehicle or sensor specification.
Many TPMS assemblies use a low torque value, often expressed in inch-pounds rather than foot-pounds. Do not substitute a generic 2-4 ft-lb value for the manufacturer’s specification, because sensor designs differ and overtightening can crush the seal.
Checkpoint: The stem is centered, the base is fully seated, and the retaining hardware has documented torque.
Common mistake: Using pliers to twist the sensor or tightening the nut by feel.
Step 7: Reseat the bead and inflate
Lubricate the bead, position the tire correctly, and inflate with approved shop equipment until the bead seats. Install the valve core, inflate to the pressure on the vehicle placard, and do not use the maximum sidewall pressure as the normal operating setting.
Checkpoint: Both bead seating lines are even around the rim and inflation reaches the placard pressure.
Common mistake: Inflating a damaged tire beyond the vehicle’s recommended pressure to force a bead into place.
Step 8: Test for leaks and restore TPMS operation
Apply soapy water to the core, stem base, bead, and tread area. Watch each location for at least 30 seconds. Reinstall the wheel using the vehicle’s lug torque specification, then perform the required TPMS relearn or drive cycle.
Checkpoint: No growing bubbles appear, the wheel is torqued correctly, and the dashboard displays normal pressure information after relearning.
Common mistake: Treating a TPMS warning as proof that the new stem is leaking. The warning may indicate a sensor communication or relearn issue.
What changes when the wheel has TPMS?
A direct TPMS wheel contains a pressure sensor that measures pressure inside the tire, often through a valve-mounted assembly. The valve stem may be replaceable independently, or the stem may be integrated with a sensor that must be replaced as one unit.
A TPMS service kit commonly contains a new stem, grommet, washer, nut, valve core, and cap. Schrader, Bartec, Continental, Pacific, HUF, and vehicle-specific assemblies are not automatically interchangeable. The correct kit must match the sensor body and wheel.
Aluminum TPMS stems commonly require nickel-plated valve cores because brass and aluminum can promote galvanic corrosion in the presence of moisture and road salt. The United States Tire Manufacturers Association recommends following the vehicle and component manufacturer’s service instructions rather than mixing unapproved hardware.
Does TPMS need to be relearned after stem replacement?
TPMS relearning is often required after replacing a complete sensor, but a stem-only service-kit replacement may not require relearning if the original sensor remains installed and functional. The vehicle owner’s manual determines whether the system uses automatic learning, a stationary relearn procedure, or a scan-tool registration.
| TPMS service outcome | Sensor identity changes? | Typical next action |
|---|---|---|
| New grommet and stem on original sensor | No | Inflate and verify warning clears |
| New complete programmable sensor | Yes | Program and perform vehicle relearn |
| New complete OEM sensor | Yes | Register or drive-learn per manual |
| Damaged sensor housing | Yes | Replace, program, and relearn |
| Indirect TPMS reset | No direct sensor | Reset pressure reference after inflation |
A stem service cannot restore a sensor with a depleted battery, cracked housing, or failed pressure circuit. Confirm the sensor’s condition before authorizing a complete replacement.
How Much Does Valve Stem Replacement Cost?
Valve stem replacement typically costs $10-$45 per wheel for conventional rubber or metal hardware and $15-$150 for TPMS-related work. The lower range covers a standard stem during existing tire service; the upper range may include a new sensor, programming, relearn, dismounting, and balancing.
| Repair situation | Parts range | Labor and service range | Typical total |
|---|---|---|---|
| Valve-core replacement | $1-$5 | $0-$20 | $1-$25 |
| Standard rubber stem | $2-$8 | $8-$25 | $10-$30 |
| Metal bolt-on seal kit | $5-$15 | $15-$35 | $20-$50 |
| TPMS service kit | $5-$20 | $10-$35 | $15-$55 |
| Complete TPMS sensor | $35-$100 | $25-$75 | $60-$175 |
Prices vary by location and vehicle. A tire shop may include a stem at no additional labor charge when installing a new tire, while a standalone repair can incur wheel removal, bead service, balancing, and disposal fees.
Should valve stems be replaced with new tires?
Conventional rubber valve stems should normally be replaced when new tires are installed because the stem has experienced the same age, heat cycles, and environmental exposure as the tire. The part is inexpensive, and the tire is already dismounted.
TPMS hardware should also be inspected during tire replacement. The technician may replace only the service kit if the sensor tests correctly, rather than selling a complete sensor. Ask for the exact failed component and whether programming is included.
When Does a Tire Need Replacement Instead?
A tire needs replacement instead of a stem-only repair when the tire has unsafe structural damage, the bead is torn, the sidewall is punctured, the casing is exposed, or the wheel cannot hold a sound seal. A valve stem repair cannot make a worn or structurally compromised tire safe.
Check the date code, tread depth, sidewalls, and bead area. The National Highway Traffic Safety Administration warns that underinflation increases heat buildup and can contribute to tire failure, so a tire that has been driven significantly underinflated deserves an internal inspection.
A tire may also be unrepairable after a prolonged flat drive. Heat and flexing can damage the inner liner even when the outside looks normal. The stem should not become a distraction from a separate tire safety defect.
What causes a new valve stem to leak?
A new valve stem leaks when the wrong part is installed, the rim hole remains corroded, the rubber base is twisted, the bead is not seated, or bolt-on hardware is overtorqued. A damaged valve core can also leak even when the stem base is correctly installed.
Use the location of the bubbles to narrow the diagnosis:
| Bubble location | Likely cause | Corrective action |
|---|---|---|
| Center pin | Loose or damaged valve core | Tighten gently or replace core |
| Rubber base | Mis-seated or wrong snap-in stem | Deflate and reinstall matched stem |
| Metal nut or grommet | Wrong torque or reused seal | Install new kit and torque correctly |
| Rim edge bead | Corrosion or bead damage | Break bead, inspect, repair wheel or tire |
| Tread or sidewall | Puncture or casing damage | Tire repair assessment or replacement |
Do not smear sealant around the outside of a leaking stem as a permanent repair. External sealant hides the failure and can complicate later tire service.
Is valve stem replacement a DIY job?
Valve-core replacement is suitable for many owners with a core tool and a leak-test solution. Complete stem replacement is better handled by a tire shop unless the owner has a proper bead breaker, compressed-air equipment, wheel restraints, a torque wrench, and training in tire service.
A portable scissor jack is not bead-breaking equipment. Tire irons alone can damage modern alloy wheels, tear a bead, or strike a TPMS sensor. The risk is highest when inflating a tire whose bead has been displaced, because the bead can seat suddenly.
Professional service is the safer choice for:
- Direct TPMS wheels with unknown sensor construction.
- Truck, trailer, RV, or commercial tires above ordinary passenger-car pressure.
- Corroded, cracked, bent, or aftermarket wheels.
- Run-flat tires and low-profile tires.
- Tires that have been driven flat.
- Repairs requiring bead seating with high-volume compressed air.
The repair is inexpensive compared with wheel damage or a pressure-loss incident. A shop can also balance the wheel if the tire was dismounted substantially.
How should you choose the repair?
Choose a new valve core for a leak at the center pin, a standard rubber stem for a conventional passenger wheel, and a vehicle-specific TPMS service kit when the original sensor works but its seal or stem has failed. Replace the complete sensor only when the sensor itself is damaged, incompatible, unprogrammable, or battery-dead.
Daily commuter
Use the original manufacturer-specified rubber snap-in stem unless the wheel requires another design. Replace it during tire installation and inspect for UV cracking, hardened rubber, and cap damage.
High-pressure truck or RV
Use only a metal or heavy-duty stem approved for the wheel and operating pressure. Pressure rating alone does not authorize an upgrade, because the rim hole, sensor angle, nut design, and tire-clearance requirements must also match.
Trailer owner
Use a stem rated for the trailer tire’s cold inflation pressure and load application. Inspect stems whenever the trailer has been stored outdoors, because long periods of sun exposure and low use can age rubber without obvious tread wear.
Modern vehicle with direct TPMS
Ask whether the repair requires a service kit or a complete sensor. Confirm whether the sensor will be programmed and whether the vehicle requires a relearn procedure after installation.
Frequently Asked Questions
Can a valve stem cause a tire to go flat overnight?
Yes, a damaged core, cracked rubber stem, failed TPMS grommet, or corroded rim hole can release enough air to flatten a tire overnight. Test the stem with soapy water, but also inspect the tread, bead, and sidewall because a stem is only one possible leak source.
Are valve stems included with new tires?
Valve stems are often included as a low-cost installation item for conventional tires, but policies vary by tire shop. TPMS service kits and complete sensors are usually priced separately because the required component depends on the vehicle and sensor design.
Can a valve stem be repaired with tire sealant?
Tire sealant is not a reliable repair for a leaking valve stem base. Sealant may temporarily affect a core leak or contaminate the TPMS sensor, so the correct solution is to replace the defective core, stem seal, or sensor hardware.
How often should valve stems be replaced?
Replace conventional rubber stems when tires are replaced, commonly after about 3-5 years of service, or sooner when cracking, hardening, swelling, or leakage appears. Metal and TPMS stems require inspection, while their seals may need replacement before the electronic sensor reaches the end of its battery life.
Can a tire shop replace one valve stem or all four?
A tire shop can replace one failed stem, but replacing all four may be sensible when all stems are the same age and show similar deterioration. For TPMS wheels, technicians usually replace only failed or serviceable components unless the remaining seals are visibly aged or the vehicle manufacturer specifies a broader service.
Is it safe to drive with a leaking valve stem?
Driving with a leaking valve stem is safe only for the short distance needed to reach a repair facility, provided the tire remains at its prescribed cold pressure and the leak is very slow. Do not drive on a visibly underinflated or rapidly deflating tire; inflate it correctly or use roadside assistance.
The Bottom Line
A valve stem can be replaced on a tire without replacing the tire when the tire, bead, and wheel are sound. A core-only leak may need a $1-$5 insert, while a stem-base leak normally requires bead access and costs about $10-$50 for conventional hardware or $15-$175 when TPMS components are involved.
Use a new seal kit, match the stem to the wheel and pressure application, follow the specified torque, and verify the repair with soapy water. If the tire has been driven flat, the rim is corroded, or the wheel uses direct TPMS, professional service is the prudent choice. A can a valve stem be replaced on a tire repair is usually simple, but correct diagnosis determines whether the inexpensive stem is really the failed part.


