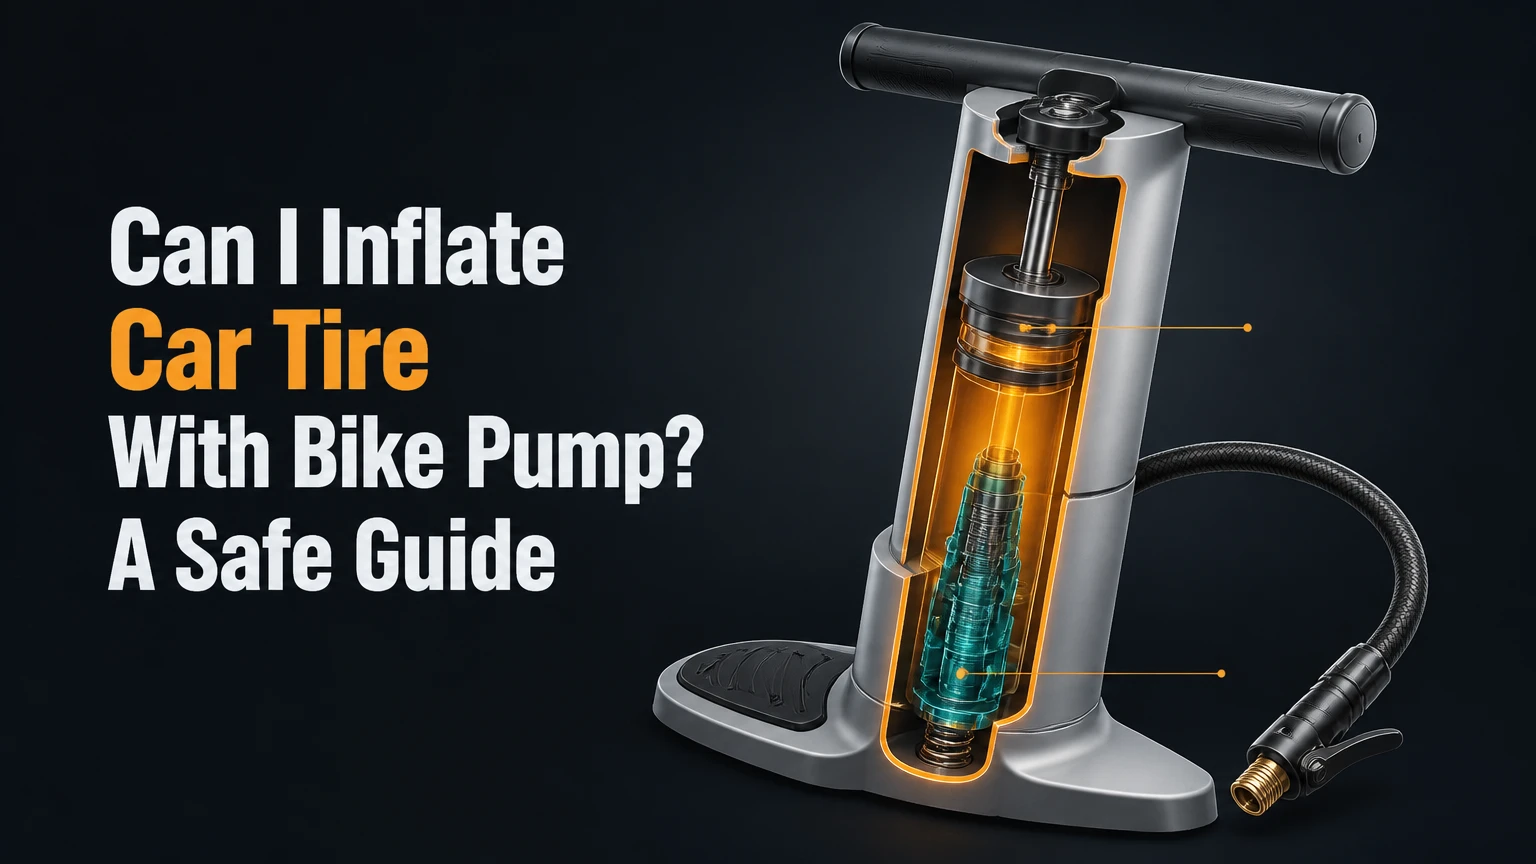
Yes, you can inflate a car tire with a bicycle pump if the pump head fits the tire’s Schrader valve and the tire has no serious damage. A floor bicycle pump can usually add 5 PSI in roughly 2-5 minutes, although inflating a completely flat passenger-car tire may require 300-800 strokes and 15-30 minutes of strenuous work.
Key Facts at a Glance
- Most car tires and many bicycle pumps use the same Schrader valve connection.
- The correct car-tire pressure is printed on the vehicle placard, usually inside the driver’s door jamb, not on the tire sidewall.
- A typical passenger car requires about 30-36 PSI, while many road-bike tires require 80-110 PSI.
- A floor pump works far better than a small frame pump because it moves more air per stroke.
- A bicycle pump is suitable for adding air or reaching a nearby service station, but it is a poor choice for repeated zero-to-full inflation.
- Never inflate or drive on a tire with a cut sidewall, a separated tread, a visibly broken valve stem, or a bead that has come off the rim.
Can I Inflate Car Tire With Bike Pump?
A bicycle pump can inflate a car tire because both systems commonly use a Schrader valve, and the pump only needs to exceed the tire’s current internal pressure to transfer air. Pressure capacity is not the main limitation. Air volume and physical effort are the limitations.
A bicycle pump rated at 120 PSI does not force a car tire to 120 PSI automatically. The tire accepts air until its pressure approaches the pressure generated inside the pump barrel, while the pump’s one-way valve prevents air from returning during the upstroke. A floor pump therefore can raise a tire from 28 PSI to 33 PSI, even though a car tire holds much more air than a bicycle tire.
The practical answer changes with the starting condition. Adding 3-5 PSI is reasonable; filling a wide SUV tire from zero is possible but exhausting. The tire must also be intact, properly seated, and accessible in a safe location.
Why does pressure capacity not equal filling speed?
Pressure measures force per square inch, while volume measures how much air the tire contains. A bicycle pump may produce 120 PSI, but its cylinder moves only a small quantity of air on each stroke. A car tire typically needs several times more air than a bicycle tire at a similar pressure.
That distinction explains the apparent paradox: high-pressure bicycle tires are small, whereas car tires are lower-pressure but high-volume. A compact pump can reach the required pressure, yet it may need hundreds of strokes to produce enough total air.
Which Valve and Pump Head Do You Need?
A car tire normally uses a Schrader valve, the wider valve with a spring-loaded center pin. A bicycle pump must have a Schrader-compatible head, an automatic dual head, or a threaded Schrader hose fitting.
| Valve or connection | Typical appearance | Compatibility with car tire | Required action |
|---|---|---|---|
| Schrader valve | Wide, 8 mm stem with center pin | Direct fit | Use the Schrader opening |
| Presta valve | Narrow threaded bicycle valve | No direct fit | Use a Schrader adapter only if the pump head supports it |
| Dual-head pump | Two labeled openings | Usually direct fit | Select Schrader, often the larger opening |
| Reversible pump head | Rubber insert changes orientation | Usually direct fit | Set the insert to Schrader mode |
| Ball needle adapter | Thin metal needle | No fit | Do not use on a car valve |
Remove the dust cap and inspect the stem before attaching the pump. A bent stem, cracked rubber base, bubbling corrosion, or persistent hiss indicates a valve problem rather than a simple low-pressure condition.
The pump head must depress the Schrader valve’s center pin while sealing around the stem. If the head is attached at an angle, air may escape faster than the pump supplies it.
What Pressure Should You Use?
Use the cold inflation pressure on the vehicle’s tire information placard or in the owner’s manual. The placard is commonly located on the driver’s door jamb, door edge, glovebox door, fuel-door area, or trunk lid.
The National Highway Traffic Safety Administration advises drivers to use the vehicle manufacturer’s recommended pressure, which is separate from the maximum pressure molded into the tire sidewall. The sidewall number is an upper tire limit, not the normal operating target for that vehicle.
| Vehicle category | Typical placard pressure | Common sidewall maximum | Practical interpretation |
|---|---|---|---|
| Small passenger car | 30-35 PSI | 44-51 PSI | Follow the placard, often near 32 PSI |
| Mid-size sedan | 32-36 PSI | 44-51 PSI | Front and rear values may differ |
| Crossover SUV | 33-38 PSI | 44-51 PSI | Check the placard for loaded conditions |
| Light pickup | 35-45 PSI | 50-80 PSI | Axle and load ratings can vary |
| Temporary spare | 60 PSI | 60 PSI | Use the spare’s specified pressure |
| Road bicycle tire | 70-110 PSI | 100-130 PSI | Higher pressure does not mean higher volume |
Check pressure when the tire is cold, ideally before driving or after the vehicle has been parked for at least three hours. Driving heats the air and can make the gauge reading temporarily higher than the cold-pressure specification.
A tire that is 5 PSI below its placard value needs air, but a tire that repeatedly loses 5 PSI needs inspection. Inflation corrects pressure; it does not repair a puncture.
How to Inflate a Car Tire With a Bicycle Pump
Inflate a car tire with a floor bicycle pump in nine controlled steps. The total time is typically 2-5 minutes for a 5 PSI increase or 15-30 minutes from nearly empty, and the most important success factor is a straight, airtight Schrader connection.
Before You Start
| Requirement | Typical value |
|---|---|
| Time for a 5 PSI increase | 2-5 minutes |
| Time from approximately 0 PSI | 15-30 minutes |
| Manual pump type | Floor pump preferred |
| Pressure gauge | 0-60 PSI useful range |
| Target pressure | Vehicle placard value |
| Surface | Flat, stable, traffic-free area |
| Safety equipment | Gloves, reflective vest at roadside |
Do not attempt the procedure beside moving traffic unless the vehicle can be moved safely. Turn on hazard lights, apply the parking brake, and keep passengers away from the traffic side.
Step 1: Park and Inspect the Tire
Park on firm, level ground and inspect the tread, sidewall, rim, and valve stem. Do not inflate a tire with a sidewall bulge, exposed cords, a large cut, a separated tread, or a bead visibly detached from the rim.
You will know the tire is suitable for inflation when the casing remains intact and the wheel is not visibly distorted. A damaged tire requires roadside assistance or tire-service inspection.
A common mistake is treating every flat tire as an air shortage. Severe structural damage can make inflation unsafe because compressed air may dislodge the tire bead or worsen a failure.
Step 2: Find the Correct Pressure
Read the front and rear pressures on the placard because they may differ by several PSI. If the vehicle carries a full load, check whether the placard lists a separate loaded setting.
You will know the target is correct when the number comes from the vehicle manufacturer rather than the sidewall. Record the value before starting because a bicycle-pump gauge may be difficult to read while pumping.
A common mistake is choosing the tire’s maximum sidewall pressure. That value can exceed the vehicle’s recommended setting by 10-20 PSI.
Step 3: Remove the Dust Cap and Clean the Valve
Unscrew the cap and wipe dirt, grit, or water from the Schrader valve. Pressing the center pin briefly can confirm that the valve is not stuck, but do not release air unnecessarily from an already low tire.
You will know the valve is ready when the stem is straight and the center pin moves without obvious damage. Keep the dust cap nearby so it can be replaced after inflation.
A common mistake is forcing a dirty pump head onto the stem. Debris can prevent the rubber seal from closing and can damage the valve core.
Step 4: Set the Pump to Schrader Mode
Use the larger opening on a dual-head pump or switch a reversible head to its Schrader configuration. Do not force a narrow Presta opening over the wider automotive stem.
You will know the setting is correct when the pump head slides over the stem with moderate resistance and the locking lever can move through its normal range. The pump’s maximum rating should exceed the target pressure.
A common mistake is assuming every bicycle pump head is universal. Some racing-bike pumps accept only Presta valves unless a separate adapter is installed.
Step 5: Attach and Lock the Pump Head
Push the head straight onto the valve until it is fully seated, then move the lever to the locked position. A brief hiss during attachment is normal, but continuous hissing means the seal is incomplete.
You will know the connection works when the hose remains stable and the gauge responds as the handle moves. Hold the hose near the head to reduce sideways force on a rubber valve stem.
A common mistake is pumping with the lever half-closed. The pump may appear connected while losing most of its air around the valve.
Step 6: Pump With Full, Controlled Strokes
Stand with both feet on the floor-pump base, keep your back neutral, and use your legs and upper body rather than rapidly bending your lower back. Complete strokes move more air than short, fast movements.
You will know the pump is transferring air when the tire becomes progressively firmer and the gauge rises. Pause if the hose, pump barrel, or head becomes unusually hot.
A common mistake is leaning heavily on a mini pump and bending the valve stem. A floor pump’s hose permits better alignment and reduces that load.
Step 7: Check Pressure in Intervals
Check the gauge every 25-50 strokes, or every 1-2 minutes with a pump that lacks a reliable gauge. If the pump gauge reads near the target, confirm the final pressure with a separate digital or pencil gauge.
You will know the tire is ready when the cold-pressure reading matches the placard within about 1 PSI. Gauge accuracy can vary, particularly on a 0-160 PSI bicycle gauge where 32 PSI occupies only a small part of the scale.
A common mistake is relying on tire firmness by hand. Passenger tires can feel firm while still being materially underinflated.
Step 8: Remove the Pump Head Correctly
Unlock the lever first, then pull the head straight off in one quick motion. Replace the dust cap and measure the pressure again if the valve released a noticeable hiss.
You will know removal was successful when the valve stem remains straight and the final reading has not dropped more than about 1 PSI. A small pressure loss is normal during disconnection.
A common mistake is twisting the locked head sideways. That motion can loosen a valve-core assembly or crack an aged rubber stem.
Step 9: Recheck After Driving
After reaching a safe location, check the tire again when cold. If the pressure has fallen materially, inspect for a puncture, leaking valve core, damaged rim, or bead leak.
You will know the temporary inflation worked when the pressure remains stable and the vehicle has no renewed TPMS warning. A TPMS light can remain on until the system is recalibrated or the vehicle has been driven several minutes.
Which Pump Type Works Best?
A floor bicycle pump is the best manual option for a car tire because its larger barrel and stable base provide greater air volume per stroke. A foot pump can work, while a mini frame pump is practical mainly for a small pressure correction.
| Pump type | Typical maximum rating | Typical car-tire use | 5 PSI addition | Zero-to-32 PSI estimate |
|---|---|---|---|---|
| Floor pump | 120-200 PSI | Best manual choice | 2-5 minutes | 15-30 minutes |
| Foot pump | 100-150 PSI | Usable emergency option | 3-7 minutes | 20-35 minutes |
| Full-size hand pump | 100-160 PSI | Usable with effort | 5-10 minutes | 30-45 minutes |
| Mini frame pump | 90-120 PSI | Last-resort top-up | 10-20 minutes | 60 minutes or more |
| High-volume shock pump | 300 PSI | Poor car-tire choice | 20+ minutes | Often impractical |
These are typical practitioner ranges for a passenger-car tire and vary with tire size, starting pressure, pump-cylinder volume, temperature, and the operator’s stroke rate. A large all-terrain tire can take substantially longer than a compact-car tire.
The pump’s maximum PSI rating describes pressure capability, not inflation speed. For car tires, a high-volume cylinder is more valuable than an extreme pressure rating.
How Long Will a Bicycle Pump Take?
A floor pump typically takes 2-5 minutes to add 5 PSI to a passenger-car tire and 15-30 minutes to fill a tire from nearly empty. A mini pump can take an hour or more because each stroke moves less air.
Typical stroke counts are more useful than false precision. Adding 5 PSI may require about 60-150 full floor-pump strokes, while a tire starting near zero may require 300-800 strokes depending on tire size and pump design.
| Starting pressure | Target pressure | Floor-pump strokes, typical | Floor-pump time, typical |
|---|---|---|---|
| 27 PSI | 32 PSI | 60-150 | 2-5 minutes |
| 20 PSI | 35 PSI | 150-300 | 5-12 minutes |
| 10 PSI | 35 PSI | 250-500 | 10-20 minutes |
| 2 PSI | 32 PSI | 400-800 | 15-30 minutes |
| 0 PSI with bead seated | 32 PSI | 500-1,000 | 25-45 minutes |
A completely deflated tire may have a bead leak or internal damage, so the listed time assumes the tire remains seated and the valve seals correctly. If the pump seems to add no pressure after dozens of strokes, stop and diagnose the system.
Manual inflation is physically demanding because the final strokes require greater force as the tire’s internal pressure approaches the pump’s delivery pressure. Take short breaks rather than using jerky movements that can damage the valve stem.
How Does It Compare With Other Options?
A 12-volt inflator is usually the fastest practical roadside tool, a service-station compressor is faster still, and a bicycle pump is the most independent because it needs no electricity or payment. The right choice depends on whether the tire needs a small correction or a full refill.
| Inflation option | Typical price | 5 PSI time | Zero-to-32 PSI time | Main limitation |
|---|---|---|---|---|
| Floor bicycle pump | $25-$80 | 2-5 minutes | 15-30 minutes | Physical effort |
| Foot pump | $15-$40 | 3-7 minutes | 20-35 minutes | Smaller cylinder, stability |
| 12-volt inflator | $25-$100 | 1-3 minutes | 8-20 minutes | Needs powered vehicle or battery |
| Cordless inflator | $40-$150 | 1-3 minutes | 8-20 minutes | Battery charge and heat |
| Gas-station compressor | $1-$3 or free | Under 2 minutes | 2-5 minutes | Location and access |
| Roadside service | $50-$150 typical callout | Variable | Variable | Waiting time and coverage |
Do not drive to a gas station on a tire that is nearly flat, visibly damaged, or losing air rapidly. Driving even a short distance on a severely underinflated tire can damage the sidewall and turn a repairable puncture into a replacement.
A portable inflator is more convenient for regular car use, but a manual floor pump remains valuable during battery failure, remote travel, or a blown vehicle accessory fuse.
When Is a Bicycle Pump Not Enough?
A bicycle pump is not enough when the tire has structural damage, will not hold air, has unseated from the rim, or needs inflation while the vehicle remains in a dangerous traffic position. Manual pumping cannot repair a puncture or safely reseat every bead.
Stop and obtain professional help in these situations:
- The sidewall has a bulge, deep cut, exposed cord, or abrasion through the rubber.
- The tire drops below the target again within minutes.
- Air escapes from the tread faster than the pump can replace it.
- The valve stem is cracked, bent, loose, or leaking at its base.
- The tire bead has separated from the rim.
- The wheel is damaged, heavily corroded, or visibly bent.
- The vehicle cannot be positioned safely away from traffic.
- A tire-pressure warning appears together with vibration, pulling, or unusual noise.
A temporary spare tire has its own pressure specification, often around 60 PSI, and should not be treated like a standard passenger tire. Use the spare’s label and drive only within its stated speed and distance limits.
What Problems Can Occur?
Most bicycle-pump failures on car tires come from a poor seal, incorrect valve-head configuration, inaccurate pressure measurement, or a tire leak. The pump itself is rarely unable to generate the required pressure.
| Symptom | Likely cause | Safe correction | Stop condition |
|---|---|---|---|
| Continuous hiss at head | Misaligned or unlocked chuck | Reseat straight and lock firmly | Hiss continues after reseating |
| Gauge does not rise | Valve pin not depressed or failed gauge | Refit head and test with a second gauge | Tire remains unchanged |
| Handle becomes very hard | Pressure near pump limit or blocked head | Check connection and target pressure | Handle jerks or backfires |
| Air escapes from stem base | Cracked rubber stem or damaged rim seal | Avoid driving and arrange repair | Any visible cracking |
| Pressure falls after removal | Leaking valve core or puncture | Test with soapy water | Bubbles continue |
| Pump barrel overheats | Extended high-load pumping | Pause for 5-10 minutes | Melted plastic or burning smell |
A pump handle that kicks upward can indicate a failed check valve or an unsecured pump head. Release the head carefully and inspect the equipment rather than forcing the handle downward.
A cheap high-pressure gauge can be least trustworthy near 30 PSI because its scale may extend to 160 PSI. A separate automotive gauge with a 0-60 PSI or 0-100 PSI range often gives a more readable result.
How Can You Improve Accuracy and Safety?
Use a separate tire gauge, compare readings when the tire is cold, and keep the pump head aligned with the valve stem. These three practices prevent most user-caused errors, especially when a bicycle pump gauge is designed for road-bike pressures.
A useful practitioner rule is to make a small correction, remove the pump, and verify the pressure independently. Do not keep pumping because the tire “feels” soft after reaching the placard value; sidewalls vary significantly between tire models.
Another practical rule is to add air before a warning becomes an emergency. A tire at 27 PSI can usually accept a 5 PSI correction with a floor pump, while a tire at 5 PSI may already have suffered sidewall flex damage.
Keep the following in a trunk kit:
- A floor pump with a Schrader-compatible head
- A separate digital gauge
- A valve-core tool and spare valve cores
- A flashlight and reflective vest
- Disposable gloves
- The vehicle owner’s manual
- A charged 12-volt inflator if regular long-distance driving is expected
A bicycle pump is an excellent backup. It is not a substitute for inspecting recurring pressure loss.
FAQ
Can a small hand bike pump inflate an SUV tire?
A small hand bicycle pump can inflate an SUV tire, but the process may take 30-60 minutes from very low pressure and require several hundred strokes. The pump should use a Schrader-compatible head and have a stable connection. A floor pump or 12-volt inflator is substantially more practical for a large SUV tire.
Can you use a Presta-only bicycle pump on a car tire?
A Presta-only bicycle pump cannot connect directly to a car tire’s Schrader valve. A threaded Schrader adapter may solve the problem if the pump’s hose uses a compatible connection, but forcing the Presta opening onto the automotive stem can damage the chuck and create an unreliable seal.
Can pumping a car tire with a bike pump damage the pump?
Normal use at the vehicle’s placard pressure should not damage a correctly rated bicycle pump. Damage can occur when the head is forced onto the valve, the hose is bent sharply, the pump is operated beyond its maximum pressure, or the barrel overheats during prolonged inflation.
How often should car tire pressure be checked?
Check car tire pressure at least monthly and before long trips, using cold tires and a reliable gauge. Seasonal temperature changes can alter the reading, and a slow puncture may reduce pressure without an obvious visual change. Check all four tires and the spare when the vehicle manufacturer specifies one.
Is 30 PSI enough for a car tire?
Thirty PSI is enough only when the vehicle placard specifies 30 PSI for that particular axle and load condition. Many passenger vehicles use approximately 30-36 PSI, but some trucks, SUVs, and temporary spares require higher values. The tire sidewall maximum does not determine the normal target.
Can you drive after inflating the tire with a bicycle pump?
You can drive cautiously after bicycle-pump inflation when the tire reaches the placard pressure, has no visible damage, and holds that pressure during a short recheck. If the tire is repeatedly losing air, badly underinflated, vibrating, or damaged, do not drive it; use roadside or tire-service assistance.
The Bottom Line
Can I inflate car tire with bike pump? Yes, a Schrader-compatible bicycle pump can safely add air to an intact car tire, especially when a floor pump is used for a modest 3-5 PSI correction. Expect 2-5 minutes for a small top-up and 15-30 minutes for a near-empty passenger tire. Use the door-placard pressure, verify it with a reliable gauge, and stop when damage or rapid air loss indicates a mechanical problem rather than low pressure.


