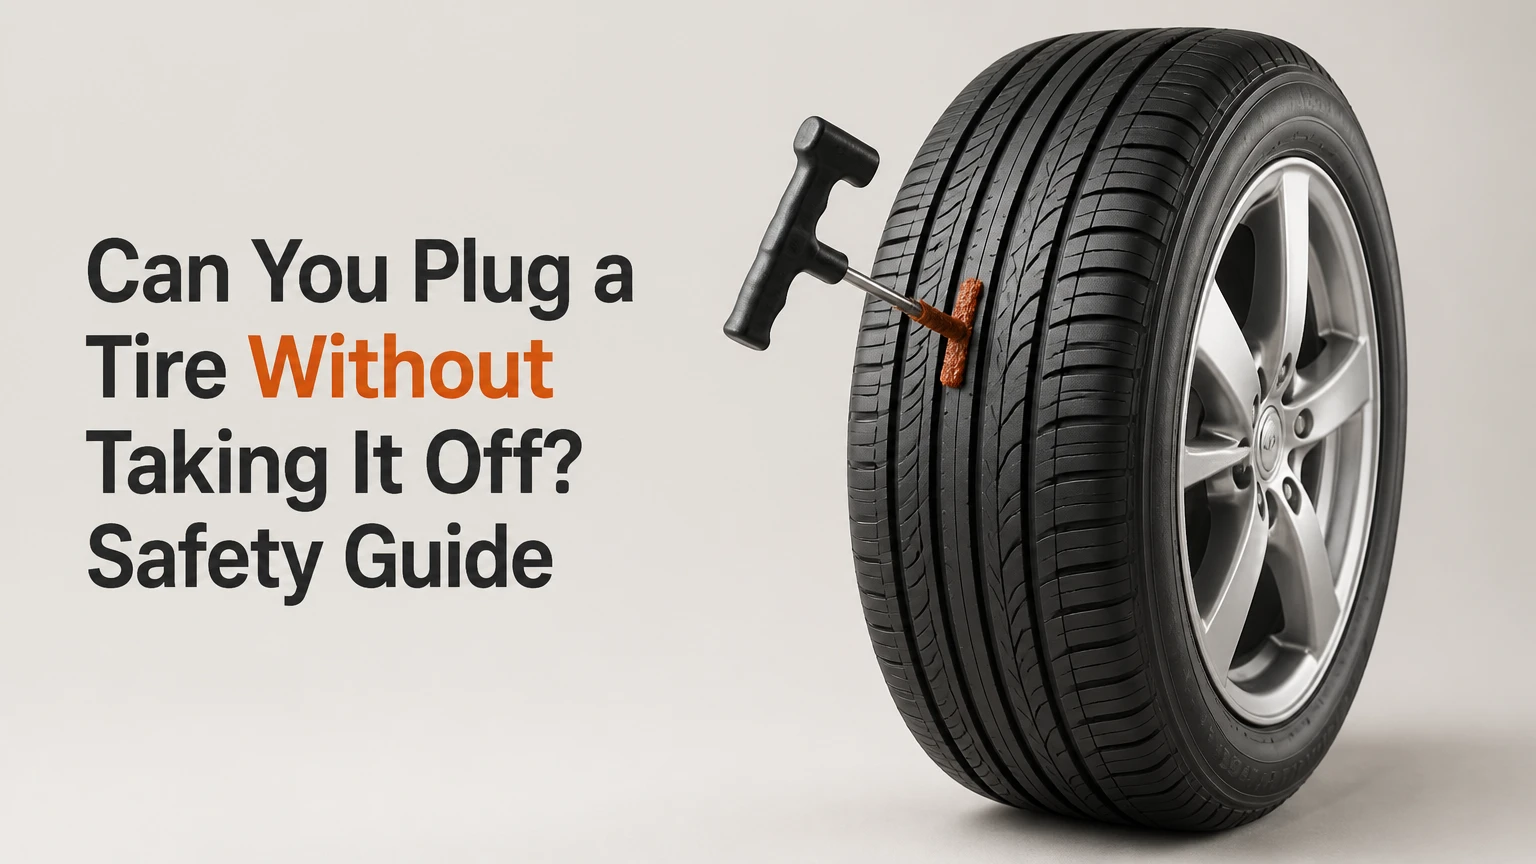
Yes, you can plug a tire without taking it off the vehicle when a small puncture sits in the central tread and the tire has not been driven flat. An on-vehicle string plug is an emergency repair that may restore air temporarily, but a tire shop should demount the tire, inspect its interior, and install an approved internal repair before normal highway use.
Key Facts at a Glance
- A tire plug can be installed on the vehicle in about 5-15 minutes when the puncture is accessible and the tire remains structurally sound.
- External plugs are intended for small tread punctures, commonly no larger than 1/4 inch, or 6 mm.
- Sidewall and shoulder punctures are not safely repairable with a plug, patch, or combination repair.
- A plug-only repair cannot reveal belt, liner, or sidewall damage caused by driving with low air pressure.
- The Tire Industry Association and U.S. Tire Manufacturers Association repair guidance generally require demounting the tire for inspection and a proper permanent repair.
- A plug is a route-to-service emergency measure, not permission to continue driving indefinitely at highway speed.
Can You Plug a Tire Without Taking It Off?
A driver can plug a tire without removing the wheel when the puncture is in the repairable tread zone, the hole is small, and the tire has not been operated while severely underinflated. The procedure uses a coated rubber repair cord inserted from outside with a reaming tool and insertion tool.
The limitation is the unseen interior. A tire that loses pressure can flex excessively, generating heat and damaging the inner liner, sidewall, or steel-belt edge. An external plug closes the channel from the outside, but it cannot show whether the casing has already been compromised.
The U.S. Tire Manufacturers Association describes a proper puncture repair as one that includes an internal inspection and seals both the puncture channel and the inner liner. That requirement is why reputable shops usually remove the tire, inspect it, and use a combination plug-patch rather than treating an exterior rope plug as a finished repair.
What Does an External Tire Plug Do?
A string plug fills the puncture channel with tacky rubber and mechanical compression. The plug material grips the roughened rubber around the hole, while air pressure presses the plug against the channel walls.
Rubber cement or the product’s specified vulcanizing fluid can help installation and sealing, but rolling heat should not be treated as a dependable fusion process. Many roadside plug kits use adhesive or uncured rubber compounds, and the completed repair remains dependent on plug fit, puncture geometry, tread movement, and casing condition.
That distinction matters. A plug can stop an immediate leak while still leaving moisture exposure, internal damage, or an improperly shaped puncture undetected.
When Is an On-Vehicle Plug Safe Enough for an Emergency?
An on-vehicle plug is reasonable only as a temporary mobility measure when every major eligibility condition is satisfied. The puncture should be in the main tread, smaller than the kit or tire manufacturer’s limit, free of visible belt damage, and located on a tire that has not been driven flat.
| Inspection factor | Emergency-plug condition | Stop and tow condition |
|---|---|---|
| Location | Center tread, at least 1 inch inside shoulder transition | Sidewall, shoulder, bead, or tread edge |
| Hole diameter | Up to 1/4 inch, or 6 mm, when allowed by product instructions | Larger than 1/4 inch, torn, irregular, or gaping |
| Entry path | Object entered nearly perpendicular to tread | Angled path, multiple channels, or missing rubber |
| Inflation history | Tire retained enough pressure to avoid collapse | Tire was driven flat or visibly deformed |
| Tire construction | Conventional tubeless passenger tire | Run-flat, specialty, commercial, or manufacturer-excluded tire |
| Tread condition | At least 2/32 inch remaining as a replacement benchmark | Exposed cords, severe cracking, bulges, or low tread |
| Repair history | No overlapping or nearby prior repair | Two repairs overlap or punctures are too close together |
The 1/4-inch limit is a common industry threshold, not a universal license for every tire. Michelin and other manufacturers direct drivers to follow the tire maker’s repair criteria, which can be stricter for speed-rated, run-flat, winter, commercial, and extra-load tires.
Which Tire Damage Cannot Be Plugged?
Sidewall damage, shoulder punctures, exposed cords, bead damage, tread separation, and damage from driving flat cannot be safely solved with an exterior plug. These areas flex heavily or carry structural loads that a rope plug cannot restore.
A puncture near the shoulder is especially deceptive because the hole may look small while the surrounding rubber bends constantly. A plug can leak, work loose, or conceal a damaged belt edge. Tire manufacturers and professional repair standards generally reject sidewall and shoulder repairs rather than treating them as ordinary punctures.
A tire with a bulge, split, abrasion through the inner liner, or visible steel wire should be replaced or evaluated by a qualified technician. Do not insert a plug into a damaged casing simply because the air leak appears localized.
How Do You Plug a Tire Without Removing It?
Plugging a tire on the vehicle requires locating the leak, securing the vehicle, preparing the puncture, inserting a fresh repair cord, and verifying pressure. A careful emergency repair typically takes 10-20 minutes, and success depends more on puncture location and casing condition than on speed.
Before You Start
| Requirement | Typical specification |
|---|---|
| Time | 10-20 minutes for installation and leak testing |
| Materials | 2-3 fresh plug cords, rubber cement if specified, soapy water |
| Tools | Pliers, spiral reamer, plug insertion tool, cutter, tire gauge |
| Inflation | Portable compressor rated for vehicle tire pressure |
| Target pressure | Door-jamb placard pressure, often 32-36 psi for passenger cars |
| Work condition | Flat, stable ground away from traffic, with hazard protection |
Read the repair-kit instructions first. Some modern kits specify a particular sealant, insertion depth, or cord type, and using generic cement can damage a kit’s material or interfere with later professional repair.
Step 1: Confirm the Leak and Puncture Location
Spray soapy water over the tread and valve area, then watch for expanding bubbles. If the object remains in the tire, leave it in place while locating the leak because removing it can turn a slow leak into a rapid deflation.
You will know the leak is identified when bubbles form consistently at one puncture channel. A common mistake is assuming the visible nail is the only leak when the valve stem, bead, or a second puncture is also losing air.
Step 2: Secure the Vehicle
Park on firm, level ground, switch on hazard lights, apply the parking brake, and select Park or first gear. Use wheel chocks where available, and never work in a traffic lane or beneath a vehicle supported only by a jack.
You will know the vehicle is secure when it cannot roll from light hand pressure. A common mistake is attempting an on-vehicle repair beside fast-moving traffic, where roadside exposure presents greater danger than the puncture itself.
Step 3: Remove the Object Straight
Use pliers to pull a nail, screw, or shard out along its entry path. Do not twist the object sideways, because sideways movement can enlarge the hole or create a second channel.
You will know the object is removed when the hole remains visible and the tread has not torn. A common mistake is driving several miles with the object installed after deciding to repair it later, which can enlarge the damage through tread movement.
Step 4: Ream the Puncture Channel
Push the spiral reamer through the original channel and work it up and down several times without changing its angle. The goal is to clean loose rubber and create a rough surface that grips the repair cord.
You will know the channel is prepared when the reamer follows the original path and reaches a consistent depth. A common mistake is forcing the reamer vertically into an angled puncture, which creates a new tunnel that the plug may not seal.
Step 5: Load and Lubricate a Fresh Plug
Thread one fresh plug cord through the eye of the insertion tool so approximately equal lengths extend on both sides. Apply only the lubricant or vulcanizing fluid specified by the kit manufacturer.
You will know the plug is ready when it remains centered in the tool and has not dried, cracked, or separated. A common mistake is using an old cord that has hardened in the kit; aged rubber may enter poorly and leak immediately.
Step 6: Insert the Plug Along the Original Path
Push the plug into the prepared hole until the tool’s depth mark or approximately 1/2 inch of cord remains outside, unless the kit gives a different instruction. Follow the puncture’s original angle rather than forcing the tool perpendicular to the tread.
You will know the plug is seated when firm resistance occurs and equal cord ends remain visible. A common mistake is inserting too little material, which leaves an inadequate seal that can pull out during the first miles.
Step 7: Withdraw the Tool and Trim the Cord
Pull the insertion tool straight out with one decisive motion, without twisting it. Leave the cord in the puncture, then trim the exposed ends close to the tread using a cutter.
You will know the plug is retained when the tool exits and the cord stays anchored. A common mistake is rotating the tool during removal, because the fork can cut or pull the cord back out of the channel.
Step 8: Inflate and Check for Bubbles
Inflate the tire to the vehicle manufacturer’s placard pressure, not the maximum pressure molded into the sidewall. Spray soapy water over the repair and observe it for at least 60 seconds.
You will know the repair is holding when no expanding bubbles appear and the pressure remains stable. A common mistake is checking only immediately after insertion; a slow leak can become visible after several minutes or after the tire flexes.
How Does a Plug Compare With a Patch or Plug-Patch?
A professional combination plug-patch is generally the preferred permanent repair for an eligible tread puncture because the stem fills the puncture channel while the patch seals the inner liner. An external rope plug is faster and cheaper, but it cannot provide the same inspection or sealing method.
| Repair method | Tire removal | Typical time | Typical cost | Appropriate role |
|---|---|---|---|---|
| String or rope plug | No | 5-15 minutes | $5-$20 DIY | Emergency mobility |
| Internal patch | Yes | 20-40 minutes | $25-$50 shop | Limited repair where approved |
| Combination plug-patch | Yes | 30-60 minutes | $35-$75 shop | Preferred permanent puncture repair |
| Tire replacement | No repair | 30-90 minutes | $100-$400+ per tire | Structural or nonrepairable damage |
Prices are typical U.S. consumer ranges and vary with tire size, location, labor, balancing, and whether the tire is supplied by the shop. A free or low-cost repair policy may apply when the tire was purchased from that retailer.
Is a Patch Better Than a Plug?
A patch alone seals the inner liner but does not close the puncture channel through the tread. Moisture and contaminants can therefore travel through the open channel toward the steel belts, which is why a patch-only repair is not equivalent to a combination repair.
A plug alone closes the external channel but does not allow an interior inspection. The two methods solve different parts of the problem. A combination repair addresses both, provided the puncture is within the repairable tread zone and the casing passes inspection.
The Tire Industry Association’s training materials and USTMA guidance favor a properly installed combination repair after demounting. The exact procedure can differ by region and manufacturer, so the tire shop should follow the tire brand’s published limits rather than a generic kit label.
| Decision criterion | Rope plug | Internal patch | Combination repair |
|---|---|---|---|
| Air-channel sealing | External cord | Usually incomplete alone | Stem seals channel |
| Inner-liner sealing | No | Yes | Yes |
| Interior inspection | No | Yes | Yes |
| Roadside installation | Yes | No | No |
| Long-term suitability | Emergency only | Manufacturer-dependent | Usually preferred if approved |
| Hidden damage detection | Poor | Good | Good |
Can You Drive on a Tire Plug?
You may drive a short distance to a tire shop after a successful plug-only emergency repair if pressure remains stable, the puncture is in the center tread, and the tire shows no structural damage. Avoid sustained highway speed, heavy loading, towing, aggressive cornering, and long trips until the tire receives a professional inspection.
A plug does not automatically erase the tire’s original speed rating, but an uninspected plug-only repair does not establish that the tire remains suitable for the vehicle’s maximum speed. Heat, load, pressure, and flex all increase the consequences of a marginal repair.
Check pressure before departure and again after a short, low-speed trip. Stop immediately if the TPMS warning returns, the steering changes, vibration develops, the repair bubbles, or pressure falls more than the tire gauge’s normal measurement variation.
How Long Does a Tire Plug Last?
A tire plug may last days, months, or the remaining life of a tire, but no responsible service provider can guarantee its duration without inspecting the tire internally. Longevity depends on hole size, puncture angle, plug material, tread movement, inflation pressure, load, and prior low-pressure driving.
Treat the plug as temporary until a tire professional confirms the casing is repairable. A commuter should arrange inspection the same day or within the shortest practical interval, while an off-road driver should replace the temporary plug-patch or tire before returning to normal highway travel.
What Should You Do if the Plug Leaks?
A leaking plug requires stopping, measuring pressure, and finding the complete leak source rather than repeatedly adding cords. If bubbles appear around the plug, or pressure drops noticeably after inflation, drive no farther than necessary for safety and use a spare or roadside service.
| Symptom | Likely cause | Safe response |
|---|---|---|
| Immediate bubbles at plug | Poor insertion, oversized hole, torn channel | Stop driving; install spare or seek service |
| Slow bubbles at plug | Cord too short, angled channel, degraded material | Professional demounting and repair |
| No plug bubbles, pressure still falls | Valve, bead, second puncture, wheel crack | Test the whole wheel with soapy water |
| Vibration after repair | Cord protrusion, casing damage, imbalance | Stop and request tire inspection |
| TPMS warning returns | Ongoing leak or incorrect pressure | Recheck with a gauge before driving |
| Bulge or sidewall distortion | Internal structural failure | Do not drive; replace or tow |
Do not stack two cords into a large hole as a normal remedy. A second cord can be an improvised trail measure in some off-road contexts, but it does not restore a damaged casing or convert a nonrepairable puncture into an approved repair.
Which Alternatives Are Safer Than an On-Vehicle Plug?
A spare tire is the safest common alternative when the puncture is outside the repairable zone, the tire is flat, or the casing may have been damaged. Roadside assistance is preferable when traffic, weather, darkness, or vehicle location makes a roadside repair hazardous.
| Situation | Best immediate option | Reason |
|---|---|---|
| Small center-tread puncture, stable pressure | Plug only to reach a shop | Fast temporary mobility |
| Tire driven flat | Spare or tow | Internal damage cannot be assessed externally |
| Sidewall or shoulder puncture | Spare or replacement | Repair materials cannot restore flexing structure |
| No spare, slow leak, safe parking | Inflator and immediate shop visit | Limits roadside exposure |
| Run-flat tire with warning activated | Manufacturer-approved service | Construction and distance limits differ |
| Multiple damaged tires | Roadside assistance | One temporary repair may not provide safe mobility |
A tire inflator with sealant is not interchangeable with a plug. Sealant can interfere with TPMS sensors, complicate professional repair, and have a manufacturer-specified speed or distance limit. Read the vehicle and sealant instructions before use.
How Much Does an On-Vehicle Tire Plug Cost?
A DIY plug kit typically costs $5-$20, while a professional puncture repair commonly costs $20-$75 when the tire is eligible and the shop does not provide the repair free of charge. Tire replacement can cost $100-$400 or more per tire, depending on size, construction, brand, mounting, and balancing.
The lowest immediate price is not always the lowest total cost. A failed plug can cause a second roadside event, damage the wheel, or force replacement of a tire that could have received a proper repair when the puncture first occurred.
What Do Repair Shops Usually Inspect?
A technician should remove the tire from the rim and inspect the inner liner, sidewalls, bead area, belt edges, and puncture channel. The technician also checks whether an earlier repair overlaps the new puncture and whether the tire has enough usable tread.
A professional repair may include demounting, internal inspection, cleaning, drilling or preparation according to the repair system, installing a combination unit, balancing, and resetting the TPMS. Ask whether the quoted price includes those steps, because “plug repair” can describe very different services.
What Are the Most Common Plugging Mistakes?
The most consequential mistake is repairing a tire based only on the visible hole. A small tread puncture can coexist with internal abrasion from low-pressure driving, and an external plug cannot reveal that damage.
- Repairing the shoulder: The shoulder flexes heavily and is outside the normal repair zone. Replace the tire or ask a technician to confirm the manufacturer’s disposition.
- Reaming at the wrong angle: Follow the object’s entry path. A new straight tunnel can leave the original channel unsealed.
- Using a dried plug: Fresh, flexible cord grips better than brittle material stored for years in heat.
- Driving immediately at high speed: Give the repair a leak check, then travel only to service at moderate speed.
- Ignoring pressure loss: A tire that needs repeated inflation has an unresolved leak or structural problem.
- Using the sidewall maximum as the inflation target: Inflate to the vehicle placard specification, usually found on the driver-door jamb.
An experienced technician also checks the wheel. A bent rim, cracked alloy, corroded bead seat, or leaking valve can imitate a failed plug and will not be corrected by inserting another cord.
Should You Remove the Tire After Plugging It?
Yes, remove the tire from the rim for inspection as soon as practical after an on-vehicle plug. The internal examination determines whether the tire was driven underinflated and whether a combination plug-patch can be installed under the tire manufacturer’s rules.
A shop may reject the tire even when the plug is holding. Rejection is appropriate when the tire has a sidewall injury, exposed cords, excessive tread wear, run-flat damage, an oversized or irregular hole, or a previous repair in the same area.
Do not ask a technician to patch blindly over an external plug without evaluating the puncture channel. The technician may remove the temporary cord, prepare the injury correctly, or recommend replacement if the casing is unsafe.
When Should You Replace the Tire Instead?
Replace the tire when the puncture reaches the shoulder or sidewall, exceeds the repair system’s size limit, causes a cut or tear, exposes cords, or follows a period of driving while flat. Replacement is also appropriate when tread wear, age-related cracking, bulges, belt separation, or multiple nearby repairs make the casing unreliable.
The common 2/32-inch tread-depth threshold is a replacement benchmark in the United States, not a universal rule that makes every tire above that measurement repairable. Wet-weather performance can decline before the legal minimum, and winter tires may require substantially more usable tread for snow traction.
Vehicle configuration also matters. On all-wheel-drive vehicles, replacing one tire can create circumference differences that stress the drivetrain, so the owner’s manual or tire manufacturer may require matching tread depth or replacing multiple tires.
FAQ
Can You Plug a Tire Twice?
A tire should not receive overlapping or closely spaced plugs without professional evaluation. Two punctures may weaken the same belt area, and a second external cord does not correct an incorrectly prepared first channel. A technician must decide whether a properly placed combination repair remains allowed or whether the tire should be replaced.
Can a Screw Stay in a Tire?
A screw can remain temporarily while you arrange a repair because removing it may accelerate air loss, but driving on it can enlarge the puncture and damage the casing. Check pressure, move the vehicle only to a safe location or repair facility, and do not remove the screw beside traffic without a backup plan.
Can You Plug a Run-Flat Tire?
Run-flat tires require manufacturer-specific inspection after pressure loss, and many cannot be repaired if driven beyond their permitted distance or speed while deflated. Do not assume a center-tread puncture is eligible for a roadside plug. Consult the tire sidewall markings, vehicle manual, or an authorized tire service provider.
Is Tire Plugging Legal?
A tire plug is not universally illegal, but legal requirements and accepted repair standards differ by country, state, tire type, and manufacturer. A shop may refuse an exterior-only repair even where no statute specifically bans it, because industry guidance generally requires internal inspection and a properly sealed repair.
Can You Plug a Tire Near the Tread Edge?
A puncture near the tread edge is usually outside the repairable crown and should be evaluated by a tire professional. The shoulder transition flexes more than the center tread, so a plug placed there has a higher risk of leakage or casing failure than a plug in the central repair zone.
The Bottom Line
Can you plug a tire without taking it off? Yes, but only as a short-term emergency measure for a small, straight puncture in the central tread of a tire that has not been driven flat. Keep speed and distance low, monitor pressure, and arrange demounting and internal inspection promptly. A tire plug is not a substitute for a properly installed combination repair or replacement when the casing is damaged.


