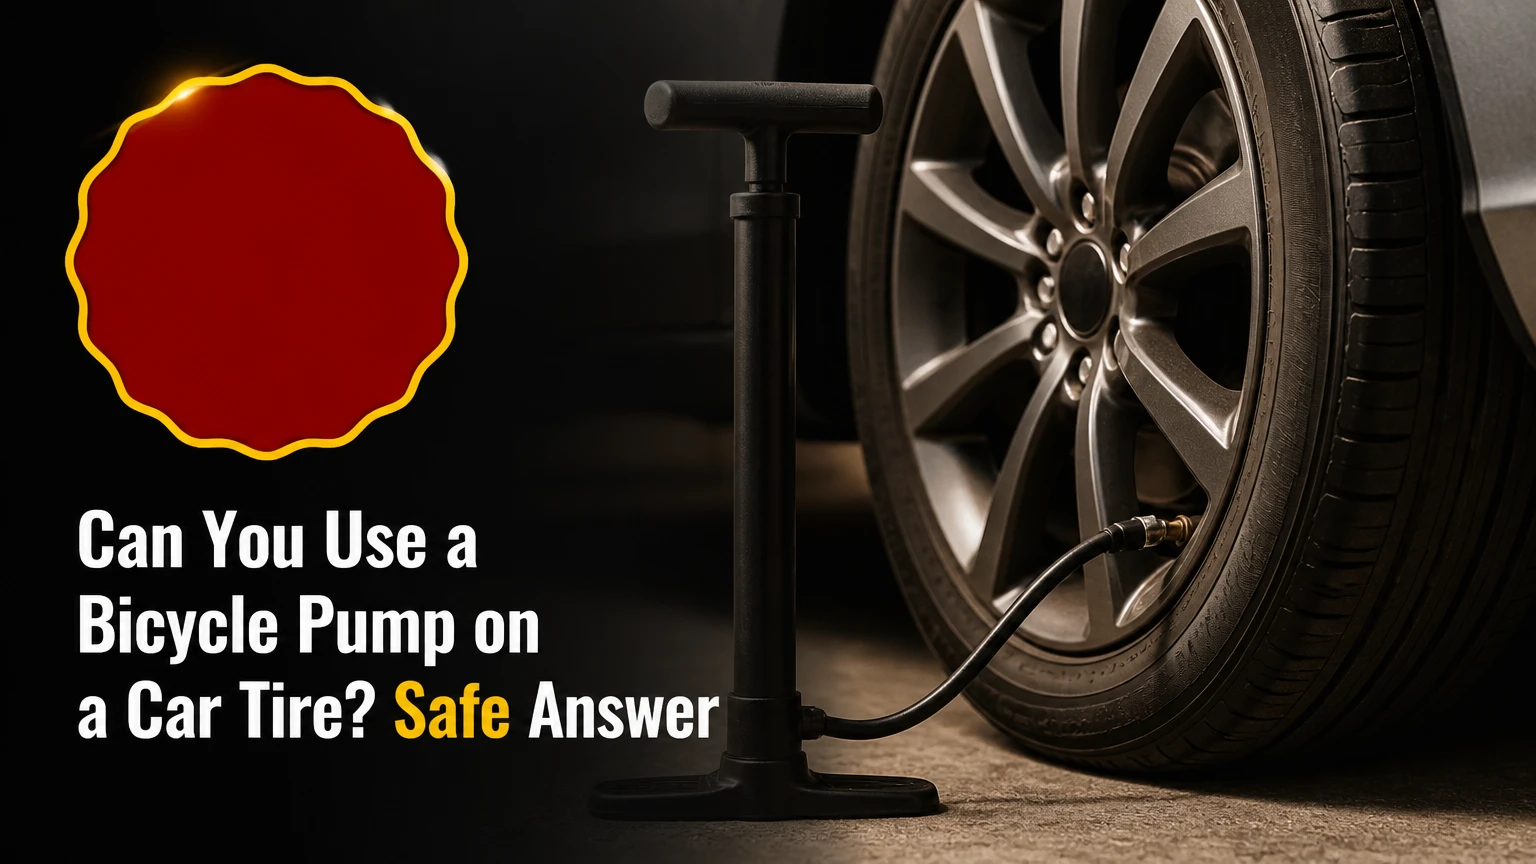
Yes, you can use a bicycle pump to inflate a car tire if the pump head fits the tire’s Schrader valve. A floor pump can usually raise a passenger-car tire to its recommended 30-35 PSI, but the larger tire volume makes the process slow and physically demanding. A hand-held mini pump is an emergency fallback, not a practical primary solution.
Key Facts at a Glance
- A passenger-car tire normally uses a Schrader valve, the same wide valve found on many bicycles and electric bicycles.
- The correct inflation pressure appears on the vehicle placard, usually inside the driver’s doorjamb, not on the tire sidewall.
- A floor bicycle pump commonly reaches 60-120 PSI, but its air volume per stroke determines how quickly it fills a car tire.
- Adding 5 PSI typically takes about 3-8 minutes with a floor pump, depending on tire size and pump design.
- A completely flat tire may have an unseated bead, puncture, or damaged valve, making manual inflation unsafe or ineffective.
- A portable 12V or battery inflator is normally the better roadside tool because it reduces effort and measures pressure continuously.
Can You Use a Bicycle Pump on a Car Tire?
A bicycle pump can inflate a car tire when three conditions are met: the pump accepts a Schrader valve, the tire is still seated on the wheel, and the tire has no significant puncture. The connection is mechanical, so a bicycle pump does not need special automotive pressure technology to add air.
Most modern floor pumps have a dual-valve head or an automatic head that accepts Schrader and Presta valves. Schrader valves are wider and have a spring-loaded center pin. Presta valves are narrow, threaded bicycle valves and cannot attach directly to a typical car tire.
The important distinction is pressure versus volume. A bicycle tire may need 40-100 PSI, while a passenger car often needs 30-35 PSI, so a floor pump can reach the required pressure. A car tire contains substantially more air, however, which means the pump must move many more liters of air before the pressure rises noticeably.
A pump’s maximum PSI rating does not predict its speed on a car tire. Barrel diameter, stroke length, hose losses, valve seal, and the tire’s internal volume matter more for the time required.
Why does pressure not tell the whole story?
Pressure measures force per unit area, while volume measures how much space the air occupies. A pump can generate high pressure with a small barrel, yet still deliver little air per stroke.
For example, a high-pressure road-bike pump may reach 120 PSI but move only a small amount of air. A large floor pump rated to 100 PSI may inflate a car tire faster because its barrel displaces more air during each full stroke. The lower pressure requirement of a car tire helps the pump overcome backpressure, but it does not remove the volume problem.
The AI Overview’s basic conclusion is correct, but “10 to 20 times the volume” should be treated as a rough comparison, not a universal specification. Tire size, wheel diameter, sidewall height, and the inflation state all change the actual air requirement.
What PSI Should a Car Tire Have?
A car tire should be inflated to the cold pressure specified on the vehicle’s tire-information placard or in the owner’s manual. Many passenger cars specify approximately 30-35 PSI, but some vehicles require different front and rear pressures, and loaded SUVs or vans may use higher values.
The number printed on the tire sidewall is usually the tire’s maximum permitted cold inflation pressure or a related load specification. It is not the normal pressure target for that particular vehicle. NHTSA consumer guidance identifies the driver’s door area and owner’s manual as the places to find the manufacturer’s recommended pressure.
Check pressure before driving, or after the vehicle has been parked for roughly three hours. Driving heats the tire and temporarily raises the gauge reading, so reducing a warm tire to the cold target can leave it underinflated after cooling.
| Pressure reference | Typical value | Correct use | Main risk |
|---|---|---|---|
| Compact-car placard | 32 PSI | Normal cold target | Using 35 PSI instead may alter handling |
| Passenger sedan placard | 32-35 PSI | Set each axle as specified | Front and rear values may differ |
| Tire sidewall maximum | 44-51 PSI | Do not use as routine target | Overinflation and reduced contact patch |
| Bicycle floor-pump gauge range | 0-160 PSI | Read approximately, then verify | Small 2-4 PSI errors are hard to see |
| Temporary spare placard | 60 PSI or more | Follow the spare’s label | Normal tire pressure may be unsafe |
Which gauge should you trust?
Use a dedicated digital or calibrated analog automotive gauge to set the final pressure. Many bicycle pump gauges have a broad 0-160 PSI scale, so the difference between 32 and 35 PSI occupies only a small portion of the dial.
A bicycle pump gauge remains useful for tracking progress. It is less suitable for deciding whether a tire is exactly at the vehicle manufacturer’s target unless its low-pressure accuracy has been verified against a known gauge.
Expert insight: the final two or three PSI matter more than the first ten for vehicle handling, tire wear, and traction. Pump quickly at first, then slow down and verify with the car gauge near the target.
Which Bicycle Pump Works Best for a Car Tire?
A large floor bicycle pump is the most effective manual option for a car tire because its long barrel and full-body operation move more air per stroke. A sturdy foot pump can also work, while a compact bicycle mini pump is usually too slow for anything beyond a small pressure correction.
| Pump type | Typical price | Typical time to add 5 PSI | Practical car-tire use |
|---|---|---|---|
| Large floor pump | $20-$60 | 3-5 minutes | Best manual option for one low tire |
| High-volume floor pump | $35-$90 | 2-4 minutes | Faster emergency inflation |
| Single-barrel foot pump | $15-$35 | 5-10 minutes | Compact backup for short corrections |
| Dual-barrel foot pump | $25-$60 | 3-7 minutes | More air per pedal cycle |
| Hand-held mini pump | $15-$30 | 15 minutes or longer | Small emergency top-up only |
| 12V car compressor | $30-$80 | 5-15 minutes per tire | Better roadside choice when powered |
| Battery inflator | $40-$150 | 4-12 minutes per tire | Convenient, but battery-dependent |
These are typical field ranges, not guaranteed performance figures. A large tire at 20 PSI may require far more work than a smaller tire at 28 PSI, and a pump with a leaking chuck can take several times longer.
Is a foot pump better than a floor pump?
A foot pump can be easier to store, but a rigid floor pump generally offers better control, higher air delivery, and less risk of bending the pump frame. Foot pumps transfer force through a pedal, which can reduce arm fatigue, but inexpensive models may flex, tip, or overheat at the cylinder.
Choose a foot pump when storage space matters and the tire needs a modest top-up. Choose a floor pump when you already own one, need to inflate several tires, or want more stable operation.
Can a mini bicycle pump inflate a car tire?
A mini pump can add a small amount of air to a car tire, but it is an inefficient choice for a tire that is nearly flat. Its narrow barrel moves little air, and hundreds or thousands of strokes may be required to create a useful pressure increase.
A mini pump becomes reasonable only when the tire has lost a few PSI and the vehicle is already in a safe location. Stop if the barrel becomes hot, the handle flexes, or the hose connection leaks. A damaged pump is a poor trade for a slow inflation that may still leave the tire below its required pressure.
How Do You Inflate a Car Tire With a Floor Bicycle Pump?
Inflating a car tire with a floor bicycle pump usually takes 5-15 minutes for a modest pressure correction and 20 minutes or longer from very low pressure. The decisive factors are a sealed Schrader connection, a stable pump, an accurate final gauge reading, and a tire that remains seated on the rim.
Before You Start
| Requirement | Typical specification |
|---|---|
| Work area | Flat, stable surface away from moving traffic |
| Target pressure | Vehicle placard value, commonly 30-35 PSI |
| Manual pump | Large floor pump with Schrader head |
| Separate gauge | Digital gauge with 0-100 PSI range |
| Time for 5 PSI | Approximately 3-8 minutes |
| Cost | $0 if owned, $20-$60 to buy a floor pump |
| Safety check | No sidewall bulge, exposed cord, or major puncture |
Do not inflate a visibly damaged tire simply to drive it to a repair shop. A nail, screw, torn sidewall, cracked valve stem, or tire separated from the rim requires professional attention.
Step 1: Find the Correct Cold Pressure
Read the tire placard on the driver’s doorjamb, fuel-door area, or owner’s manual. Record separate front and rear values if the vehicle lists them.
Do not substitute the sidewall maximum. You will know this step worked when the target is written down before the pump is connected. A common mistake is assuming every tire on the vehicle uses the same pressure.
Step 2: Position the Vehicle Safely
Park on firm, level ground, engage the parking brake, and switch on hazard lights if the vehicle is near traffic. On a motorway shoulder, remain behind the barrier where possible and use roadside assistance instead of kneeling beside the wheel.
You will know the setup is adequate when the hose can reach the valve without crossing a traffic lane. A common mistake is spending ten minutes pumping beside a live roadway when moving to safety is the priority.
Step 3: Remove the Valve Cap and Check the Stem
Unscrew the dust cap and inspect the Schrader stem for dirt, bending, corrosion, or air escaping around its base. Keep the cap in a pocket or clean container.
A normal valve stem has a centered opening and no visible crack where it enters the wheel. Do not rock the stem while attaching the chuck, especially on rubber snap-in stems that can tear at their base.
Step 4: Set the Pump Head to Schrader
Use the larger opening on a dual-head pump, or leave the automatic head in its default setting if the manufacturer specifies that arrangement. A Presta adapter is unnecessary for a standard car valve.
Press the chuck straight onto the stem until the internal pin depresses the Schrader core. You will know the connection is correct when a brief hiss stops after the locking lever engages. Continuous hissing indicates a poor seal.
Step 5: Lock the Chuck Without Bending the Stem
Flip the locking lever and hold the hose in line with the valve. Pump heads differ, so the lever may lock upward or downward. The lever position matters less than a stable, airtight connection.
A common mistake is pulling the hose sideways during each stroke. That movement loads the valve stem and can create a leak that was not present before inflation.
Step 6: Pump With Full, Controlled Strokes
Stand with both feet on the pump base and use the full barrel length. Smooth strokes move more air and generate less heat than short, rapid movements.
Pump for 20-30 strokes, then pause for several seconds. On a tire needing 5 PSI, a large floor pump may require approximately 75-150 strokes, although barrel size and tire volume change the result. You will know progress is occurring when the gauge rises and the tire sidewall becomes evenly supported.
Step 7: Check Pressure With a Separate Gauge
Remove the pump head carefully, measure pressure, and compare it with the placard target. If the tire is still low, reconnect the chuck straight and continue in short sets.
Gauge readings can change slightly while the hose is pressurized. The dedicated automotive gauge should determine the final setting, particularly when the pump dial has widely spaced marks.
Step 8: Disconnect and Replace the Cap
Release the locking lever before pulling the chuck straight off the valve. A short hiss during removal is normal, but prolonged leakage indicates the chuck may have damaged or loosened the valve core.
Replace the dust cap tightly by hand. The cap is not the primary air seal, but it keeps water and grit away from the valve core. Afterward, check all four tires when practical because uneven pressure can indicate a slow leak or neglected maintenance.
How Long Does a Bicycle Pump Take?
A floor bicycle pump typically takes 3-8 minutes to add 5 PSI to a passenger-car tire, while inflation from near-flat to 32 PSI may take 20-40 minutes of strenuous work. A mini pump can take an hour or more and may fail before reaching a safe driving pressure.
| Starting pressure | Target pressure | Large floor pump | Mini pump | Likely interpretation |
|---|---|---|---|---|
| 28 PSI | 32 PSI | 2-5 minutes | 10-20 minutes | Routine top-up |
| 25 PSI | 35 PSI | 5-10 minutes | 20-40 minutes | Investigate recurring loss |
| 15 PSI | 32 PSI | 12-25 minutes | 45-90 minutes | Emergency-only manual task |
| 5 PSI | 32 PSI | 20-40 minutes | 1-2 hours | Possible puncture or bead issue |
| 0 PSI, bead seated | 32 PSI | 25-50 minutes | Usually impractical | Inspect before driving |
| 0 PSI, bead unseated | 32 PSI | Usually unsuccessful | Unsafe to attempt | Tire-service equipment needed |
The tire’s actual volume is the hidden variable. A 225/65R17 SUV tire needs more air than a 175/65R14 compact-car tire, even when both target 32 PSI.
Expert insight: do not judge success by whether the tire looks round. Radial tires can appear normal while remaining several PSI below the placard value, and visual inspection cannot replace measurement.
When Should You Not Use a Bicycle Pump?
Do not rely on a bicycle pump when the tire has a visible sidewall injury, a separated bead, a valve leak, exposed cords, severe deformation, or a pressure loss that happened suddenly. Manual inflation cannot repair structural damage, and driving on a compromised tire can destroy the casing.
Stop and request tire service in these situations:
- The tire will not hold pressure for at least several minutes.
- Air escapes from the tread, sidewall, bead, or valve base.
- The bead has pulled away from the wheel rim.
- The tire was driven while severely underinflated.
- A run-flat tire has exceeded its permitted distance or speed.
- The vehicle uses a TPMS warning and the cause is unknown.
- The tire is on a highway shoulder without a protected work area.
A bead that has unseated often needs a high-volume compressor to reseat safely. A bicycle pump may add air through the valve without supplying enough initial airflow to push the bead back against the rim.
Can you drive after inflating the tire manually?
Drive only after the tire reaches the vehicle placard pressure, holds that pressure, and has no visible damage. Travel directly to a tire shop if the tire was significantly low, because the original leak still needs diagnosis.
Do not drive normally on a tire that has been raised only enough to look inflated. If the pressure falls again within minutes, the tire may have a puncture, loose valve core, damaged wheel, or bead leak.
What Are the Main Alternatives to a Bicycle Pump?
A portable 12V compressor is the most practical alternative for routine roadside inflation because it runs from the vehicle’s accessory socket and usually includes a pressure gauge. Battery inflators offer greater convenience but require a charged battery, while roadside assistance is safest for structural damage or an unseated bead.
| Alternative | Typical cost | Power source | Typical inflation role | Limitation |
|---|---|---|---|---|
| 12V compressor | $30-$80 | Vehicle 12V socket | One or more low tires | Slow on large tires |
| Battery inflator | $40-$150 | Rechargeable battery | Short roadside top-up | Battery may be empty |
| Workshop compressor | $100-$300 | Mains electricity | Repeated service work | Not normally portable |
| Service-station compressor | $0.00-$2.00 | Mains or station system | Fast public top-up | Access and gauge quality vary |
| Roadside assistance | $0-$200 per event | Professional equipment | Damage, bead, or unsafe location | Waiting time and membership limits |
Check the compressor’s duty cycle before inflating multiple tires. Some inexpensive units need a cooling period after 10-15 minutes, and their published maximum PSI does not guarantee adequate airflow.
A compressor gauge is convenient but should still be checked against a separate tire gauge when accuracy matters. Pressure accuracy, cord length, chuck quality, and thermal protection are more useful specifications than an impressive maximum PSI number.
What Problems Happen During Inflation?
Most bicycle-pump problems on car tires come from a poor valve seal, an inaccurate gauge, a damaged valve core, or excessive heat. Diagnosing the symptom before pumping harder prevents valve damage and avoids mistaking a mechanical fault for low tire pressure.
| Symptom | Likely cause | Immediate correction | Stop condition |
|---|---|---|---|
| Air hisses continuously | Chuck is crooked or unlocked | Reseat it straight and lock lever | Valve base leaks |
| Handle is extremely hard | Chuck is not opening valve core | Push chuck fully onto stem | Stem bends or cracks |
| Pressure does not rise | Puncture or open bead | Inspect tread and bead | Air escapes audibly |
| Handle springs upward | Pump check valve is failing | Stop and inspect pump | Back-pressure remains |
| Gauge changes erratically | Loose hose or poor gauge | Use separate digital gauge | Readings differ widely |
| Barrel becomes hot | Excessive friction or duty-cycle limit | Stop and cool 10-15 minutes | Plastic softens or odor appears |
Why is the pump handle hard to push?
An unusually hard handle often means the chuck has not depressed the Schrader valve core, so the pump is compressing trapped air rather than transferring it into the tire. Remove the chuck, inspect its seal and internal pin, then reconnect it straight and fully.
A check valve failure can also allow tire pressure to push air back into the pump. If the handle rises by itself after each stroke, stop using that pump until its valve is cleaned or replaced.
What if air leaks out faster than you pump?
Release the chuck, inspect the rubber seal, and reconnect it with the hose aligned to the stem. If the hiss continues after correct attachment, apply a small amount of soapy water around the valve, tread puncture, and bead to identify bubbles.
Do not use sealant or tighten the valve core randomly on the roadside. Valve-core tools can help with a loose core, but a damaged core or valve stem needs replacement.
Which Option Fits Each Situation?
The best choice depends on the starting pressure, the location, and whether the vehicle can safely remain stationary. A floor pump is suitable for a home top-up, a compressor is better for roadside pressure loss, and professional service is required when the tire cannot retain air.
For a cyclist who already owns a floor pump
Use the floor pump for a 2-10 PSI correction at home or in a protected parking area. Its cost is already paid, it requires no battery, and it can handle the pressure target without an adapter.
Do not choose it as the only emergency plan for a completely flat tire. Store a separate gauge and inspect the pump head periodically because a worn chuck can waste more air than the pump supplies.
For a driver building an emergency kit
Choose a 12V compressor, a digital gauge, a valve-cap set, and a flashlight. A basic kit commonly costs $40-$100 total, depending on compressor quality and whether the vehicle already has a spare.
Test the compressor before a long trip. Confirm that the cord reaches all four wheels, the plug fits the accessory socket, and the unit can run for its stated duty cycle without overheating.
For a vehicle with a slow leak
Inflate the tire only enough to reach a qualified tire shop if the tire is safe and the pressure remains stable. Record how much pressure it loses and ask the technician to inspect the tread, valve, wheel, and bead.
Repeatedly adding air hides the fault rather than fixing it. A tire that loses 2 PSI every few days may have a small puncture, but only a physical inspection can establish the cause.
Expert Rules That Prevent Damage
A few practical rules matter more than pump speed. These rules address mistakes that commonly occur when people apply bicycle equipment to automotive tires.
- Never use the tire sidewall maximum as the vehicle’s normal target.
- Keep the chuck straight, because sideways force can tear a rubber valve stem.
- Measure cold pressure whenever possible, then verify the final reading with an automotive gauge.
- Pause when a manual pump becomes hot, especially near the barrel base or hose fitting.
- Treat zero PSI as a mechanical inspection problem, not merely an inflation task.
- Do not trust a pressure reading obtained while the chuck is leaking.
- Check the other tires after repairing one low tire, since uneven pressure may indicate a broader maintenance issue.
A bicycle pump is also not a substitute for a jack, tire plug kit, spare wheel, or roadside service. It adds air only; it does not restore a damaged casing or correct a bent wheel.
FAQ
Can a bicycle pump inflate an SUV tire?
Yes, a large floor bicycle pump can inflate an SUV tire if the tire remains seated and the pump head seals on the Schrader valve. SUV tires usually contain more air than compact-car tires, so adding 5 PSI may take 5-12 minutes, with much longer times from near-flat pressure.
Do car tires and bicycle tires use the same valve?
Many car tires and some bicycles use Schrader valves, which have a wide threaded stem and spring-loaded center pin. Road bicycles commonly use Presta valves instead. A dual-head bicycle pump accepts both types, but a Presta-only pump needs a proper Schrader-compatible head or adapter.
Can you use a bicycle pump on a completely flat tire?
You can try only when the bead remains seated, the tire has no visible damage, and the vehicle is in a safe location. If the bead has unseated or the tire was driven while flat, a bicycle pump is unlikely to restore it and professional tire equipment is safer.
Will pumping a car tire damage a bicycle pump?
Normal short-duration use generally will not damage a sturdy floor pump, but repeated high-load pumping can heat seals, hoses, and check valves. Mini pumps are more vulnerable because their small barrels require many strokes. Stop when the barrel becomes hot, the hose softens, or the pump develops back-pressure.
Can you use a bicycle pump if the car has TPMS?
Yes, tire-pressure monitoring sensors do not prevent inflation through a normal Schrader valve. Set the pressure using the door-placard specification and drive far enough for the vehicle’s monitoring system to update. A persistent warning may indicate a sensor fault, slow leak, or incorrect pressure.
How much does a bicycle pump raise car-tire pressure per stroke?
A large floor pump commonly raises a passenger-car tire by only a small fraction of 1 PSI per stroke, with the exact amount changing as pressure and tire volume change. A practical estimate is 75-150 strokes for a 5 PSI increase, followed by gauge verification.
The Bottom Line
Can you use a bicycle pump car tire? Yes, provided the pump fits the Schrader valve and the tire has no structural or bead problem. A floor pump can handle a normal 30-35 PSI car-tire target, but it is slow because the tire holds far more air than a bicycle tire. For routine top-ups, manual inflation works; for roadside emergencies, a 12V compressor and accurate gauge are usually the better combination.


