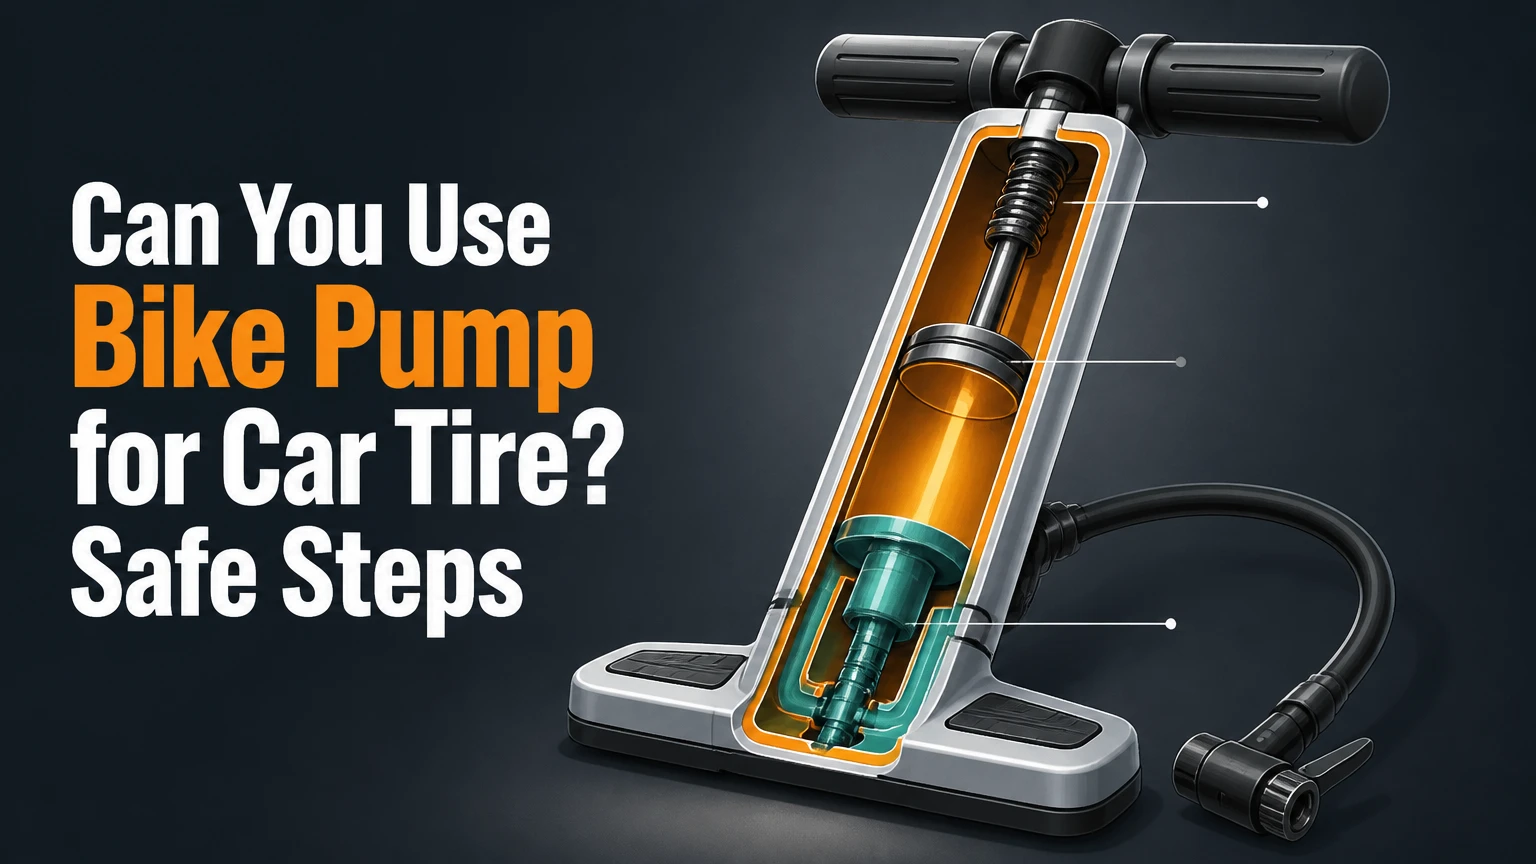
Yes, you can use a bicycle pump to inflate a car tire if the pump connects to the tire’s Schrader valve and the pump is structurally sound. A floor pump can handle the pressure, but adding several PSI takes substantial effort because a car tire contains far more air than a bicycle tire. Stop if the tire is damaged or the bead is unseated.
Key Facts at a Glance
- Most passenger-car tires use a Schrader valve, the wider valve also found on many bicycles.
- A typical car tire reaches approximately 30-35 PSI, but the correct value is printed on the vehicle’s driver-side door-jamb label.
- A bicycle floor pump typically adds 5-10 PSI in about 10-20 minutes, depending on tire size, pump volume, and starting pressure.
- A small frame pump can inflate a car tire in an emergency, but hundreds of strokes may produce only a small pressure increase.
- The tire sidewall’s maximum PSI is not the vehicle’s recommended operating pressure.
- A bicycle pump is suitable for a minor top-off, not for driving on a visibly damaged, rapidly leaking, or completely unseated tire.
Can You Use Bike Pump for Car Tire?
A bicycle pump can inflate a car tire when its hose and chuck fit a Schrader valve. The pump does not need to be designed specifically for automobiles because the pump’s pressure rating describes the maximum pressure it can create, while the tire’s size determines how much air each stroke must deliver.
Most floor pumps have a dual-head chuck for Schrader and Presta valves. A Schrader opening is wide and usually requires no removable valve core nut; a Presta valve is narrow, threaded, and common on road bicycles. A Presta-only pump needs a proper threaded adapter before it can connect to a car tire.
The connection must be airtight. A loose chuck can hiss continuously, making the pump appear ineffective while air escapes around the valve stem. A working check valve prevents the tire from forcing air back through the pump between strokes.
Will the valve fit?
A standard car-tire valve is a Schrader valve, so a bicycle pump with a Schrader setting will normally fit directly. A pump with separate openings may require selecting the larger hole, while a reversible head may require moving an internal rubber seal and pin.
Check the pump specification before forcing the chuck onto the stem. The metal pin inside the chuck must depress the Schrader valve core, and the locking lever must hold the chuck straight against the stem. A Presta-only head cannot be made safe by pushing harder.
Why Does It Work Slowly?
A bike pump works on a car tire because pressure and air volume are different requirements. The pump can create more than the car tire’s target pressure, but its narrow cylinder moves much less air per stroke than an automotive compressor.
A typical passenger-car tire may require several times more air volume than a bicycle tire, even though the bicycle tire may operate at 60-120 PSI. That counterintuitive difference explains why a bicycle pump can reach 100 PSI on a bicycle wheel yet feel inefficient at 32 PSI on a car.
Each stroke compresses a small quantity of air and pushes it through the valve. As the car tire pressure rises, the pump must generate slightly greater pressure than the tire’s internal pressure to move air through the valve. The limiting factor is usually volume per stroke, not pressure capability.
A pump with a larger barrel and longer stroke transfers more air. Body position also affects output because full strokes use the complete cylinder rather than only the upper portion.
What Pressure Should You Use?
Use the cold tire pressure printed on the vehicle manufacturer’s door-jamb label, fuel-door label, or owner’s manual. Do not use the maximum pressure molded into the tire sidewall, because that value describes a tire limit rather than the vehicle’s recommended setting.
The U.S. National Highway Traffic Safety Administration, or NHTSA, states: “The recommended tire pressure is the vehicle manufacturer’s recommended tire pressure, not the maximum tire pressure indicated on the tire.” The correct setting can differ between front and rear axles, and some vehicles specify a separate pressure for heavy loads.
Measure pressure before driving, when the tire has been parked for several hours. Driving warms the air and can raise the gauge reading, so releasing air from a hot tire can leave it underinflated after cooling.
Typical pressure references
| Vehicle or tire situation | Typical pressure range | Correct reference |
|---|---|---|
| Compact passenger car | 30-35 PSI | Driver-side door label |
| Midsize sedan | 32-36 PSI | Owner’s manual or door label |
| Crossover or small SUV | 33-38 PSI | Vehicle placard |
| Temporary spare tire | 60 PSI or more | Spare-tire sidewall and manual |
| Bicycle road tire | 80-120 PSI | Bicycle tire sidewall or manufacturer chart |
The table gives common ranges, not replacement values. A temporary spare is an important exception: its required pressure may be far above a normal car tire, so a basic pump can require a long session.
How Long Will a Bike Pump Take?
A bicycle floor pump typically takes 10-20 minutes to add 5-10 PSI to a passenger-car tire, while a completely flat tire may require 30-60 minutes or more. These are typical field estimates, not universal specifications, because tire size, pump barrel, leakage, and user stroke rate change the result.
A small hand pump may take several hundred strokes to add a measurable amount to a car tire. A foot pump usually transfers more air than a mini frame pump, but inexpensive models can flex, overheat, or lose their seal under repeated loading.
| Pump type | Typical addition | Typical time | Practical use |
|---|---|---|---|
| High-volume floor pump | 5-10 PSI | 10-20 minutes | Best manual option for a passenger car |
| Dual-cylinder foot pump | 5-10 PSI | 15-30 minutes | Emergency top-off with no electricity |
| Single-cylinder foot pump | 5-10 PSI | 20-40 minutes | Usable, but slower and more tiring |
| Mini frame pump | 1-3 PSI | 10-20 minutes | Short emergency increase only |
| 12-volt compressor | 0-15 PSI | 3-10 minutes | Faster option for most drivers |
A pump gauge can be inaccurate, especially at the low-pressure end of a high-pressure bicycle scale. Use a separate automotive tire gauge for the final reading.
Which Bike Pump Works Best?
A sturdy bicycle floor pump with a steel or reinforced barrel, a locking Schrader chuck, a stable base, and a usable gauge is the best manual choice. A high-pressure road-bike pump may reach the target pressure, but a high-volume mountain-bike pump generally moves more air per stroke and reduces the workload.
| Feature | Floor pump | Foot pump | Mini hand pump | 12-volt compressor |
|---|---|---|---|---|
| Air delivery per stroke or cycle | High | Medium | Low | Continuous |
| Typical purchase cost | $25-$60 | $15-$40 | $15-$35 | $30-$100 |
| Power source | Human effort | Human effort | Human effort | Vehicle 12-volt socket |
| Passenger-car top-off | Practical | Possible | Poor | Practical |
| Gauge quality | Basic to good | Basic | Often absent | Digital or analog |
| Main failure risk | Chuck or seal wear | Hinge or hose failure | Overheating and fatigue | Fuse, cable, or motor heat |
The pump’s pressure rating is not a reliable measure of automotive usefulness. A 160-PSI road pump can still be slow if its barrel is narrow, while a lower-rated high-volume pump may add air more efficiently at a car tire’s 32-35 PSI.
How Do You Inflate a Car Tire With a Bike Pump?
Inflate a car tire manually by checking the vehicle pressure, securing a Schrader-compatible chuck, pumping in controlled intervals, and verifying the final reading with a separate gauge. Allow approximately 15-30 minutes for a modest top-off and keep the tire stationary on a firm, safe surface.
Before You Start
| Requirement | Typical value |
|---|---|
| Time for a minor top-off | 10-30 minutes |
| Difficulty | Moderate physical effort |
| Cost if equipment is available | $0 |
| Required pump | Schrader-compatible floor or foot pump |
| Required measurement tool | Tire gauge accurate to at least 1 PSI |
| Surface | Flat concrete or dry asphalt |
| Pressure reference | Door-jamb placard or owner’s manual |
Do not begin beside fast-moving traffic without a safe shoulder, warning equipment, or roadside assistance. A low tire can hide a puncture, and pumping air into a damaged tire does not make it safe to drive.
Step 1: Inspect the Tire Before Inflating
Look across the tread, sidewall, bead area, and valve stem for nails, cuts, bulges, exposed cords, or a tire that has separated from the rim. Do not inflate a tire with a sidewall bulge, large cut, visible cord, or bead that is no longer seated.
You will know the tire is suitable for a temporary top-off when the casing remains seated evenly around the wheel and no severe damage is visible. The common mistake is treating every low-pressure warning as an ordinary air shortage.
Step 2: Find the Correct Pressure
Read the cold inflation pressure on the driver-side door placard. If the front and rear values differ, record the value for the specific wheel you are servicing.
You will know the target is correct when the number matches the vehicle placard rather than the tire sidewall. The common mistake is inflating to the sidewall maximum, which can produce an unnecessarily hard ride and uneven contact.
Step 3: Prepare the Schrader Connection
Remove the valve cap and keep it in a pocket or clean surface. Set the bicycle pump head to Schrader mode, or install the manufacturer’s specified adapter if the head does not have a direct Schrader port.
You will know the pump is configured correctly when the wider chuck opening fits over the valve stem without force. The common mistake is using a Presta opening, which may fail to depress the valve core or damage the chuck.
Step 4: Attach the Chuck Straight
Push the chuck firmly onto the valve stem and engage the locking lever. A brief hiss during attachment is normal, but continuous hissing indicates a poor seal.
You will know the connection works when the gauge shows a pressure reading and the hiss stops after locking. The common mistake is holding the chuck at an angle, which can bend or tear a rubber valve stem.
Step 5: Stabilize the Pump
Place the pump base on flat concrete or asphalt and keep the hose aligned with the valve. Avoid grass, loose gravel, and sloped surfaces because the base can move while the user applies downward force.
You will know the setup is stable when the pump remains upright through a full stroke. The common mistake is twisting the hose to reach a wheel, which places sideways load on the valve stem.
Step 6: Use Full, Controlled Strokes
Pump through the entire cylinder with a steady rhythm. Use both arms and body weight while keeping knees slightly bent, rather than forcing the handle rapidly with the shoulders.
Pause for 30-60 seconds after every 2-3 minutes of continuous pumping. You will know the pump is working when the gauge rises gradually and the handle moves smoothly. The common mistake is short, rapid strokes that waste motion and heat the seals.
Step 7: Verify and Replace the Cap
Stop at the vehicle’s recommended cold pressure, then check the reading with a separate tire gauge. Replace the valve cap firmly because it provides secondary protection against dirt and moisture, even though the valve core creates the primary air seal.
You will know the job is complete when the pressure matches the placard and the tire remains visibly seated. If the pressure drops noticeably within minutes, locate the leak or arrange a repair instead of driving normally.
Is a Bicycle Pump Safe for a Car Tire?
A bicycle pump is generally safe for a car tire when the tire is intact, the valve connection is correct, and the pump is used within its instructions. The main risks are valve-stem damage, pump overheating, incorrect pressure, and driving on a tire with a structural defect.
A normal bicycle pump cannot create the explosive pressure hazard associated with compressed-gas equipment because car tires operate at relatively low pressure. However, a tire with a damaged sidewall or unseated bead can fail regardless of how carefully air is added.
When should you stop?
Stop pumping and do not drive normally when any of these conditions appears:
- The tire has a sidewall bulge, deep cut, exposed cord, or displaced bead.
- Air escapes faster than the pump can replace it.
- The valve stem moves excessively, cracks, or leaks at its base.
- The pump barrel, hose, chuck, or handle becomes too hot to touch.
- The tire remains collapsed after several minutes of pumping.
- The tire pressure falls again immediately after reaching the target.
- The vehicle is stopped in an unsafe traffic location.
A completely flat tire may have been driven while underinflated, damaging the internal sidewalls even if the exterior looks acceptable. Tire manufacturers and roadside technicians generally treat that situation as an inspection issue, not a simple inflation task.
What Are the Main Alternatives?
A 12-volt tire inflator is the most practical alternative for regular drivers, while roadside assistance is the safest option when traffic, tire damage, or an unsafe location makes manual inflation unsuitable. A gas-station compressor can work, but access and gauge accuracy vary.
| Alternative | Typical cost | Typical time | Best situation | Limitation |
|---|---|---|---|---|
| 12-volt compressor | $30-$100 | 3-10 minutes | Routine trunk emergency kit | Motor needs cooling breaks |
| Battery inflator | $50-$150 | 5-15 minutes | Cars without a reliable 12-volt socket | Battery may be discharged |
| Gas-station compressor | $1-$3 or free | 3-8 minutes | Nearby service station | Requires safe travel to reach it |
| Roadside assistance | Membership or service fee | 20-90 minutes | Damage, danger, or a fully flat tire | Waiting time and coverage limits |
| CO₂ cartridges | $10-$30 kit | 1-5 minutes | Bicycle tires or temporary mobility | Poor capacity for car tires |
A portable compressor should include a hose long enough to reach all four wheels, a gauge readable near 35 PSI, an automatic shutoff, and a cable rated for the vehicle’s 12-volt outlet. The compressor’s duty cycle matters because low-cost motors may need ten-minute cooling periods after several minutes of use.
Can a Bike Pump Inflate a Completely Flat Tire?
A floor pump can sometimes inflate a completely flat passenger-car tire, but a mini pump is usually impractical and a tire with a displaced bead may not reseat safely with a bicycle pump. The starting condition matters more than the final PSI because a flat tire may indicate structural damage or a large leak.
If the tire is flat after a puncture, the pump may add air temporarily while the puncture continues releasing it. If the tire has come off the bead, inflating it requires a strong initial air surge to push the bead against the rim, which most bicycle pumps cannot provide efficiently.
Do not jack up a vehicle or attempt bead reseating with improvised straps, flammable sprays, or explosive methods. Those methods can cause severe injury. Use a spare tire, a professional tire service, or roadside assistance.
Can you use a bike pump on an SUV?
A high-volume floor pump can top off many SUV tires, but the larger casing may require 20-40 minutes for a 5-10 PSI increase. A small hand pump is a poor choice for a full-size SUV, pickup, van, or heavy-duty tire because the required air volume increases substantially.
Vehicle weight also affects the recommended pressure. Use the SUV’s placard, not a generic passenger-car value, and check whether the placard specifies different pressures for normal and maximum loads.
Common Problems and How to Fix Them
Why is air hissing from the valve?
Continuous hissing usually means the chuck is not fully seated, the locking lever is open, or the chuck’s internal seal is worn. Remove the chuck, inspect the rubber seal, press the head straight onto the Schrader stem, and relock it.
If air still escapes around the valve core after removing the pump, tighten the core only with a valve-core tool. A leaking valve stem or damaged core requires replacement.
Why does the handle push back upward?
A handle that rises forcefully can indicate a failed check valve, a leaking pump piston, or pressure flowing back through the cylinder. Stop using the pump if the handle jerks violently because repeated backpressure can damage the piston seal or hose connection.
Test the pump on a bicycle tire or another known-good valve. If the same behavior occurs, replace or repair the pump rather than applying more force.
Why is the gauge not moving?
A stationary gauge may result from an improperly seated chuck, a blocked hose, a damaged gauge, or a chuck pin that does not depress the Schrader valve core. Confirm progress with a separate tire gauge instead of relying on the bicycle pump’s display.
A gauge that reads zero while the tire visibly firms may be disconnected from the air path. A gauge that changes wildly during attachment may have a damaged mechanism.
Why does the pressure fall after pumping?
Pressure can fall because the chuck releases a small amount of air during removal, the valve core leaks, or the tire has a puncture. A minor reading change of approximately 1 PSI can result from measurement differences, but a rapid drop indicates a fault.
Apply soapy water around the tread puncture, valve core, and rim edge if conditions are safe. Bubbles identify escaping air, but they do not replace a professional tire inspection.
Expert Rules That Prevent Mistakes
A pressure rating does not equal fast inflation. Pump barrel volume determines how much air moves per stroke, while the pressure rating indicates the pump’s ability to overcome resistance. For a car tire, high volume usually matters more than an impressive maximum-PSI number.
The valve stem is the fragile part of the setup. Many rubber stems are flexible, but they are not designed to support a sideways pumping motion. Keeping the chuck aligned with the stem protects the stem-to-rim seal, which can be more difficult and expensive to repair than replacing a pump chuck.
A pressure warning is a diagnosis prompt. If one tire repeatedly loses 3-5 PSI between checks, inflation only resets the symptom. A puncture, leaking valve, rim corrosion, or temperature change may be responsible, and the correct response is inspection rather than repeated top-offs.
Which Option Should You Choose?
Choose a bicycle floor pump when a car tire is only moderately low, the vehicle is parked safely, and no damage is visible. Choose a 12-volt compressor for routine preparedness, because it supplies air faster with less physical strain and usually includes a more suitable automotive gauge.
| Driver situation | Recommended option | Reason | Avoid |
|---|---|---|---|
| Apartment resident with one low tire | Bicycle floor pump | No electricity or storage space required | Mini pump for a full refill |
| Daily commuter | 12-volt compressor | Fast repeatable top-offs | Driving far on a low tire |
| Remote-road traveler | Compressor plus spare tire | Handles distance and limited services | Depending on a gas station |
| Tire with visible damage | Roadside assistance | Prevents unsafe inflation and driving | Manual pumping |
| Completely flat tire | Spare or professional service | Checks for internal damage | Long-distance driving after inflation |
A bicycle pump is a useful backup, not a complete tire-maintenance system. Keep a separate gauge, inspect pressures monthly and before long trips, and investigate recurring pressure loss.
FAQ
Can I use a bicycle pump without a gauge?
You can add air without a built-in gauge, but you should verify the final pressure with a separate automotive tire gauge. Tire appearance is not accurate enough to identify a 5-10 PSI difference, especially on stiff low-profile tires.
Will pumping a car tire damage a bicycle floor pump?
Normal controlled use should not damage a sound floor pump rated for the required pressure. Excessive heat, a defective check valve, repeated force against a blocked chuck, or continuous pumping beyond the manufacturer’s duty guidance can damage seals and plastic components.
Can I use a Presta pump on a car tire?
A Presta-only pump cannot connect directly to a Schrader car valve. A correctly sized Presta-to-Schrader adapter may work if the pump chuck can create a secure seal, but a dual-head Schrader-compatible pump is simpler and less likely to leak.
Should I inflate a tire while it is hot?
Set tire pressure according to the vehicle placard and avoid releasing air from a hot tire to reach a cold-pressure number. Check again when the tire cools, because driving raises air temperature and temporarily increases the gauge reading.
How often should car tire pressure be checked?
Check pressure at least monthly and before long trips, using a gauge when the tires are cold. Seasonal temperature changes can alter pressure, and a tire that repeatedly loses air needs inspection for a puncture, valve leak, wheel problem, or tire damage.
Can I drive after using a bike pump?
Drive only after the tire reaches the vehicle’s recommended pressure, remains seated, and shows no damage or continuing leak. If the tire was completely flat, lost pressure rapidly, or was driven while severely underinflated, arrange an inspection before continuing.
The Bottom Line
Can you use bike pump for car tire inflation? Yes, a Schrader-compatible bicycle floor pump can restore a moderately low passenger-car tire, usually adding 5-10 PSI in 10-20 minutes. The method is slow but workable in a safe location. Do not use it to mask a puncture, repair structural damage, reseat a bead, or justify driving on an unsafe tire.


