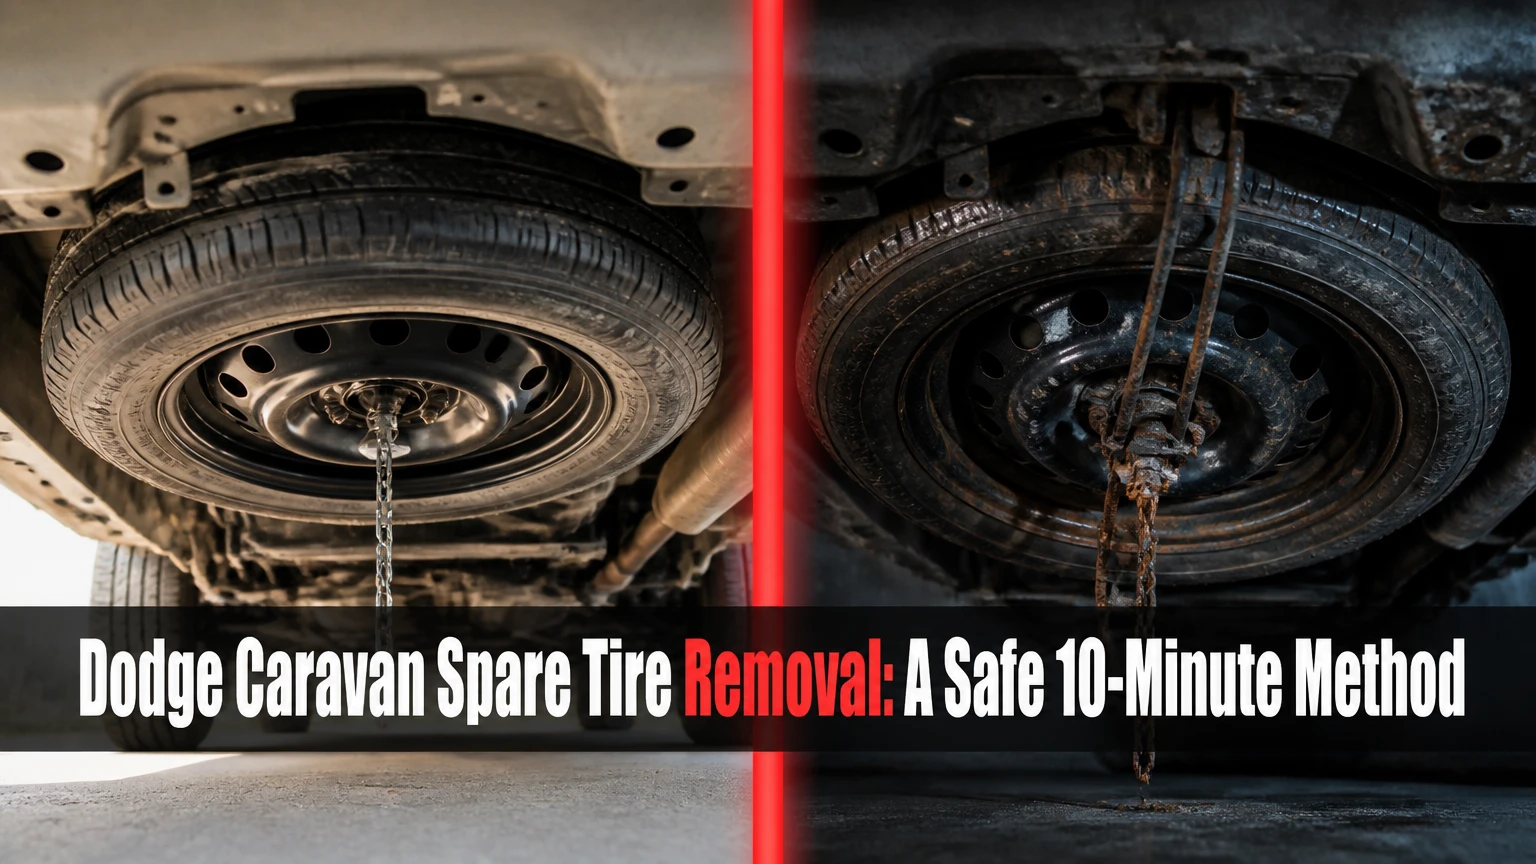
Dodge Caravan spare tire removal requires releasing the underbody cable winch, lowering the tire through the cabin-accessed winch nut, and sliding the tire out from beneath the van. On most 2008-2020 Dodge Grand Caravan models, the spare sits between the front seats under the floor, and a complete removal typically takes 10-20 minutes when the hoist is not corroded.
Key Facts at a Glance
A 2008-2020 Dodge Grand Caravan usually stores its spare tire under the center floor, between the front doors.
The factory jack-kit hook and extension handle turn the spare-tire winch counter-clockwise.
The cable must be lowered beyond the point where the tire first touches the pavement.
A retainer, often called a dog bone, passes through the spare wheel center and must align with the hub opening.
Most temporary spares require 60 psi and a maximum speed of 50 mph, but the sidewall and owner’s manual control.
Never crawl under a van supported only by the factory scissor jack.
Before You Start
A normal spare-tire extraction takes 10-20 minutes and requires no lifting of the van. The most important success factor is identifying the correct access point for the winch nut before you begin turning the tool, because console layouts differ between a standard floor console and a Super Console.
Park on firm, level ground away from traffic. Apply the parking brake, select Park, switch on the hazard lamps, and place the transmission in Park before opening the liftgate. If the van is on a shoulder, stand on the side away from traffic and call roadside assistance rather than working in an exposed travel lane.
Tools and Conditions
| Item | Typical quantity or size | Purpose |
|---|---|---|
| Factory lug wrench | 1, usually 19 mm or 3/4 inch | Turns the winch extension and removes lug nuts |
| Hook section | 1 | Engages the winch socket or cable mechanism |
| Extension bar | 1-2 sections | Reaches the cabin winch nut |
| Work gloves | 1 pair | Protects hands from rust and road debris |
| Flashlight | 1 | Identifies the retainer and underbody latch |
| Wheel chock | 1-2 | Prevents vehicle movement during a wheel change |
| Penetrating oil | 1 small can | Helps a corroded winch or retainer, if accessible |
The factory tool kit is normally stored behind a removable panel on the driver-side wall of the rear cargo area. Turn the panel fasteners, remove the pouch, and connect the hook, extension section, and lug wrench. The completed assembly should be rigid and should fit the winch nut without slipping.
Do not substitute a random socket extension if the tool cannot fully engage the winch nut. A partly engaged tool rounds the drive surface and can turn a roadside extraction into a hoist repair.
Where Is the Spare Tire Located?
A 2008-2020 Dodge Grand Caravan normally carries the compact spare under the center of the vehicle, below the floor area between the driver and front passenger seats. The tire is held horizontally by a cable hoist, while the winch nut is reached from inside the cabin through a console drawer, floor opening, or removable plug.
The location differs from a conventional SUV, where the spare may sit inside the cargo compartment or on a rear door. The Grand Caravan’s Stow ’n Go seating arrangement uses the underfloor space for seating hardware, so the spare is placed beneath the central underbody instead.
Look for the winch access opening between the front seats. Depending on equipment, the opening may be inside a storage bin, beneath a false tray, under a carpet flap, or beneath a round plastic cover. Do not confuse the winch nut with a seat anchor, a floor fastener, or a trim-panel screw.
How Does Dodge Caravan Spare Tire Removal Work?
The Grand Caravan spare-tire hoist uses a threaded winch and cable to hold the wheel against the underbody. Turning the winch nut counter-clockwise pays out cable; after the wheel reaches the pavement, additional turns lower the retainer far enough for the wheel to slide sideways from beneath the van.
The tire does not usually fall free when it first contacts the ground. The center retainer remains connected to the cable, and the wheel may still be trapped by the retainer’s angle or by a secondary safety latch. Continued counter-clockwise rotation creates the slack needed to pull the wheel outward.
The mechanism is mechanical rather than electronic. No vehicle battery, TPMS reset, or dashboard switch releases the spare. If the cable moves but the wheel does not, the likely problem is corrosion, a stuck safety latch, or pressure from the tire against the carrier.
Which Caravan Generations Use Which System?
The 2008-2020 Grand Caravan uses the center underbody winch accessed through the cabin, while earlier Dodge Caravan designs commonly use a rear underbody carrier reached through a hole near the rear bumper or liftgate area. Model equipment varies, so the owner’s manual and the visible tool access point should settle any year-specific uncertainty.
| Vehicle or generation | Approximate years | Spare location | Winch access |
|---|---|---|---|
| First-generation Caravan | 1984-1990 | Rear underside | Rear bumper or liftgate access |
| Second-generation Caravan | 1991-1995 | Rear underside | Rear body access hole |
| Third-generation Caravan | 1996-2000 | Rear underside | Rear underside or liftgate area |
| Fourth-generation Caravan | 2001-2007 | Usually rear underside | Rear access hole or cargo-area fitting |
| Fifth-generation Grand Caravan | 2008-2020 | Center underside | Cabin floor or console opening |
A 2008-2020 Chrysler Town & Country generally uses a closely related center-mounted hoist. Ram C/V models based on the same minivan platform can also share comparable hardware, but parts and access trim should be verified by VIN.
Do not apply the 2008-2020 center-console method to a 2001-2007 vehicle without checking the access arrangement. The rear winch opening may be the correct entry point on an older Caravan.
Step-by-Step Dodge Caravan Spare Tire Removal
Step 1: Retrieve and Assemble the Factory Tools
Open the rear liftgate, remove the driver-side cargo access panel, and take out the jack-kit pouch. Join the hook section to the extension bar, then attach the lug wrench so the completed tool reaches the cabin winch nut.
Success checkpoint: The hook or socket end seats squarely in the winch fitting, and the handle does not wobble under hand pressure.
Common mistake: Leaving one extension section in the pouch can make the tool too short to reach the winch nut or can encourage unsafe reaching under the van.
Step 2: Expose the Winch Nut
Move to the floor between the front seats. Open the center-console drawer or storage compartment, remove the tray if fitted, and inspect the bottom for a circular plug or square drive opening. On a standard console, lift the carpet flap or remove the small trim cover.
Success checkpoint: You can see a metal winch nut or drive fitting directly below the access opening.
Common mistake: Forcing a trim panel from the wrong edge. Use the molded finger notch or the owner’s manual method, because broken clips can leave the console loose.
Step 3: Lower the Spare Tire
Insert the assembled tool into the winch nut and turn counter-clockwise. Continue rotating until the spare tire reaches the pavement, then keep turning until the cable has enough slack for the tire to move sideways from beneath the van.
Success checkpoint: The tire lies flat on the ground and the cable retainer can move through the wheel center without remaining taut.
Common mistake: Stopping as soon as the tire touches the pavement. The wheel can remain trapped because the cable is still too short and the retainer is still centered under load.
If the handle suddenly becomes hard to turn, stop and inspect the fitting. A hard stop can indicate a fully lowered cable, a damaged winch, or a retainer caught against the wheel. Do not lean your full body weight on the wrench.
Step 4: Pull the Tire Out
Approach from the driver side when there is adequate clearance, crouch beside the van, and pull the tire outward by its tread. Avoid reaching deep beneath the chassis while traffic, exhaust heat, or vehicle movement presents a hazard.
Success checkpoint: The wheel clears the underbody and the cable hangs through the center hole with visible slack.
Common mistake: Pulling the tire at an angle that wedges the wheel against a crossmember. Rotate the wheel slightly and pull it straight out before trying to release the retainer.
Step 5: Release the Dog-Bone Retainer
Tilt the retainer so its narrow dimension aligns with the wheel’s center hole, then guide it through the opening. Some assemblies use a retainer with squeeze tabs; pinch those tabs only when the design clearly requires it.
Success checkpoint: The tire separates from the cable without bending the retainer or damaging the wheel’s center bore.
Common mistake: Turning the retainer while the cable is under tension. Lower the cable farther rather than prying the retainer through the hub.
Step 6: Inspect the Spare Before Installation
Check the tire sidewall for cracks, bulges, severe rust damage, or an expired date-related condition. Measure pressure with a gauge, confirm that the wheel’s bolt pattern matches the van, and inspect the hoist cable for broken strands before putting the spare into service.
A temporary spare is an emergency wheel, not a normal replacement for a worn road tire. If the spare is flat, damaged, or missing, use roadside assistance instead of driving on the wheel rim.
What Pressure and Lug Torque Apply?
Most 2008-2020 Dodge Grand Caravan compact spares are inflated to 60 psi and temporary-spare use is limited to 50 mph, while the common wheel-lug torque specification is 100 ft-lb, or 135 N·m. Verify the exact values on the tire sidewall, driver-door label, and owner’s manual because wheel packages and model years can differ.
| Specification | Common Grand Caravan value | Verification point |
|---|---|---|
| Temporary-spare pressure | 60 psi | Spare sidewall and owner’s manual |
| Temporary-spare maximum speed | 50 mph, 80 km/h | Spare sidewall warning |
| Typical wheel-lug torque | 100 ft-lb, 135 N·m | Model-year service information |
| Common lug-nut size | 19 mm, approximately 3/4 inch | Actual lug wrench and vehicle |
| Temporary-use distance | Minimum necessary distance | Tire and vehicle instructions |
The 50-70-mile figure often repeated online is not a universal factory distance limit. Chrysler’s instructions generally emphasize driving only as far as necessary to obtain a proper tire repair, so distance should be treated as a practical emergency limit, not a guarantee.
After installation, tighten the lug nuts in a star pattern and recheck torque with a calibrated torque wrench. If the van uses TPMS sensors, the temporary spare may not provide a normal pressure reading, and the warning lamp can remain illuminated until the original road wheel is restored.
Can You Drive Far on the Temporary Spare?
A Dodge Caravan temporary spare should be driven only to a safe repair location, at no more than 50 mph, with gentle steering, braking, and acceleration. A compact spare reduces grip and can alter handling, especially on wet roads, steep grades, or a fully loaded van.
The compact wheel may have a different diameter and tread width from the road tires. That difference can affect ABS, traction control, and drivetrain behavior. On an all-wheel-drive vehicle, using a significantly mismatched tire can place additional stress on the drivetrain, so follow the vehicle-specific manual rather than assuming the donut is acceptable for extended use.
Avoid towing, heavy cargo, long highway trips, and prolonged use. Replace or repair the original tire promptly.
What If the Factory Tool Kit Is Missing?
A missing factory tool kit does not change the hoist mechanism, but it requires a correctly sized tool with sufficient reach and a secure engagement point. First identify the winch fitting, then obtain the model-specific lug wrench and extension assembly from a Dodge parts supplier, salvage yard, or roadside service provider.
| Situation | Temporary option | Safer decision |
|---|---|---|
| Lug wrench missing, winch intact | Correct 19 mm tool and extension | Verify socket engagement before turning |
| Extension missing | OEM or VIN-matched replacement | Do not crawl under the van to improvise |
| Jack missing | Replacement scissor jack with correct saddle | Use only at marked lift points |
| Flat spare | Air compressor if tire is serviceable | Call roadside assistance if pressure will not hold |
| Damaged winch fitting | Professional extraction | Avoid rounding the winch nut |
A generic breaker bar may provide too much leverage and damage a frozen winch. Roadside technicians have the correct long tool and can usually lower an intact carrier without removing underbody components.
Why Will the Spare Tire Not Drop?
A spare that will not drop usually has a corroded safety latch, a retainer trapped under tension, or a frozen winch gear. Diagnose the symptom before applying force, because continuing to unwind a cable while the tire remains supported can worsen tangling or leave the retainer inaccessible.
Cable Unwinds but the Tire Stays Up
If the cable descends while the wheel remains against the underbody, the secondary latch may still support the tire. Wind the cable back up slightly until only minimal slack remains, push upward on the tire to relieve latch pressure, and rock the tire by its tread while an assistant turns the tool slowly.
Do not place your torso beneath the van during this operation. A long tool may help release an accessible latch, but the correct release point differs by hoist design. If the tire remains locked, a shop can support the wheel safely and remove or replace the carrier.
The Winch Nut Will Not Turn
If the winch nut does not move in either direction, inspect for a damaged or cross-threaded tool, then apply penetrating oil around the accessible fitting and wait 10-20 minutes. Work the tool gently in both directions; do not use an impact wrench unless a service procedure explicitly permits it.
A seized internal gear may require cable cutting and hoist replacement. Cutting the cable can free a trapped tire, but it also eliminates the mechanism that secures the replacement spare, so the carrier must be repaired before normal use.
The Retainer Will Not Pass Through the Wheel
A retainer that will not pass through the center hole is usually misaligned or still loaded by cable tension. Rotate the retainer to its narrow profile, lower the cable farther, and keep the wheel flat while guiding the retainer through the hub opening.
Never hammer the retainer through the wheel. That can enlarge the center hole, bend the retainer, or damage the cable connection.
Common Mistakes and How to Fix Them
| Mistake | Likely result | Correct recovery |
|---|---|---|
| Stopping when the tire first touches ground | Tire remains trapped | Turn counter-clockwise farther for slack |
| Turning clockwise first | Cable tightens | Return to counter-clockwise rotation |
| Using the jack before lowering the spare | Unsafe access and unstable vehicle | Keep the van on level ground during extraction |
| Crawling under a scissor jack | Crush injury risk | Use rated stands or call a professional |
| Cutting the cable immediately | Lost hoist function | Diagnose latch and gear condition first |
| Driving 65 mph on the donut | Heat, wear, and handling risk | Stay below the sidewall speed limit |
An expert rule is to separate “lowering the tire” from “changing the tire.” The spare can be extracted with the van sitting on its wheels; the jack is needed only after the spare is available and the vehicle is positioned for the wheel change.
Another practical rule is to unload the rear cargo area before changing a rear tire. Removing 100-200 pounds of luggage reduces jack load and makes the vehicle less likely to shift during lifting.
The factory jack is an emergency lifting device, not a substitute for a workshop hoist. If you must work beneath a raised vehicle, use jack stands rated above the vehicle’s weight and place them on manufacturer-approved support points.
Which Alternative Is Safer in Difficult Situations?
Roadside assistance is safer than DIY extraction when the van is in traffic, the winch is seized, the tire is trapped by corrosion, or the vehicle requires lifting before the carrier can be accessed. A portable inflator is useful only when the original tire has a repairable puncture and its sidewall remains undamaged.
| Alternative | Typical cost | Typical time | Best use |
|---|---|---|---|
| DIY extraction | $0-$30 | 10-20 minutes | Intact hoist on level ground |
| Mobile roadside service | $50-$120 labor | 20-60 minutes | Traffic exposure or missing tools |
| Tire shop extraction | $75-$175 labor | 30-90 minutes | Stuck latch or damaged retainer |
| Replacement hoist assembly | $50-$150 part | 1-2 labor hours | Frozen or cut cable |
| New temporary spare | $100-$250 | Same day to several days | Damaged, missing, or aged spare |
Typical prices vary by region, parts brand, and access difficulty. A Dorman replacement hoist may cost less than an original Mopar assembly, but compatibility should be confirmed by VIN and model year.
Time, Cost, and Replacement Decisions
A straightforward Dodge Caravan spare tire removal takes 10-20 minutes, while a corroded carrier can require 30-90 minutes and professional access. Typical DIY cost is limited to penetrating oil or replacement tools, whereas a new hoist commonly adds $50-$150 for the part and approximately one to two labor hours.
Replace the hoist when the cable has broken strands, the retainer is bent, the gear slips under load, or the carrier will not secure the spare tightly against the underbody. A carrier that lowers correctly but cannot hold the wheel is a safety defect.
After a difficult extraction, inspect the cable along its visible length and confirm that the spare rises evenly. Lubricate only the applicable moving mechanism according to the service information. Grease on a cable can attract abrasive dirt, and spraying blindly into the cabin access tube can contaminate trim.
How Do You Store and Maintain the Spare?
Check the temporary spare’s pressure at least twice yearly and before long trips, because an underbody tire is rarely inspected during routine service. Inflate the tire to the value printed on its sidewall, not to the pressure of the full-size road tires.
Lower the spare during scheduled maintenance so a technician can inspect the cable, retainer, wheel, and underbody corrosion. A yearly test is especially useful in regions that use road salt, where the hoist can remain stationary through several winters.
After reinstalling the spare, turn the winch until the wheel is firmly seated without crushing the tire. Confirm that the retainer is centered through the wheel and that the cable does not rub against suspension components or exhaust parts.
Frequently Asked Questions
Does every Dodge Caravan have a spare tire underneath?
No. Most 2008-2020 Grand Caravan models use an underbody spare, but equipment packages, commercial configurations, and older Caravan generations can differ. Check the cargo-area tool storage, the owner’s manual, and the underside before assuming a spare or hoist is present.
Can I remove the spare without removing the center console?
Usually, yes. The winch nut is commonly accessible through a drawer, tray, carpet flap, or removable plug in the console area. Removing the entire console is not normally part of the roadside procedure, although damaged trim or aftermarket storage equipment may block the factory opening.
What direction do I turn the spare-tire winch?
Turn the winch counter-clockwise to lower the tire on the common Grand Caravan system. Turn slowly and verify cable movement after the first few rotations. If the tire rises instead of lowers, stop and reverse direction rather than forcing the handle.
Why does the spare tire have 60 psi?
The compact spare’s narrow construction and small contact patch require higher inflation pressure than many full-size road tires. The 60 psi value is common for Grand Caravan temporary spares, but the sidewall marking is authoritative for the specific tire installed in the van.
Can I use a full-size tire in the underbody carrier?
Only if the full-size wheel physically fits the carrier, clears the underbody, and does not overload or interfere with the hoist. Many full-size tires are too tall or wide for the Grand Caravan carrier. Test fitment during normal service, never during a roadside emergency.
Should I replace the spare after using it?
Replace or repair the removed road tire and return the temporary spare to its carrier as soon as possible. Inspect the spare for damage, restore its specified pressure, and replace it if the sidewall, tread, valve stem, or wheel suffered damage during use.
The Bottom Line
Dodge Caravan spare tire removal is normally a cabin-accessed winch procedure on 2008-2020 Grand Caravan models: assemble the factory tool, expose the floor winch nut, turn counter-clockwise until the tire and retainer have slack, then pull the wheel out and release the dog bone. Keep the van on level ground, never work beneath a factory jack, and treat a stuck or corroded hoist as a roadside-service problem rather than a force test.


