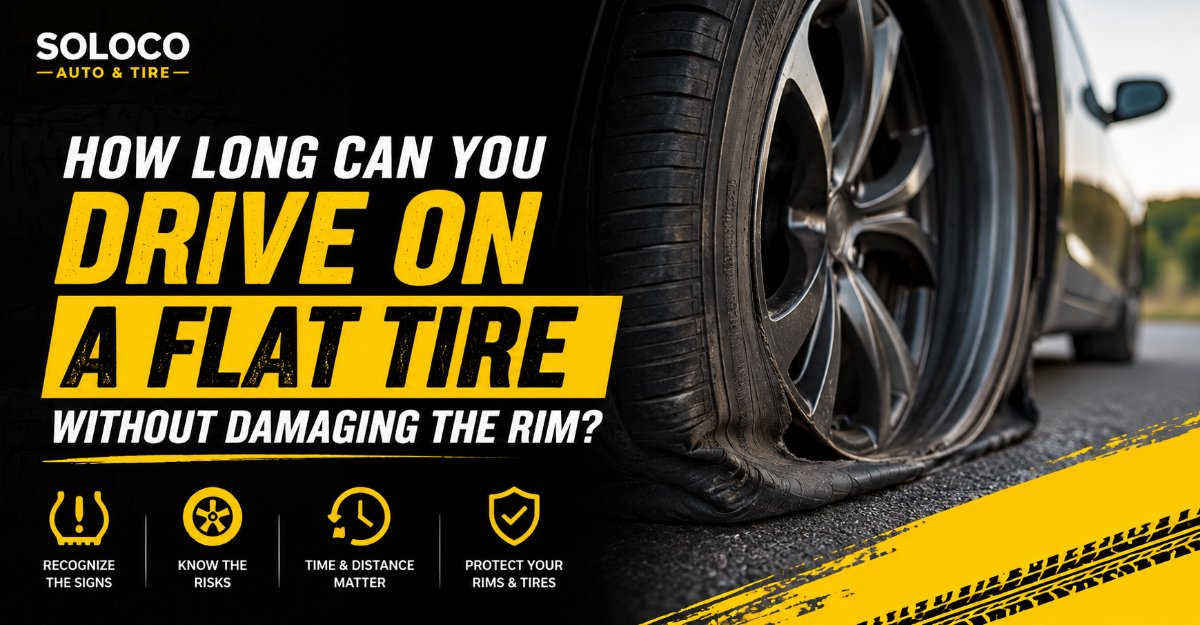
Driving on a completely flat tire destroys the structural integrity of your wheel within a quarter mile. You can drive a maximum of 0.25 miles (400 meters) at speeds under 10 mph (16 km/h) before irreversible rim ruin occurs.
This definitive guide covers precise driving limits, a complete tool checklist, and an exact six-step process to change your tire safely without damaging your vehicle.
Before You Start
- Time Required: 20 to 30 minutes.
- Difficulty Level: Beginner to intermediate.
- Cost: Free if using existing vehicle tools and spare; $100 to $300 if purchasing a replacement jack or professional roadside assistance.
- Tools and Materials Checklist:
- Spare tire: 1 (inflated to correct PSI).
- Vehicle jack: 1 (scissor or hydraulic type).
- Lug wrench: 1 (matching your vehicle lug nut hex size, typically 17mm, 19mm, 21mm, or 3/4 inch).
- Wheel chocks: 2 (rubber blocks, bricks, or heavy stones).
- Tire pressure gauge: 1.
- Flashlight or headlamp: 1 with fresh batteries.
- Reflective safety vest and warning triangle: 1 set.
- Mechanic gloves: 1 pair.
- Penetrating oil or wire brush: Optional, for rusted components.
- Prerequisite Conditions: A flat, hard surface away from active traffic lanes, dry weather or shelter, and an uncompromised vehicle frame lifting point.
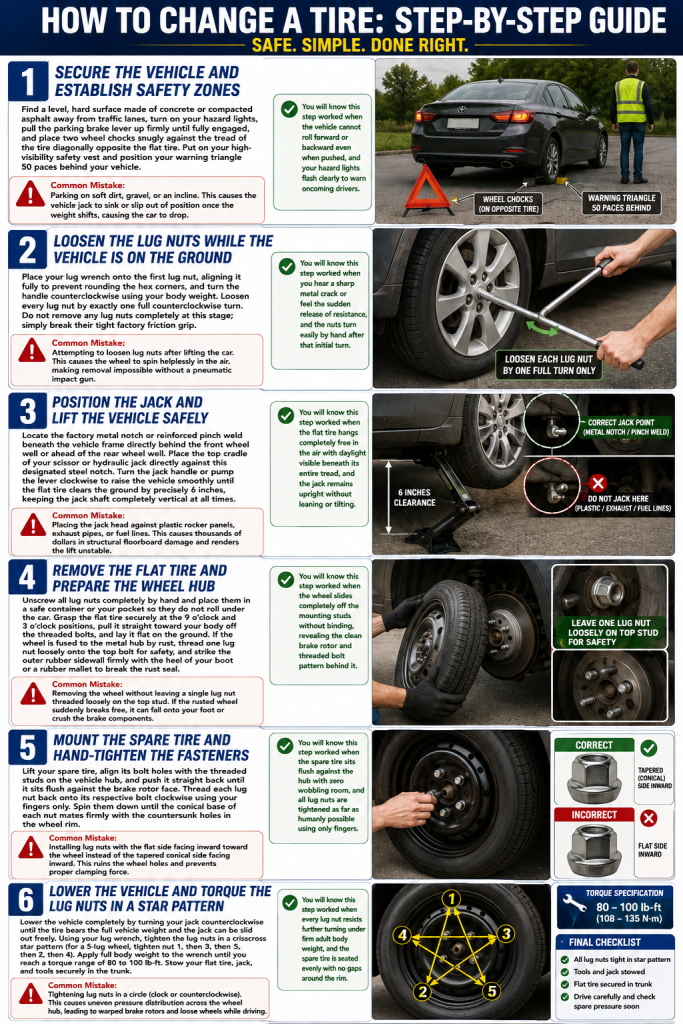
Step 1: Secure the Vehicle and Establish Safety Zones
Secure the vehicle on a stable, flat surface before performing any mechanical work to prevent catastrophic rolling or jack slippage.
Find a level, hard surface made of concrete or compacted asphalt away from traffic lanes, turn on your hazard lights, pull the parking brake lever up firmly until fully engaged, and place two wheel chocks snugly against the tread of the tire diagonally opposite the flat tire. Put on your high-visibility safety vest and position your warning triangle 50 paces behind your vehicle.
You will know this step worked when the vehicle cannot roll forward or backward even when pushed, and your hazard lights flash clearly to warn oncoming drivers.
Common Mistake: Parking on soft dirt, gravel, or an incline. This causes the vehicle jack to sink or slip out of position once the weight shifts, causing the car to drop.
Step 2: Loosen the Lug Nuts While the Vehicle Is on the Ground
Break the factory torque seal on all lug nuts while the tire remains firmly planted on the ground to prevent the wheel from spinning freely in the air.
Place your lug wrench onto the first lug nut, aligning it fully to prevent rounding the hex corners, and turn the handle counterclockwise using your body weight. Loosen every lug nut by exactly one full counterclockwise turn. Do not remove any lug nuts completely at this stage; simply break their tight factory friction grip.
You will know this step worked when you hear a sharp metal crack or feel the sudden release of resistance, and the nuts turn easily by hand after that initial quarter-turn.
Common Mistake: Attempting to loosen lug nuts after lifting the car. This causes the wheel to spin helplessly in the air, making removal impossible without a pneumatic impact gun.
Step 3: Position the Jack and Lift the Vehicle Safely
Elevate the vehicle frame using only the designated structural lift points to prevent crushing plastic side skirts or damaging the undercarriage floorboards.
Locate the factory metal notch or reinforced pinch weld beneath the vehicle frame directly behind the front wheel well or ahead of the rear wheel well. Place the top cradle of your scissor or hydraulic jack directly against this designated steel notch. Turn the jack handle or pump the lever clockwise to raise the vehicle smoothly until the flat tire clears the ground by precisely 6 inches, keeping the jack shaft completely vertical at all times.
You will know this step worked when the flat tire hangs completely free in the air with daylight visible beneath its entire tread, and the jack remains upright without leaning or tilting.
Common Mistake: Placing the jack head against plastic rocker panels, exhaust pipes, or fuel lines. This causes thousands of dollars in structural floorboard damage and renders the lift unstable.
Step 4: Remove the Flat Tire and Prepare the Wheel Hub
Remove the loosened lug nuts and pull the flat tire straight off the wheel hub mounting studs.
Unscrew all lug nuts completely by hand and place them in a safe container or your pocket so they do not roll under the car. Grasp the flat tire securely at the 9 o’clock and 3 o’clock positions, pull it straight toward your body off the threaded bolts, and lay it flat on the ground. If the wheel is fused to the metal hub by rust, thread one lug nut loosely onto the top bolt for safety, and strike the outer rubber sidewall firmly with the heel of your boot or a rubber mallet to break the rust seal.
You will know this step worked when the wheel slides completely off the mounting studs without binding, revealing the clean brake rotor and threaded bolt pattern behind it.
Common Mistake: Removing the wheel without leaving a single lug nut threaded loosely on the top stud. If the rusted wheel suddenly breaks free, it can fall onto your foot or crush the brake components.
Step 5: Mount the Spare Tire and Hand-Tighten the Fasteners
Mount the spare tire onto the hub bolts and spin the lug nuts on by hand until they seat securely against the wheel bevel.
Lift your spare tire, align its bolt holes with the threaded studs on the vehicle hub, and push it straight back until it sits flush against the brake rotor face. Thread each lug nut back onto its respective bolt clockwise using your fingers only. Spin them down until the conical base of each nut mates firmly with the countersunk holes in the wheel rim.
You will know this step worked when the spare tire sits flush against the hub with zero wobbling room, and all lug nuts are tightened as far as humanly possible using only your fingers.
Common Mistake: Installing lug nuts with the flat side facing inward toward the wheel instead of the tapered conical side facing inward. This ruins the wheel holes and prevents proper clamping force.
Step 6: Lower the Vehicle and Torque the Lug Nuts in a Star Pattern
Lower the vehicle back to the ground and apply final torque to the lug nuts using a strict star pattern to ensure even clamping pressure.
Lower the vehicle completely by turning your jack counterclockwise until the tire bears the full vehicle weight and the jack can be slid out freely. Using your lug wrench, tighten the lug nuts in a crisscross star pattern (for a 5-lug wheel, tighten nut 1, then 3, then 5, then 2, then 4). Apply full body weight to the wrench until you reach a torque range of 80 to 100 lb-ft. Stow your flat tire, jack, and tools securely in the trunk.
You will know this step worked when every lug nut resists further turning under firm adult body weight, and the spare tire is seated evenly with no gaps around the rim.
Common Mistake: Tightening lug nuts in a circle (clock or counterclockwise). This causes uneven pressure distribution across the wheel hub, leading to warped brake rotors and loose wheels while driving.
Common Mistakes and How to Fix Them
- Driving Beyond the 0.25-Mile Limit: Continuing to drive long distances on a flat tire shreds the rubber tread, separates the sidewall, and grinds the aluminum or steel rim against the asphalt. Fix: Stop immediately in a safe zone. If the rim is already gouged or bent, do not install a spare; call a flatbed tow truck to prevent suspension damage.
- Using an Uncalibrated or Damaged Jack: Raising a heavy vehicle with a bent or poorly greased scissor jack can lead to structural collapse. Fix: Inspect the jack threads before every use, apply multi-purpose grease to the screw shaft, and never place any part of your body underneath a vehicle supported solely by a mechanical jack.
- Forgetting the Post-Installation Re-Torque Check: Spare tires and newly mounted wheels experience thermal expansion and settling during initial driving. Fix: Drive no more than 50 miles on your spare tire, then revisit every lug nut with your wrench to verify that none have loosened due to vibration.
Variations: Adapting the Process for Different Situations
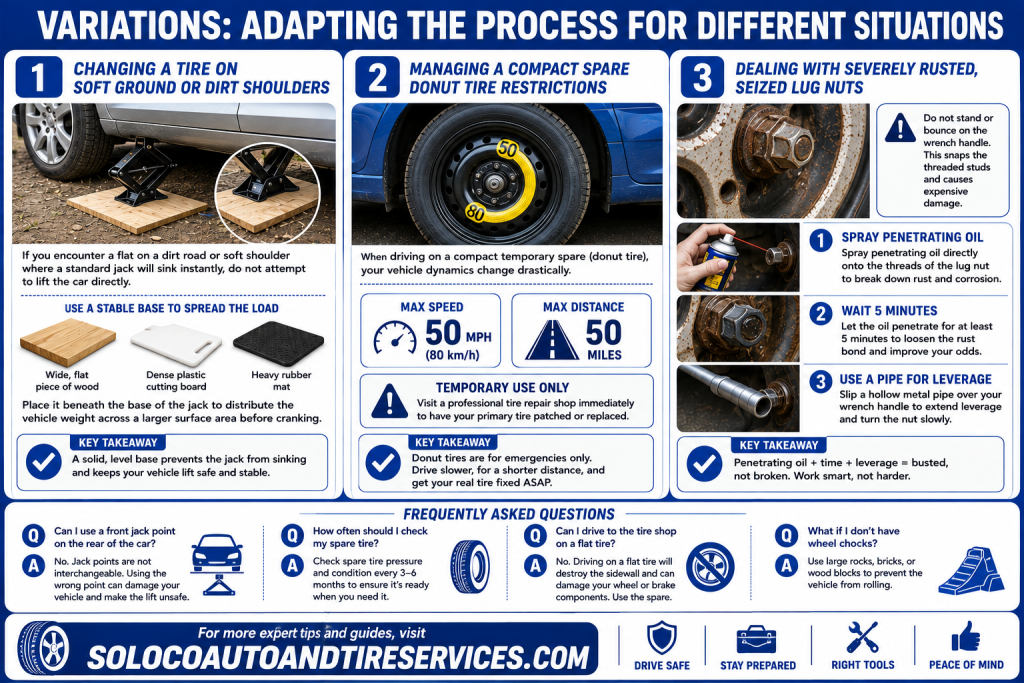
Changing a Tire on Soft Ground or Dirt Shoulders
If you encounter a flat on a dirt road or soft shoulder where a standard jack will sink instantly, do not attempt to lift the car directly. Place a wide, flat piece of wood, a dense plastic cutting board, or a heavy rubber mat beneath the base of the vehicle jack to distribute the vehicle weight across a larger surface area before cranking.
Managing a Compact Spare Donut Tire Restrictions
When driving on a compact temporary spare (donut tire), your vehicle dynamics change drastically. These tires are rated for a maximum speed of 50 mph (80 km/h) and a maximum driving distance of 50 miles. Visit a professional tire repair shop immediately to have your primary tire patched or replaced.
Dealing with Severely Rusted, Seized Lug Nuts
If factory lug nuts have rusted solid and refuse to turn under normal hand pressure, do not stand or bounce on the wrench handle, as this snaps the threaded studs. Spray penetrating oil directly onto the threads, let it penetrate for 5 minutes, and slip a hollow metal pipe over your wrench handle to extend your leverage.
Frequently Asked Questions
Can I drive on a flat tire if I keep my hazard lights on and stay on the shoulder?
No. Hazard lights and road shoulders do not protect your tire or rim from destruction. Driving even one mile on a flat tire shreds the rubber casing, destroys the inner tire liner, and chews up the metal rim edges against the road surface. Keep your driving distance under 0.25 miles strictly to find a safe stopping location.
What pressure should my spare tire be inflated to?
Compact spare donut tires typically require 60 PSI, which is significantly higher than standard passenger car tires. Full-sized matching spares should match the vehicle placard pressure, usually between 32 and 35 PSI. Check and inflate your spare tire twice a year so it is ready for emergencies.
Will driving on a flat tire ruin my suspension or alignment?
Yes, if driven on for extended distances. Once the tire flattens completely, the effective height of that corner of the vehicle drops by several inches. This abrupt height mismatch twists the control arms, damages strut assemblies, and destroys wheel alignment settings before you even reach a safe stopping zone.
Can a tire shop repair a tire that has been driven on while flat?
Usually no. When a tire is driven on while completely flat, the inner sidewalls are crushed between the heavy vehicle weight and the outer rim flange. This creates internal rubber shredding and structural breakdown, meaning the tire is unrepairable and must be replaced for safety reasons.
What should I do if my vehicle does not include a spare tire or jack?
Many modern vehicles substitute traditional spare tires with a temporary tire inflation kit and 12-volt air compressor. If your tire suffered a massive blowout or sidewall tear, sealant kits will not work. Safely pull over, turn on your hazard lights, and contact your roadside assistance provider or a local mobile tire service for towing.


