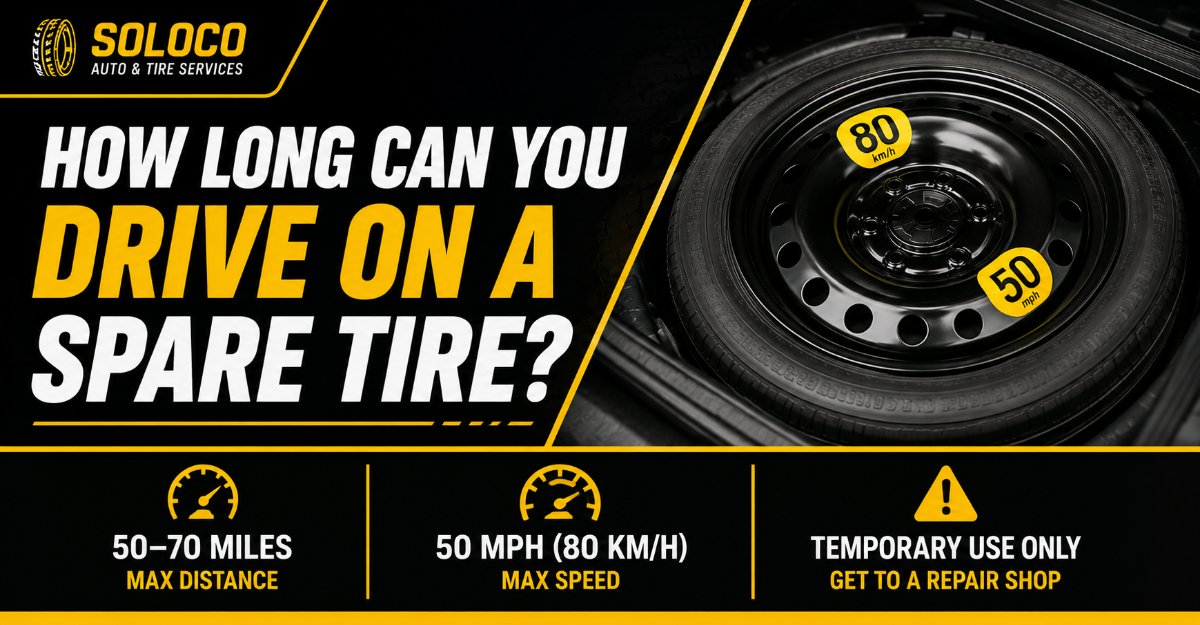
Driving on a spare tire requires strict adherence to safety limits, with space saver donut tires restricted to a maximum distance of 50 miles (80 kilometers) and a top speed of 50 mph (80 km/h). This complete guide covers the 5-step replacement process, critical safety thresholds, and exact torque specifications to get you back on the road safely in 20 minutes.
Before You Start
- Time Required: 15 to 20 minutes
- Difficulty Level: Beginner to Intermediate
- Typical Cost: Free (using factory-equipped gear) to 150 dollars for professional roadside assistance
- Tools and Materials Checklist:
- Spare tire: 1 unit (inflated to 60 PSI for donut spares)
- Scissor or hydraulic jack: 1 unit (rated to exceed vehicle gross weight)
- Lug wrench or cross wrench: 1 unit (matching lug nut millimeter or inch size)
- Wheel chocks: 2 units (or heavy rubber wedges)
- Flashlight and reflective safety triangles: 1 set
- Work gloves: 1 pair
- Prerequisite Conditions: Park on level, hard asphalt or concrete away from active traffic lanes. Never perform this on a soft dirt shoulder or a steep incline.
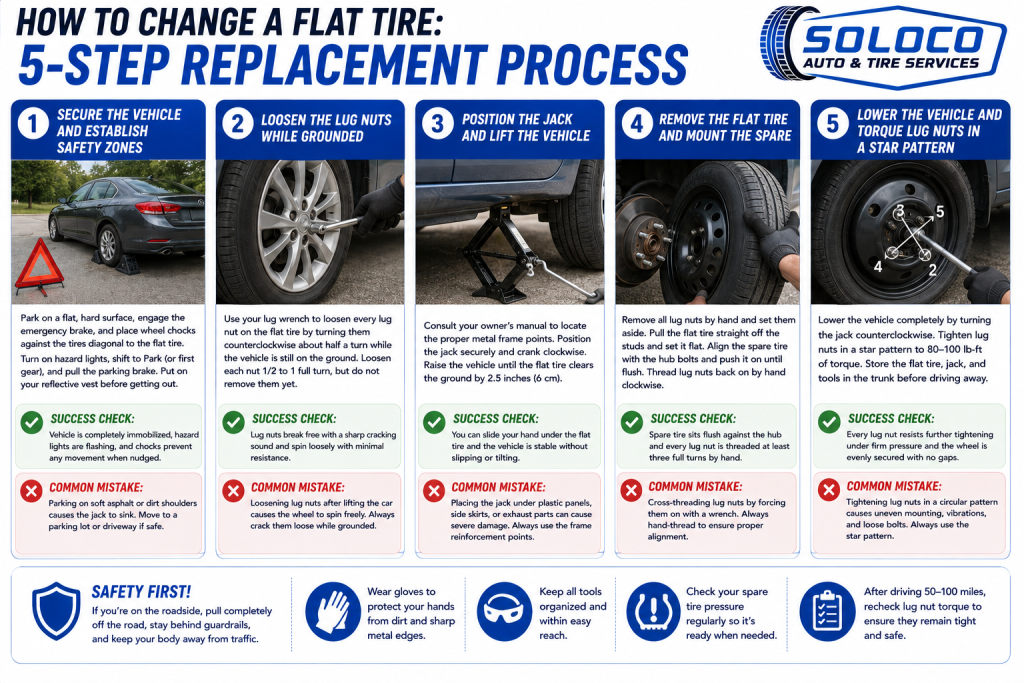
Step 1: Secure the Vehicle and Establish Safety Zones
Park on a flat, hard surface, engage the emergency brake, and place wheel chocks firmly against the tires diagonal to the flat tire.
Turn on your hazard warning lights immediately to alert oncoming traffic. Shift your automatic transmission into Park (or first gear for manual transmissions) and pull the mechanical or electronic parking brake firmly. Retrieve your wheel chocks from the trunk and place them tightly against the tread of the tire furthest away from the flat, on both the front and back sides to prevent any rolling motion. Put on your reflective vest before stepping out into traffic zones.
- Success Check: You will know this step worked when the vehicle is completely immobilized, hazard lights are flashing, and the chocks prevent any forward or backward movement when lightly nudged.
- Common Mistake: Parking on soft asphalt or dirt shoulders causes the heavy vehicle weight to push the jack directly into the ground during lifting. Always relocate to a parking lot or driveway if safe to do so.
Step 2: Loosen the Lug Nuts While Grounded
Use your lug wrench to loosen every lug nut on the flat tire by turning them counterclockwise approximately one half-turn while the vehicle is still resting firmly on the ground.
Fit the correct socket size securely over the first lug nut. Position the handle of your wrench to the left or top so you can use your body weight downward. Push or step down firmly on the wrench handle in a counterclockwise direction to break the factory torque seal. Loosen each nut about one half-turn to one full turn, but do not remove them yet. The friction of the tires against the ground prevents the wheel from spinning as you apply force.
- Success Check: You will know this step worked when the lug nuts break free with a sharp cracking sound and spin loosely with minimal resistance.
- Common Mistake: Attempting to loosen lug nuts after lifting the car causes the wheel to spin freely in the air. Always crack the nuts loose while the vehicle weight anchors the wheel.
Step 3: Position the Jack and Lift the Vehicle
Consult your vehicle owner’s manual to locate the designated metal frame reinforcement points, position the jack securely, and crank it until the flat tire clears the ground by 2.5 inches (6 centimeters).
Slide beneath the side of the vehicle near the flat tire to locate the factory notch or vertical steel pinch weld behind the front wheel or ahead of the rear wheel. Align the head of your scissor or hydraulic jack directly with this reinforced lifting point. Insert the crank handle or socket extension and pump or turn clockwise. Raise the car smoothly until the deflated tire is hanging completely free above the asphalt, leaving enough clearance to slide the fully inflated spare into place without dragging.
- Success Check: You will know this step worked when you can freely slide your hand under the flat tire and the vehicle frame remains stable without slipping or tilting.
- Common Mistake: Placing the jack head under plastic side skirts, floor pans, or exhaust components causes catastrophic structural crushing. Always verify contact with solid frame rails.
Step 4: Remove the Flat Tire and Mount the Spare
Remove the loosened lug nuts completely by hand, pull the flat tire straight off the wheel studs, and push the spare tire onto the hub bolts.
Take off all the lug nuts and place them in your pocket or the hubcap so they cannot roll away into storm drains or grass. Grasp the flat tire firmly with both hands at the nine o’clock and three o’clock positions, pull it straight toward your body, and set it flat on the ground. Pick up your spare tire, align its inner center hole with the protruding threaded bolts on the vehicle hub, and push it straight back until it sits flush against the brake rotor or drum. Thread your lug nuts back onto the bolts clockwise using your fingers only.
- Success Check: You will know this step worked when the spare tire sits completely flush against the mounting plate and every lug nut is threaded at least three full turns by hand.
- Common Mistake: Cross-threading lug nuts by forcing them on with a wrench immediately. Always hand-thread nuts to ensure proper alignment with the fine threads.
Step 5: Lower the Vehicle and Torque Lug Nuts in a Star Pattern
Lower the vehicle completely by turning the jack counterclockwise, then use your wrench to tighten all lug nuts securely in a cross star pattern to between 80 and 100 lb-ft of torque.
Crank the jack downward slowly until the spare tire bears the full weight of the vehicle and the jack can be slid out freely. Take your lug wrench and tighten the nuts following a strict star pattern: tighten one nut, move to the opposite side of the wheel for the next, and continue until every nut is uniformly tight. Apply your full body weight to the end of a standard wrench handle to reach approximately 80 to 100 lb-ft of torque. Store your flat tire, jack, and tools securely in the trunk before driving away.
- Success Check: You will know this step worked when every lug nut resists further tightening under firm hand pressure and the wheel is evenly secured to the hub without gaps.
- Common Mistake: Tightening lug nuts in a circular clockwise or counterclockwise sequence causes the wheel to mount at a slight angle, leading to dangerous vibrations and loose bolts. Always use the star pattern.
Common Mistakes and How to Fix Them
- Lug Nuts Will Not Budge: Rust or excessive pneumatic gun torque at a service shop can freeze fasteners. Apply a penetrating lubricant like WD-40 Specialist around the threads, wait 5 minutes, and carefully apply downward foot pressure on the wrench handle using your heel.
- Jack Sinks Into Hot Asphalt or Dirt: If the jack begins tilting or sinking into the ground, lower the vehicle immediately. Place a thick wooden plank, a heavy floor tile, or a flat stone underneath the base of the jack to distribute the weight across a wider surface area.
- Alloy Wheel Stuck to the Hub: Corrosion often fuses aluminum wheels to steel hubs. Thread one lug nut back on loosely by two turns, then firmly kick the rubber tire sidewall with the heel of your boot to break the rust seal.
- Spare Tire Pressure Is Low: Finding your spare tire flat in an emergency renders it useless. Always inspect your spare tire pressure every 6 months during seasonal maintenance checks, inflating donut spares to the required 60 PSI.
Variations Based on Vehicle Type and Equipment
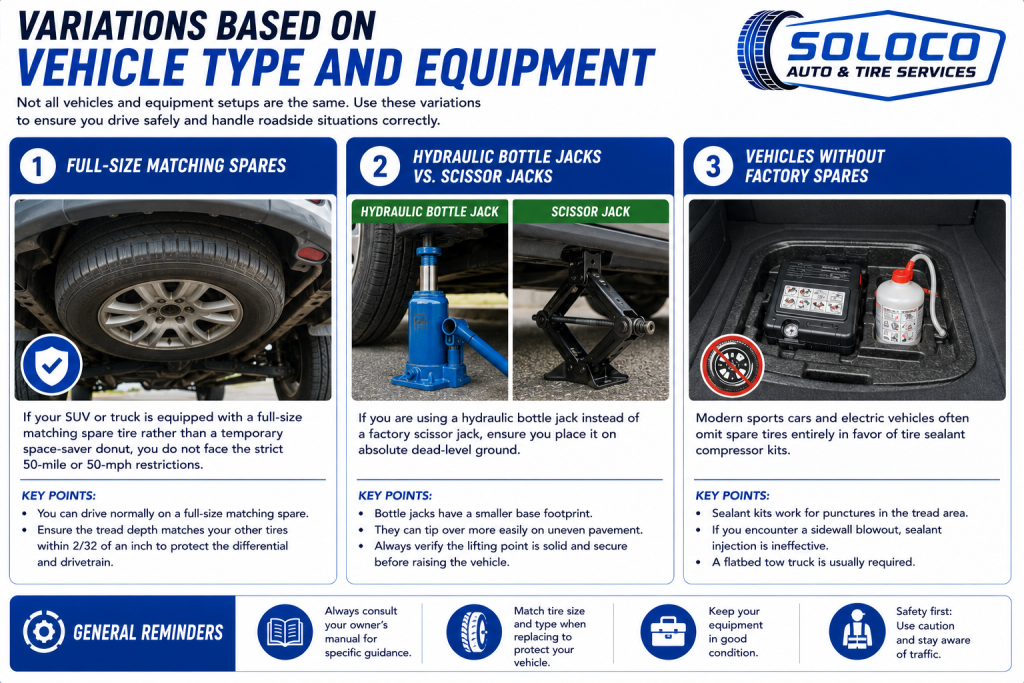
- Full-Size Matching Spares: If your SUV or truck is equipped with a full-size matching spare tire rather than a temporary space-saver donut, you do not face the strict 50-mile or 50-mph restrictions. You can drive normally, provided the tread depth matches your other tires within 2/32 of an inch to protect the differential.
- Hydraulic Bottle Jacks vs. Scissor Jacks: If you are using a hydraulic bottle jack instead of a factory scissor jack, ensure you place it on absolute dead-level ground. Bottle jacks have a smaller base footprint and can tip over more easily on uneven pavement.
- Vehicles Without Factory Spares: Modern sports cars and electric vehicles often omit spare tires entirely in favor of tire sealant compressor kits. If you encounter a sidewall blowout with a sealant kit, injection is ineffective, requiring a flatbed tow truck instead.
How Long Does It Take and What Does It Cost
- Time Investment: A first-time DIY tire change takes approximately 20 to 30 minutes from setup to cleanup. Experienced drivers equipped with a hydraulic floor jack can complete the swap in under 10 minutes.
- Financial Cost: Changing the tire yourself using factory-supplied tools costs 0 dollars. Utilizing professional roadside assistance or mobile tire services typically ranges from 75 to 150 dollars depending on your location and towing distance to a repair shop.
Frequently Asked Questions
Can I drive on a donut spare tire on the highway?
Yes, you can drive a donut spare on the highway, but you must keep your speed at or below 50 mph (80 km/h) and stay in the right-hand slow lane. Space-saver tires have significantly less rubber compound, shallower tread depths, and smaller structural footprints, making high-speed maneuvering hazardous.
How many miles can I drive on a temporary spare tire?
You should limit your driving distance to a maximum of 50 miles (80 kilometers) on a temporary donut spare tire. Driving further increases the risk of severe tread separation, internal cord fatigue, and permanent damage to your vehicle anti-lock braking and traction control systems due to rotational speed discrepancies.
Can I patch or repair a flat tire myself on the roadside?
You cannot safely repair a tire on the roadside if the puncture is located on the sidewall, if the tear is larger than 1/4 inch, or if the tire was driven on while completely flat. Roadside plugs are only safe for small tread punctures and require proper reamer tools and vulcanizing rubber strips.
Why do I need to tighten lug nuts in a star pattern?
Tightening lug nuts in a star pattern ensures even clamping force distribution across the wheel hub assembly. Tightening in a consecutive circle warps the brake rotor, prevents the wheel from seating flush, and can cause lug nuts to loosen and detach while driving at high speeds.
What should I do with the damaged flat tire after changing it?
Place the flat tire inside a heavy-duty trash bag to protect your trunk interior from brake dust and road grime, then transport it immediately to a local tire service center. Technicians can determine whether the tire can be safely patched or if you need a structural replacement.


