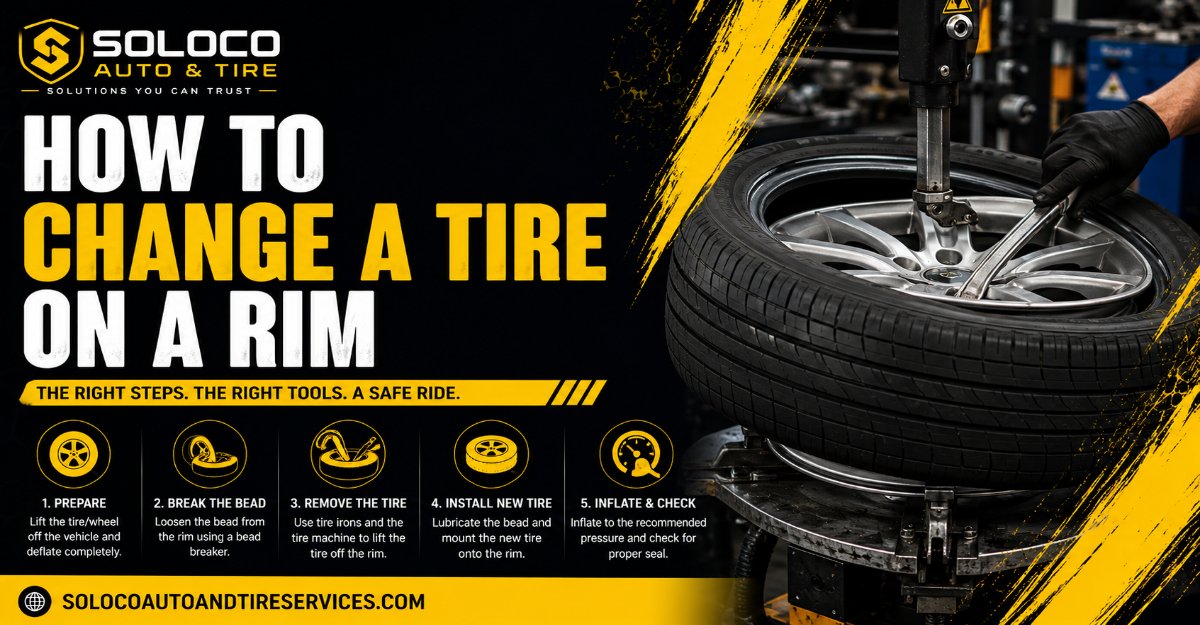
Changing a tire on a rim manually is a physically demanding mechanical process that requires precise leverage, heavy-duty spoons, and copious lubrication to prevent structural damage. By following this 8-step process, utilizing proper drop-center physics, and maintaining strict safety protocols, you can successfully dismount and mount a tire in 45 to 70 minutes.
Before You Start
- Time Required: 45 to 70 minutes per wheel.
- Difficulty Level: Advanced / High Physical Effort.
- Cost Range: $20 to $60 for manual tools (if starting from scratch) plus the cost of the tire and valve stem.
- Tools and Materials:
- 3 heavy-duty tire spoons or irons (16 to 24 inches long)
- Valve core removal tool
- New rubber or metal valve stem
- Non-petroleum tire bead lubricant paste or spray (avoid dish soap or oils which degrade rubber)
- Manual bead breaker (clamp or slide hammer style)
- High-capacity air compressor (100 PSI output minimum)
- Standard tire pressure gauge
- Heavy-duty leather work gloves and ANSI-rated safety glasses
- Prerequisite Conditions: Work on a flat, clean concrete surface. Ensure the replacement tire matches the rim diameter and width specifications precisely.
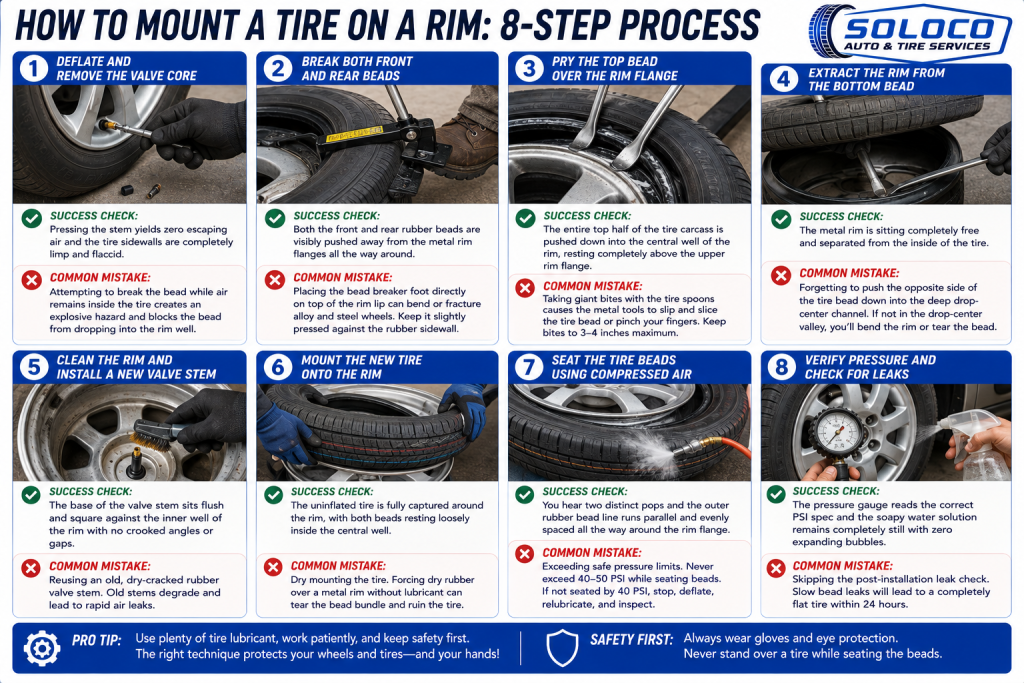
Step 1: Deflate and Remove the Valve Core
Step 1: Completely deflate the tire by extracting the internal valve core.
Unscrew the plastic valve cap from the stem. Insert the tip of the valve core tool into the center of the valve stem, engage the slot, and turn counterclockwise until the core unscrews completely. Allow all compressed air to escape fully until the hiss stops.
- Success Check: You will know this step worked when pressing the stem yields zero escaping air and the tire sidewalls feel completely limp and flaccid.
- Common Mistake: Attempting to break the bead while air remains inside the tire creates an explosive hazard and blocks the bead from dropping into the rim well.
Step 2: Break Both Front and Rear Beads
Step 2: Unseat the tire beads from the rim flanges using a dedicated bead breaker.
Position your manual bead breaker tool so the foot rests flat against the sidewall, precisely 1/8 inch away from the outer edge of the metal rim lip. Apply heavy, controlled downward force using the lever arm or slide hammer until the rubber bead pops inward and drops down past the rim flange. Flip the wheel over and repeat the exact same process on the back side.
- Success Check: You will know this step worked when both the front and rear rubber beads are visibly pushed away from the metal rim flanges all the way around the circumference.
- Common Mistake: Placing the bead breaker foot directly on top of the rim lip can bend or fracture alloy and steel wheels. Always keep it slightly pressed against the rubber sidewall.
Step 3: Pry the Top Bead Over the Rim Flange
Step 3: Work the top tire bead up and over the rim lip using two tire spoons.
Liberally brush non-petroleum tire lubricant around the entire perimeter of the top rim lip and exposed bead. Insert the flat, curved tip of your first tire spoon between the top bead and the rim flange, pushing it down about 1 inch. Pry downward on the handle to lift a section of the bead up and over the outer rim lip, then lock the spoon handle down or have an assistant hold it. Insert a second tire spoon 4 inches away from the first, pry the next section over the lip, and continue this walking motion around the wheel until the entire top bead is completely free of the rim.
- Success Check: You will know this step worked when the entire top half of the tire carcass is pushed down into the central well of the rim, resting completely above the upper rim flange.
- Common Mistake: Taking giant bites with the tire spoons creates excessive tension, causing the metal tools to slip and slice the tire bead or pinch your fingers. Keep bite lengths to 3 to 4 inches maximum.
Step 4: Extract the Rim from the Bottom Bead
Step 4: Leverage the metal rim completely out of the bottom tire bead.
Push the freed top bead all the way down so it rests inside the deepest part of the center drop-center channel of the rim. Reach down through the center opening of the wheel with a tire spoon, hook the bottom bead from the inside, and pull it upward over the top rim flange. Insert a second tire spoon adjacent to it, and lever the remaining section of the bottom bead out until the rim separates completely from the tire carcass.
- Success Check: You will know this step worked when the metal rim is sitting completely free and separated from the inside of the tire.
- Common Mistake: Forgetting to push the opposite side of the tire bead down into the deep drop-center channel. If the bead is not in the drop-center valley, there is zero slack, and forcing the spoon will bend the rim or tear the bead wire.
Step 5: Clean the Rim and Install a New Valve Stem
Step 5: Clean the rim seating surfaces and pull a fresh valve stem into place.
Scrape away any old rubber residue, corrosion, or dirt from the inner rim bead seats using a stiff wire brush or Scotch-Brite pad, then wipe clean with a shop towel. Cut the old rubber valve stem off with a utility knife. Lubricate the base of a new valve stem with rubber lubricant, insert it from the inside of the rim barrel out through the valve hole, attach a valve stem puller tool to the threaded end, and pull firmly until the rubber base snaps squarely into the hole.
- Success Check: You will know this step worked when the base of the valve stem sits flush and square against the inner well of the rim with no crooked angles or visible gaps.
- Common Mistake: Reusing an old, dry-cracked rubber valve stem. Old stems degrade under UV light and ozone exposure, leading to rapid air leaks shortly after installation.
Step 6: Mount the New Tire Onto the Rim
Step 6: Lubricate both beads of the new tire and walk them onto the rim.
Inspect the new tire sidewall for any directional arrows and ensure they match the intended rotation direction of the vehicle wheel. Apply a generous layer of tire lubricant to both the top and bottom beads of the new tire. Push the bottom bead of the tire down and over the top rim lip at an angle by hand, letting part of it drop into the deep drop-center channel. Use your tire spoons to carefully walk the remaining section of the bottom bead over the rim flange, repeat the process for the top bead, and ensure the entire tire rests loosely over the rim.
- Success Check: You will know this step worked when the uninflated tire is fully captured around the rim, with both beads resting loosely inside the central well.
- Common Mistake: Dry mounting the tire. Forcing dry rubber over a metal rim without lubricant drastically increases friction, often tearing the bead bundle and rendering the tire unusable.
Step 7: Seat the Tire Beads Using Compressed Air
Step 7: Blast compressed air into the tire assembly to pop both beads onto the rim seats.
Reinstall the valve core into the valve stem using your valve core tool. Connect your high-capacity air compressor hose directly to the valve stem without the pressure chuck locking mechanism choking the airflow. Trigger the compressor to blast air rapidly into the cavity, forcing the tire walls outward against the rim lips. Listen closely for two loud, distinct popping sounds as the front and rear beads jump outward into their final sealing positions against the rim safety humps.
- Success Check: You will know this step worked when you hear two distinct structural pops and see the outer rubber bead line run parallel and evenly spaced all the way around the rim flange.
- Common Mistake: Exceeding safe pressure limits during seating. Never exceed 40 to 50 PSI while attempting to seat stubborn beads; if they do not seat by 40 PSI, stop immediately, deflate, relubricate, and inspect.
Step 8: Verify Pressure and Check for Leaks
Step 8: Adjust final air pressure to factory specifications and perform a leak test.
Disconnect the air hose and use a standard tire pressure gauge to check the internal pressure, releasing air or adding air until it matches the vehicle manufacturer placard specification (typically 30 to 35 PSI for passenger cars). Mix a few drops of dish soap with water in a spray bottle and spritz it generously around both rim flanges and the valve stem. Watch closely for any bubbling activity.
- Success Check: You will know this step worked when the pressure gauge reads the correct PSI specification and the soapy water solution remains completely still with zero expanding bubbles.
- Common Mistake: Skipping the post-installation leak check. Slow bead leaks caused by minor rim corrosion or trapped debris will lead to a completely flat tire within 24 hours.
Common Mistakes and How to Fix Them
- Dry Mounting Tears the Bead: Forcing rubber over metal without proper lubricant damages the internal steel bead wires. Fix: If the bead wire is exposed or frayed, the tire is structurally compromised and must be discarded. Always use generous amounts of dedicated bead paste.
- Ignoring the Drop-Center Principle: Trying to pry a tire over the rim without pushing the opposite side into the deep valley makes the job impossible. Fix: Stop prying immediately if you encounter extreme resistance. Step on the opposite side of the tire to force it deep into the center drop-center channel to create instant slack.
- Spoon Pinching the Inner Liner: Driving the sharp corner of a tire iron deep into the tire carcass punctures the inner air barrier. Fix: Always insert tire spoons shallowly (just past the bead lip) and keep smooth control of the lever handles.
- Bead Will Not Seat Due to Low Air Volume: Standard consumer pancake compressors often lack the volume required to push the tire walls outward. Fix: Deflate the tire, add extra lubricant, and use a high-flow air compressor tank or wrap a ratcheting tie-down strap tightly around the center tread line to compress the rubber outward against the rim lips.
- Air Escapes from the Flange Interface: Trapped rust or grit prevents an airtight seal. Fix: Deflate the tire, break the bead down completely, scrub the metal rim lip clean with a wire brush or emery cloth, apply a thin coat of bead sealant, and reinflate.
Variations: Adapting the Process
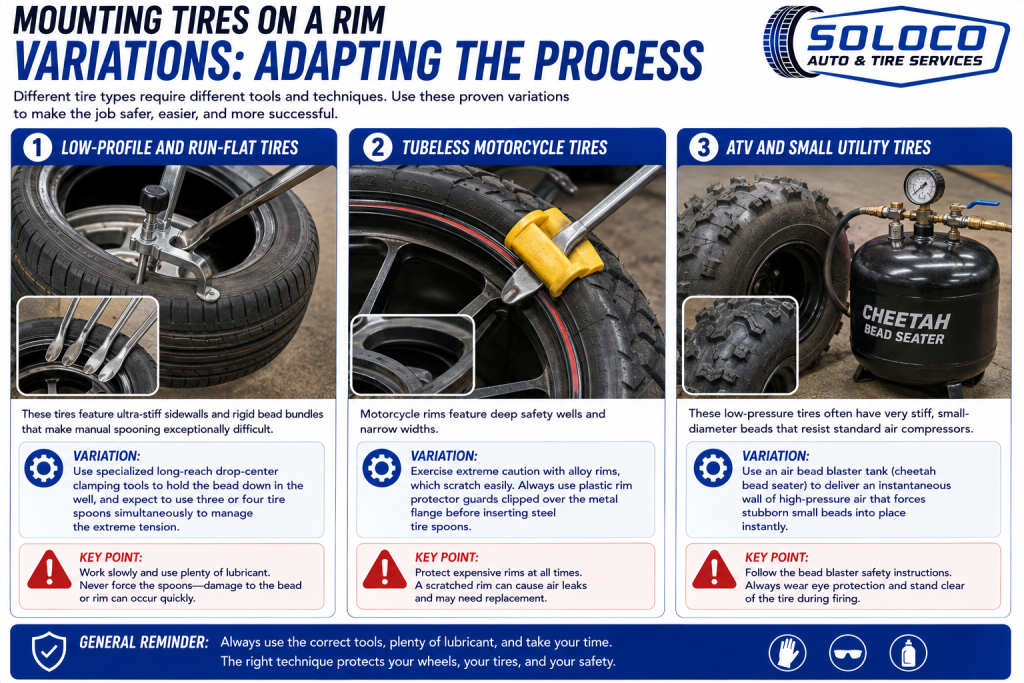
- Low-Profile and Run-Flat Tires: These tires feature ultra-stiff sidewalls and rigid bead bundles that make manual spooning exceptionally difficult. Variation: Use specialized long-reach drop-center clamping tools to hold the bead down in the well, and expect to use three or four tire spoons simultaneously to manage the extreme tension.
- Tubeless Motorcycle Tires: Motorcycle rims feature deep safety wells and narrow widths. Variation: Exercise extreme caution with alloy rims, which scratch easily. Always use plastic rim protector guards clipped over the metal flange before inserting steel tire spoons.
- ATV and Small Utility Tires: These low-pressure tires often have very stiff, small-diameter beads that resist standard air compressors. Variation: Use an air bead blaster tank (cheetah bead seater) to deliver an instantaneous wall of high-pressure air that forces stubborn small beads into place instantly.
How Long Does It Take and What Does It Cost
- Time Investment: Expect a total time commitment of 45 to 70 minutes per wheel for a first-time practitioner working with manual hand tools. Experienced technicians working with specialized bead breakers can reduce this to 20 minutes.
- Financial Cost: If you already own an air compressor and basic hand tools, buying a set of tire spoons, a valve tool, and bead paste will cost between $25 and $50. Paying a local shop to mount a tire typically costs $20 to $40 per wheel, meaning manual changing pays for tool investments after just one or two uses.
Frequently Asked Questions
Can I change a tire on a rim without a bead breaker?
Yes, you can break a stubborn tire bead by placing the wheel flat on the ground and driving the front tire of a heavy car or truck slowly over the edge of the tire sidewall (never over the metal rim). However, a manual clamp or slide hammer bead breaker offers vastly superior control and prevents accidental rim damage.
Is dish soap safe to use as a tire lubricant?
Dish soap contains water and salt residues that can promote rapid rust and corrosion on steel and aluminum rim flanges over time. While it works in a pinch, professional non-petroleum vegetable-based tire bead paste is strongly recommended to protect the rim finish and allow smooth bead seating.
What causes a newly mounted tire to lose air overnight?
Overnight pressure loss is almost always caused by microscopic debris, dried corrosion on the rim flange, a loose valve core, or a pinched inner bead during installation. Spraying soapy water around the perimeter will quickly reveal the exact leak source through bubbling.
Do I need to rebalance the wheel after changing a tire?
Yes, changing a tire alters the mass distribution of the rotating assembly. Even if the rim was previously balanced, manufacturing weight variations in a new tire mean you should take the wheel to a local shop for dynamic computer spin-balancing before highway driving.
Why won’t my tire inflate or hold air when I hook up the compressor?
If the tire beads are not touching the inner rim lips, compressed air simply escapes out the sides faster than it enters. Push down firmly on the top tread, use a ratcheting strap around the circumference to expand the beads outward, or use a high-volume air chuck with the valve core removed to maximize airflow.


