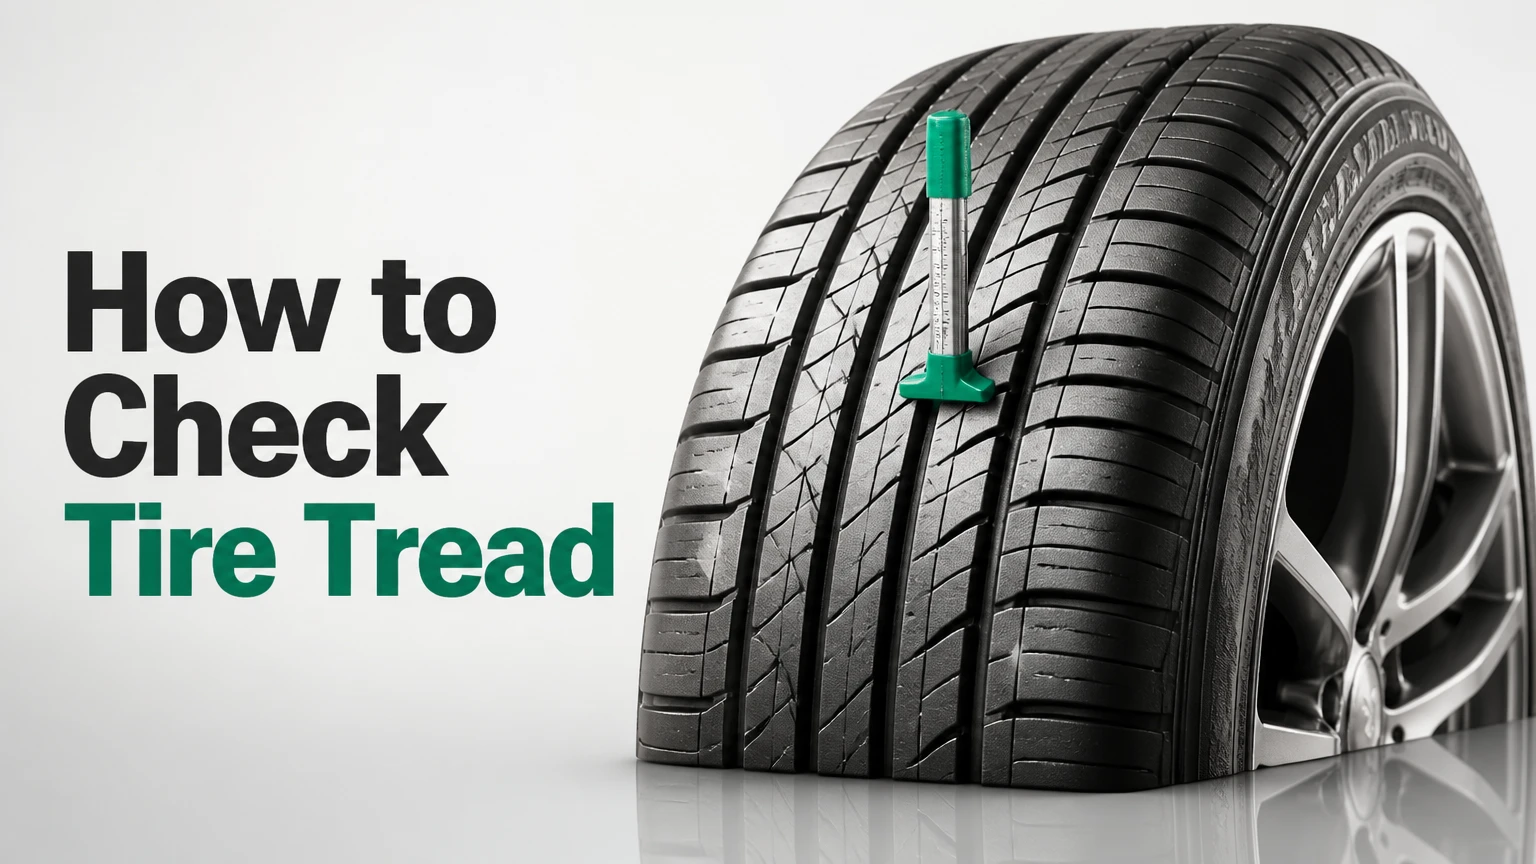
Checking tire tread regularly ensures safe braking, prevents hydroplaning, and saves you from unexpected roadside hazards. By following a precise six-step process using a coin or depth gauge, you can accurately measure tire wear in 10 to 15 minutes. Success depends entirely on measuring across multiple groove locations rather than relying on a single visual spot.
Before You Start
- Time Required: 10 to 15 minutes for all four tires.
- Difficulty Level: Beginner.
- Typical Cost: $0 (using a coin) to $5–$15 (buying a manual or digital depth gauge).
- Tools and Materials Checklist:
- 1 Penny (for a quick 2/32-inch check)
- 1 Quarter (for a quick 4/32-inch wet-weather check)
- 1 Tire tread depth gauge (analog or digital, optional for exact millimeter readings)
- 1 Smartphone or notebook (for logging data)
- 1 Clean rag or paper towel
- 1 Flashlight (for inspecting dark wheel wells)
- Prerequisite Conditions: The vehicle must be parked on a flat, level surface with the engine off, and the tires must be completely cool (not driven for at least 3 hours) to ensure accurate inflation and tread dimensions.
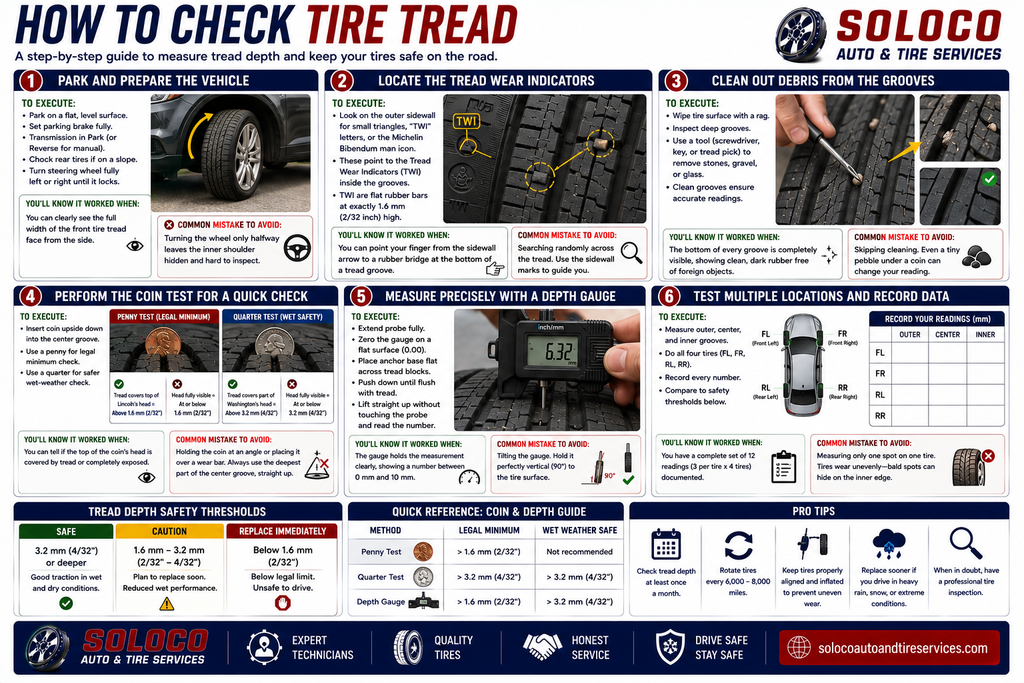
Step 1: Park and Prepare the Vehicle
Park your vehicle on a flat, level concrete surface, pull the parking brake handle all the way up, and turn the steering wheel fully to the left or right.
To execute this correctly, ensure your transmission is in Park (or Reverse for manual transmissions) and place wheel chocks behind the rear tires if you are parked on any slight slope. Turn your steering wheel completely toward one side until it locks. This action swivels the front wheels outward, exposing the tread face so you can easily access and view the outer, center, and inner grooves without crawling underneath the vehicle.
You will know this step worked when you can clearly see the full width of the front tire tread face from the side of the fender without straining your neck or body.
Common mistakes at this step include turning the steering wheel only halfway, which leaves the inner shoulder shadowed and difficult to inspect. Always lock the steering wheel completely to one side before moving to your tools.
Step 2: Locate the Tread Wear Indicators
Locate the small triangular markers or “TWI” letters on the outer sidewall of your tire and trace an imaginary line straight up onto the tread.
To execute this correctly, look closely at the outer rubber wall (the sidewall) running along the rim of the wheel. Scan for small raised triangles, the letters “TWI,” or the Michelin Bibendum man icon. These symbols point directly to the Tread Wear Indicators hidden inside the main circumferential grooves. These indicators are flat rubber bars running perpendicular to the tread pattern at a height of exactly 1.6 mm (2/32 inch). Finding these now tells you exactly where to look for the absolute legal limit of tire wear later.
You will know this step worked when you can point your finger directly from the sidewall arrow to a specific rubber bridge sitting at the bottom of a tread groove.
Common mistakes at this step include searching randomly across the tire face. Always use the sidewall manufacturing marks to guide your eyes straight to the hidden wear bars.
Step 3: Clean Out Debris from the Grooves
Wipe the tire surface thoroughly with a rag and pick out any small stones, gravel, or compacted mud trapped inside the main tread channels.
To execute this correctly, take your rag and wipe down the rubber surface to remove loose dirt. Inspect the deep grooves between the tread blocks. Use a flathead screwdriver, a key, or a dedicated tire tread pick to pry out any embedded pebbles or sharp glass shards. Trapped stones artificially elevate coins or measuring probes, giving you a falsely optimistic depth reading that masks dangerous bald spots.
You will know this step worked when the bottom of every groove is completely visible, showing clean, dark rubber free of foreign objects.
Common mistakes at this step include skipping the cleaning phase because the tire looks superficially clean. Even a tiny pebble wedged under a coin will throw off your measurement by a full millimeter.
Step 4: Perform the Coin Test for a Quick Check
Hold a coin between your thumb and forefinger, place it upside down into the center groove, and check whether the top of the head is covered by tread.
To execute this correctly, choose your coin based on your regional safety climate. If you use a United States penny, point Abraham Lincoln’s head straight down into the middle groove. If any part of the tread blocks covers the top of Lincoln’s head (passing the top of his hair), your tread is above 1.6 mm (2/32 inch), which meets the bare legal minimum. If you want a safer threshold for rainy climates, use a United States quarter; if the tread covers part of George Washington’s head, your tread is above 3.2 mm (4/32 inch), indicating safe wet-weather performance.
You will know this step worked when you can definitively state whether the top of the coin’s stamped head is submerged beneath the rubber surface or completely exposed to the air.
Common mistakes at this step include holding the coin at an angle or placing it directly over a wear bar. Always place the coin in the deepest part of the primary center groove, away from the wear bars, and hold it perpendicular to the tire surface.
Step 5: Measure Precisely with a Depth Gauge
Zero your depth gauge, place the metal probe squarely into the groove, push the flat anchor base down flush against the tread blocks, and read the measurement.
To execute this correctly, slide the metal probe out of your depth gauge until it is fully extended. If you are using a digital gauge, press the power button and ensure the screen reads 0.00 mm or 0.00 inches on a flat surface. Place the solid metal anchor bar flat across two adjacent tread blocks so the thin measuring pin drops directly into the center groove. Push the sliding base down firmly until it rests flat against the top of the rubber blocks. Carefully lift the gauge away by holding the outer casing without touching the sliding pin, and read the exact number on the analog scale or digital screen.
You will know this step worked when the gauge retains the exact depth measurement without slipping, showing a clear number between 0 mm and 10 mm.
Common mistakes at this step include tilting the gauge sideways while pressing down. Always hold the barrel of the gauge perfectly vertical at a 90-degree angle to the curved curve of the tire.
Step 6: Test Multiple Locations and Record Data
Measure the outer, center, and inner grooves of all four tires, write down every measurement in your smartphone or notebook, and compare them against safety thresholds.
To execute this correctly, repeat the measurement process in three distinct zones across the width of each tire: the outer shoulder, the center groove, and the inner shoulder. Move systematically from the front left tire to the front right, then to the rear left and rear right. Turn your steering wheel back to center once the front tires are done, and move to the rear tires. Record every single number in your smartphone notes app. Categorize your readings against standard industry benchmarks: anything 3.2 mm (4/32 inch) or deeper is safe; 1.6 mm to 3.2 mm (2/32 to 4/32 inch) requires caution and upcoming replacement; anything below 1.6 mm (2/32 inch) requires immediate replacement before driving further.
You will know this step worked when you have a complete grid of three numbers for each of your four tires, giving you a total of 12 documented data points.
Common mistakes at this step include measuring only one spot on a single tire. Tires wear unevenly due to alignment, suspension wear, or inflation habits, meaning a safe outer edge can hide a bald inner edge.
Common Mistakes and How to Fix Them
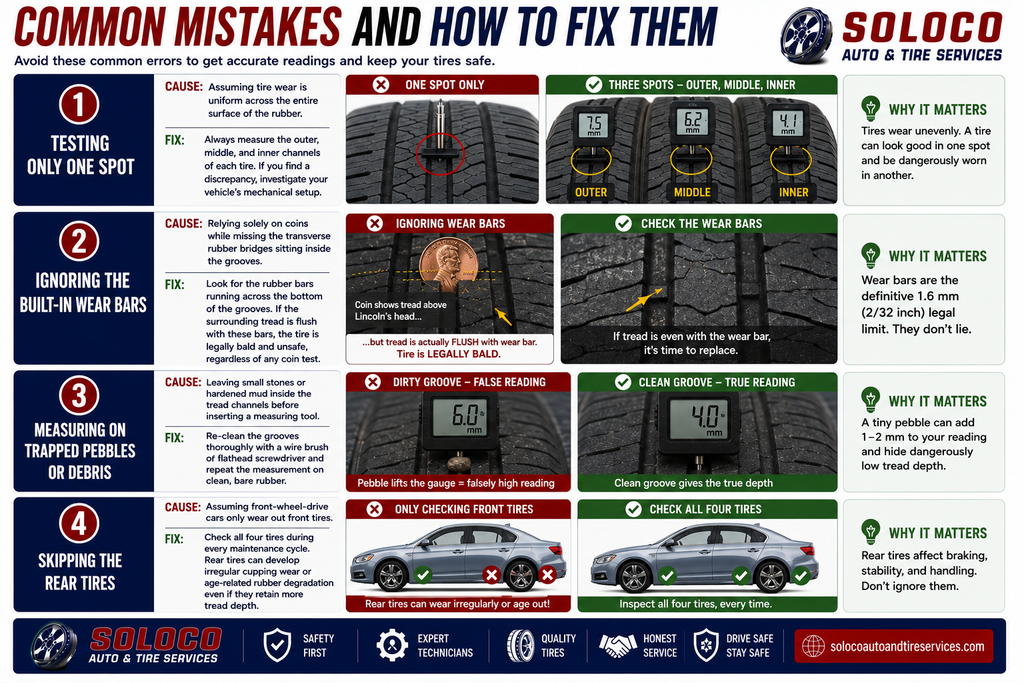
Testing Only One Spot
- Cause: Assuming tire wear is uniform across the entire surface of the rubber.
- Fix: Always measure the outer, middle, and inner channels of each tire. If you find a discrepancy, investigate your vehicle’s mechanical setup.
Ignoring the Built-In Wear Bars
- Cause: Relying solely on coins while missing the transverse rubber bridges sitting inside the grooves.
- Fix: Look for the rubber bars running across the bottom of the grooves. If the surrounding tread has worn down until it is flush with these bars, the tire is legally bald and unsafe, regardless of what any coin test suggests.
Measuring on Trapped Pebbles or Debris
- Cause: Leaving small stones or hardened mud inside the tread channels before inserting a measuring tool.
- Fix: Re-clean the grooves thoroughly with a wire brush or flathead screwdriver and repeat the measurement on clean, bare rubber.
Skipping the Rear Tires
- Cause: Assuming front-wheel-drive cars only wear out front tires.
- Fix: Check all four tires during every maintenance cycle. Rear tires can develop irregular cupping wear or age-related rubber degradation even if they retain more tread depth.
Variations: Adapting the Process for Different Situations
Using a Digital Depth Gauge Instead of Manual Tools
If you use a digital depth gauge, battery performance and calibration matter. Press the zero button on a flat surface before every single tire to calibrate the electronic sensor. Ensure you switch the units setting (millimeters versus inches) to match your vehicle manual specifications before recording data.
Checking Tires on Rear-Wheel-Drive or Staggered Vehicles
If your vehicle features a rear-wheel-drive layout or a staggered wheel setup with wider rear tires, turning the steering wheel will not expose the rear tires. You must either reverse the car slightly to inspect a different section of the rear tread or crouch down behind the wheel wells to access the rear grooves directly without steering assistance.
Adjusting for Wet Climates and Winter Driving
If you live in an area prone to heavy rainfall or snow, do not wait until the legal 1.6 mm limit to replace your tires. Upgrade your safety threshold to 3.2 mm (4/32 inch). Below this depth, tires cannot channel water quickly enough, drastically increasing your risk of hydroplaning at highway speeds.
How Long Does It Take and What Does It Cost?
- Time Investment: A thorough check of all four tires across three distinct groove locations takes approximately 10 to 15 minutes for a beginner working at a steady, careful pace.
- Financial Cost: The process costs $0 if you use a standard household penny or quarter. Purchasing a dedicated mechanical or digital tire tread depth gauge typically costs between $5 and $15 at any auto parts store or online retailer.
Frequently Asked Questions
How often should I check my tire tread depth?
Check your tire tread depth at least once every month, as well as before embarking on any long-road trips or seasonal weather shifts. Regular monthly checks help you catch alignment issues, improper inflation pressures, and uneven wear patterns before they cause sudden tire failure.
What causes the inside of a tire to wear out faster than the outside?
Severe wheel misalignment, specifically excessive negative camber where the top of the tires tilts inward, causes the inner shoulder to bear most of the vehicle’s weight. Worn suspension components like ball joints, control arm bushings, or tie rod ends also produce this rapid inner-edge wear pattern.
Can I drive on tires that measure exactly 1.6 mm?
Driving on tires measuring 1.6 mm meets the absolute minimum legal requirement in most jurisdictions, but it is unsafe for wet or slick roadways. At this depth, stopping distances increase dramatically, and your vehicle loses critical water evacuation capabilities, making hydroplaning highly likely during rainstorms.
What causes the center of a tire to wear out faster than the edges?
Chronic tire overinflation causes the middle section of the tread to bulge outward and press harder against the pavement. This concentrated friction forces the center rubber blocks to wear down significantly faster than the outer and inner shoulders, which ride above the road surface.
Do brand-new tires come with a specific tread depth?
Most standard passenger car tires come with a brand-new tread depth ranging from 8/32 to 10/32 of an inch (approximately 6 mm to 8 mm), depending on the specific tire model, tread design, and intended application. Heavy-duty truck tires or dedicated winter tires often feature deeper treads starting around 12/32 to 15/32 of an inch.


