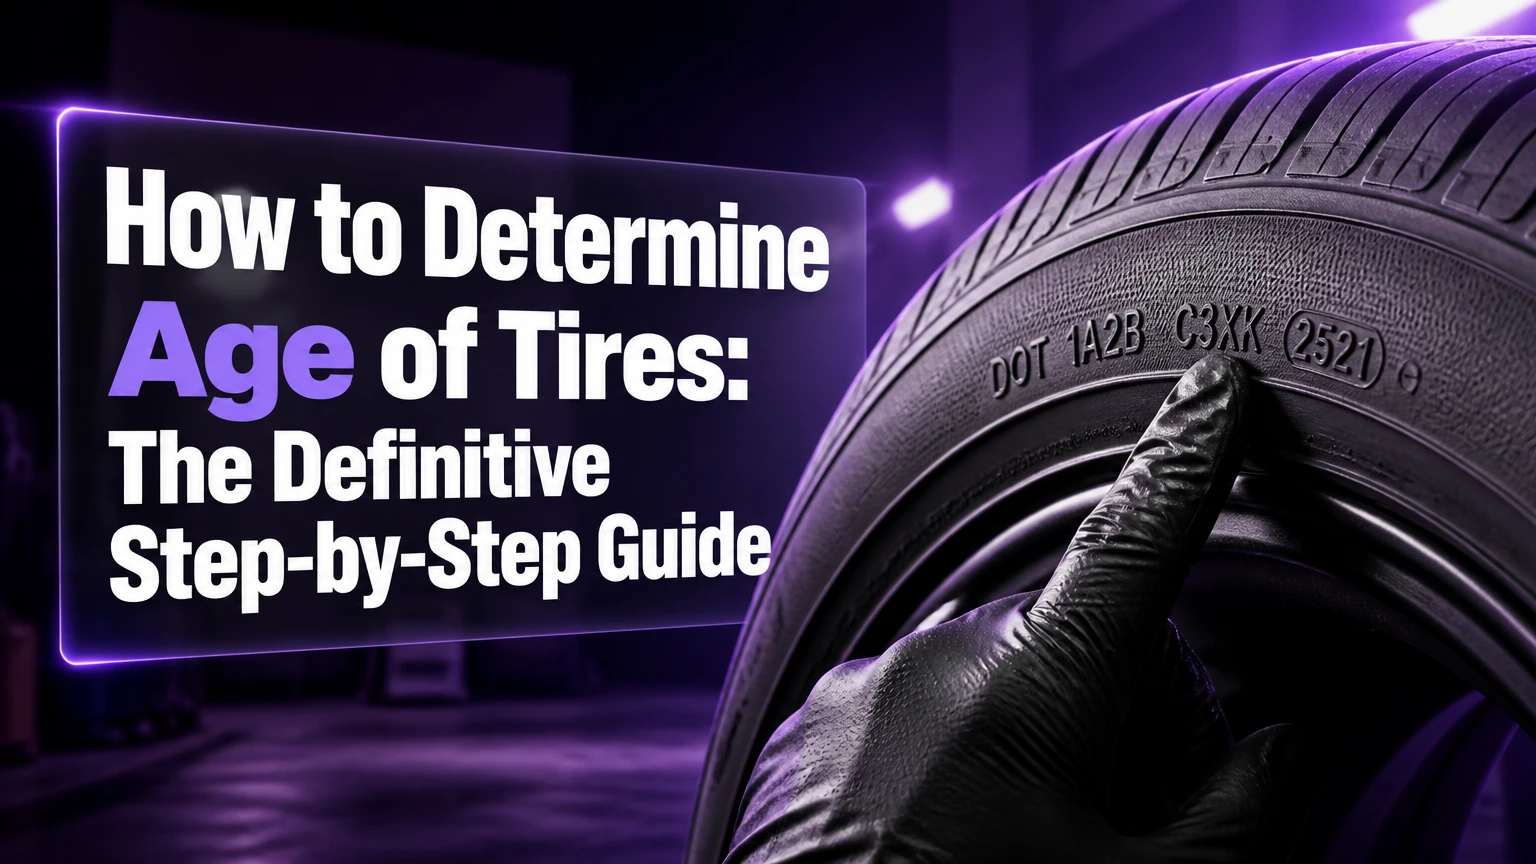
Determining the exact age of a tire is a critical vehicle maintenance task that takes less than five minutes per wheel and requires no specialized mechanic tools. By locating and decoding the Department of Transportation (DOT) code stamped into the tire sidewall, you can reveal the exact week and year your tire was manufactured, ensuring you catch degraded rubber before it compromises road safety. This complete, five-step guide walks you through cleaning, locating, isolating, and interpreting your tire date codes while avoiding common inspection pitfalls.
Before You Start
- Time Required: 3 to 5 minutes per vehicle (all four tires).
- Difficulty Level: Beginner.
- Cost: Free (using household items).
- Tools and Materials Checklist:
- Flashlight or smartphone light (Quantity: 1) — To cast a raking shadow across raised lettering in dim garage or wheel-well lighting.
- Microfiber cloth or shop rag (Quantity: 1) — To wipe away brake dust and mud without scratching the rubber.
- Water spray bottle filled with tap water or a mild solution of automotive dish soap (~100ml) — To dissolve stubborn grime. Avoid petroleum-based solvents or harsh degreasers that degrade rubber compounds.
- Prerequisite Conditions: Park the vehicle on a flat, level surface with the parking brake fully engaged. For front tires, turning the steering wheel completely to the left or right exposes the inner sidewalls, making inspection significantly easier.
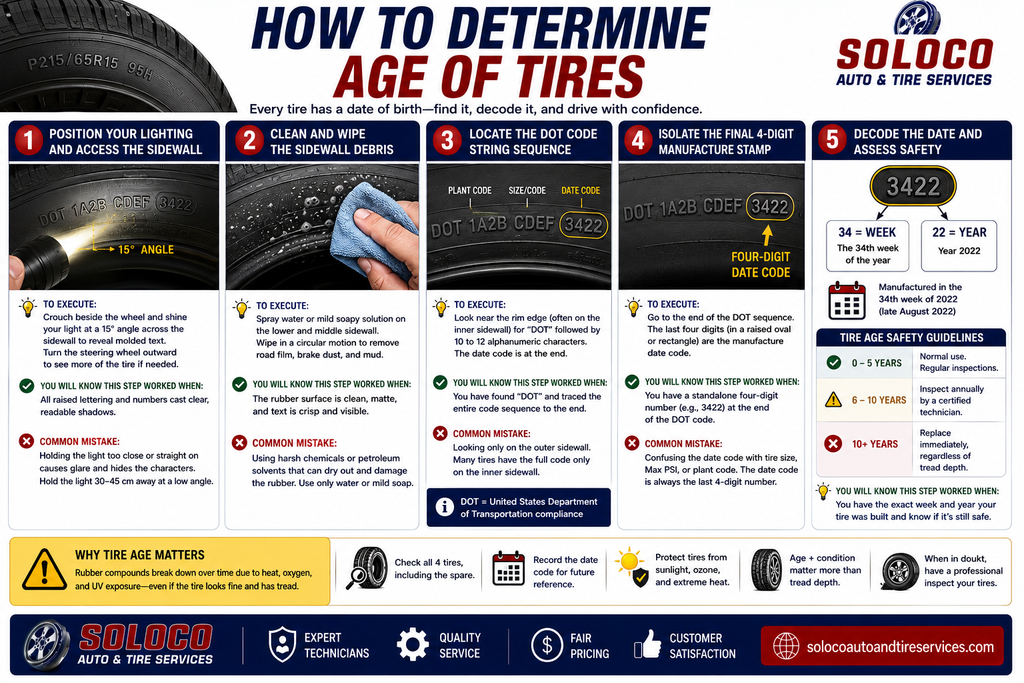
Step 1: Position Your Lighting and Access the Sidewall
Step into the correct position and illuminate the tire sidewall using an acute angle to reveal molded text.
To execute this, crouch beside the wheel and direct your flashlight beam flat across the tire sidewall at a 15-degree angle rather than pointing it straight on. Direct perpendicular light washes out the raised rubber characters, while raking light creates deep shadows that make low-profile text immediately legible. If you are inspecting front tires and cannot see the full circumference, turn your vehicle steering wheel fully toward the outside to swing the tire outward from the fender well.
You will know this step worked when all raised lettering and serial numbers along the outer circumference cast distinct, readable shadows under your light source.
Common Mistake at this Step: Holding the flashlight too close or perpendicular to the rubber, which creates a glare on glossy tire dressing and hides the alphanumeric characters. Fix this by pulling the light source back to a distance of 30 to 45 centimeters and lowering the beam angle.
Step 2: Clean and Wipe the Sidewall Debris
Spray and wipe a clean section of the outer and inner sidewall to clear away road film, brake dust, and mud.
To execute this, mist approximately 20ml to 30ml of your water or mild soapy solution directly onto the lower and middle sections of the sidewall where text is commonly molded. Take your microfiber cloth and firmly wipe in a circular motion across the raised rubber blocks until all accumulated road grime and black brake dust are completely removed from the depressed channels surrounding the letters.
You will know this step worked when the rubber surface is matte, clean, and free of obscuring films, revealing crisp text outlines.
Common Mistake at this Step: Using aggressive chemical brake-cleaners or petroleum solvents to speed up cleaning. These chemicals leach plasticizers out of the synthetic rubber, accelerating dry rot and sidewall cracking. Stick strictly to water or mild automotive soap.
Step 3: Locate the DOT Code String Sequence
Scan the sidewall circumference to find the letters “DOT” followed by a 10-to-12-character alphanumeric manufacturing string.
To execute this, run your eyes or your flashlight beam along the inner rim edge near the wheel flange. Look for the letters “DOT”, which indicate that the tire meets all Federal Motor Vehicle Safety Standards set by the United States Department of Transportation. Immediately following or near the letters “DOT”, you will see a batch of 10 to 12 letters and numbers grouped together. This entire string contains plant identification codes, size codes, and the manufacture date.
You will know this step worked when you have successfully identified the letters “DOT” and traced the complete alphanumeric chain ending near the wheel rim.
Common Mistake at this Step: Assuming the code is on the outer sidewall of every tire. In many asymmetric, directional, or professionally mounted tires, the complete 10-to-12 character DOT code is printed exclusively on the inner sidewall facing the vehicle suspension. If you only see an incomplete code (such as a plant code without numbers) on the outer wall, look at the inner sidewall facing the vehicle chassis.
Step 4: Isolate the Final 4-Digit Manufacture Stamp
Locate the last four digits of the DOT sequence, which are typically enclosed inside a shallow, raised rectangular or oval box.
To execute this, follow the full DOT sequence to its very end. Ignore the first few character blocks (which designate the manufacturing plant and tire size/construction specs). Focus exclusively on the final four-digit numeric block situated right at the tail end of the string. This four-digit block is almost always stamped inside a smooth, raised oval recess on the sidewall surface.
You will know this step worked when you have isolated a standalone four-digit number (for example, “3422”) located at the absolute end of the DOT code sequence.
Common Mistake at this Step: Confusing the date code with the tire size designation (such as P215/65R15), the maximum inflation pressure rating (Max PSI), or the DOT plant code. Remember that size and pressure ratings appear in different areas or use slash marks, whereas the date code is strictly a 4-digit number at the tail end of the DOT sequence.
Step 5: Decode the Manufacture Date and Assess Safety
Split the four-digit code into two halves to determine the exact week and year of production.
To execute this, take your four-digit number and separate it mentally into two parts. The first two digits represent the week of manufacture, running from 01 through 52. The last two digits represent the year of manufacture. For example, if your code is 3422, the first two digits (34) indicate the thirty-fourth week of the year, and the last two digits (22) indicate the year 2022. This means the tire was manufactured during late August 2022. Once you have the date, check it against safety thresholds: tires aged 6 years or older should be inspected annually by a certified technician, while tires exceeding 10 years from their manufacture date must be replaced immediately regardless of remaining tread depth.
You will know this step worked when you have successfully calculated the precise calendar week and year your tire was built and compared it against industry safety guidelines.
Common Mistake at this Step: Misinterpreting a three-digit code as a modern date. If your code only has three digits instead of four (for example, “159”), the tire was manufactured before the year 2000. In pre-2000 tires, the first two digits are the week and the last digit is the year of that specific decade (e.g., 15th week of 1989 or 1999). A three-digit code means the tire is at least 26 years old and presents an extreme, catastrophic blowout hazard. Replace it immediately.
Common Mistakes and How to Fix Them
1. Incomplete DOT Code on the Outer Wall
- The Issue: You find the letters “DOT” and a short plant code, but no trailing four-digit numbers on the side facing outward.
- The Recovery: Manufacturers often mold the full date stamp on only one side of the tire to save tooling costs during production. If the outer sidewall lacks the four-digit box, use your flashlight and a mirror (or crawl underneath the vehicle) to inspect the inner sidewall facing the car frame. The complete date code is almost guaranteed to be printed there.
2. Unreadable Code Due to Severe Curb Scuffing
- The Issue: The raised rubber characters of the DOT code have been shaved down, abraded, or covered in deep road rash from scraping against curbs.
- The Recovery: Check the remaining three tires on your vehicle. Because tires are manufactured in production batches and installed together as a matching set, they typically share the exact same manufacture week and year. If one tire’s code is damaged, inspect the corresponding tire on the opposite side of the axle.
3. Fading on Older Tires
- The Issue: The tire is several years old, and accumulated road exposure has turned the text grey, shallow, and hard to read.
- The Recovery: Apply a small amount of warm water with a drop of dish soap, let it sit for 60 seconds to soften embedded brake dust, and gently scrub using a soft-bristled nylon tire brush. Wipe dry with a white microfiber towel; the contrast between the clean rubber and the trapped dirt in the recessed stamp will make the numbers pop.
Variations: How to Adapt the Process for Different Situations
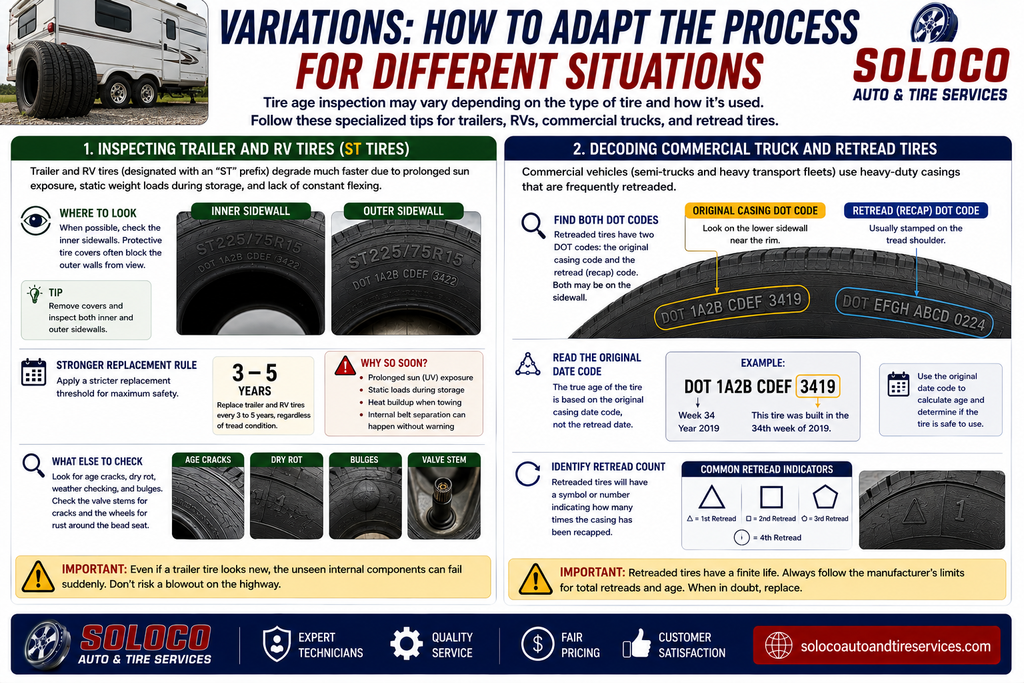
Inspecting Trailer and RV Tires (ST Tires)
Trailer and RV tires (designated with an “ST” prefix) degrade much faster due to prolonged sun exposure, static weight loads during storage, and lack of constant flexing. When inspecting trailer tires, pay extra attention to the inner sidewalls because protective tire covers often block the outer walls. Furthermore, apply a stricter replacement threshold: replace trailer tires every 3 to 5 years, even if the tread looks healthy, as internal belt separation happens silently under heavy loads.
Decoding Commercial Truck and Retread Tires
Commercial vehicles (semi-trucks and heavy transport fleets) use heavy-duty casings that are frequently retreaded. A retreaded tire will feature an additional DOT serial number stamped near the tread shoulder, along with a small symbol or triangle indicating how many times the casing has been recapped. Always read the date code on the original sidewall base rather than the retread vulcanization stamp to determine the true structural age of the core casing.
How Long Does It Take and What Does It Expect to Cost?
- Time Investment: Expect to spend 3 to 5 minutes checking all four tires on a standard passenger vehicle. If steering wheels need to be turned or inner wheel wells are caked in dried mud, add an extra 5 minutes for cleaning and preparation.
- Financial Cost: Zero dollars. No specialized tread-depth gauges, pressure readers, or mechanic diagnostic tools are required to find and read a DOT code.
Frequently Asked Questions
Do tires expire even if they have never been used and have full tread depth?
Yes, tires expire regardless of tread wear. Rubber compounds naturally oxidize, harden, and dry out over time due to UV exposure, ambient temperature fluctuations, and atmospheric ozone. Chemical softeners inside the rubber evaporate over the years, causing microscopic sidewall cracks that weaken the structural integrity of the tire carcass, leading to sudden tread separation at highway speeds.
Does the storage environment affect tire aging speed?
Storage conditions significantly impact the rate of rubber degradation. Tires stored outdoors in direct sunlight, exposed to extreme heat cycles, or kept near high-voltage electrical equipment (which generates ozone) age up to twice as fast as tires stored indoors in a temperature-controlled, dark, and dry environment. This is why spare tires mounted underneath trucks or stored in hot garages often fail prematurely.
What should I do if my tires are past the 6-year safety window but look completely fine?
If your tires exceed six years of age from their DOT manufacture date, perform a rigorous physical inspection of the tread grooves and sidewalls. Look closely for micro-cracking (crazing), bulges, blisters, or uneven wear patterns. If you spot any fine cracks in the rubber or if the vehicle vibrates at highway speeds, have a professional mechanic inspect them immediately and plan for a full replacement set.
Are winter tires subject to the same age rules as all-season tires?
Winter and snow tires are subject to the exact same age rules, but their rubber compounds are softer and more susceptible to rapid thermal degradation. Because winter tire compounds rely heavily on high natural rubber content to maintain flexibility in freezing temperatures, they tend to lose their winter grip performance around the 5-to-6-year mark, even if adequate tread depth remains.


