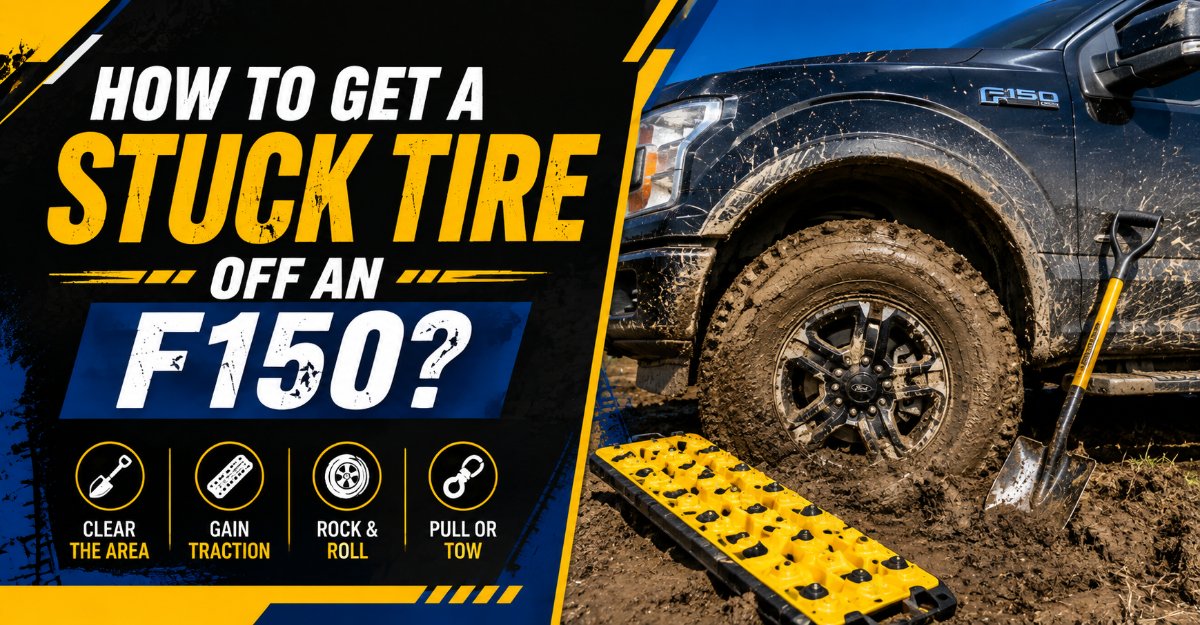
Breaking a severely rusted wheel free from a Ford F-150 requires a systematic approach to overcome galvanic corrosion between the aluminum wheel and steel hub. By following a structured 7-step process utilizing penetrating oil, controlled impact leverage, and strict safety protocols, you can safely remove a frozen wheel in 15 to 30 minutes without damaging your rims or suspension components.
Before You Start
- Total Time Required: 15 to 30 minutes
- Difficulty Level: Moderate (Physical effort required)
- Typical Cost: $0 to $15 (If purchasing penetrating oil and anti-seize)
- Tools and Materials Checklist:
- Heavy-duty hydraulic floor jack (Minimum 3-ton capacity) — Quantity: 1
- Heavy-duty jack stands (Minimum 3-ton capacity) — Quantity: 2
- Breaker bar or long-handle ratchet with a 21mm deep impact socket — Quantity: 1
- Penetrating fluid (PB Blaster, Kano Kroil, or WD-40 Specialist) — Quantity: 1 can
- Dead-blow mallet (3 to 4 lbs) or rubber mallet — Quantity: 1
- Scrap wood block (2×4 lumber, roughly 12 inches long) — Quantity: 1 piece
- Rubber or heavy-duty wheel chocks — Quantity: 2
- Wire brush (stainless steel or brass bristle) — Quantity: 1
- High-temperature anti-seize lubricant (nickel or copper formulation) — Quantity: 1 small tube
- Prerequisite Conditions: Park the F-150 on completely flat, hard concrete or asphalt. Never attempt this process on gravel, dirt, or an incline. Ensure the vehicle transmission is in Park (or first gear for manual configurations) and the ignition is turned off.
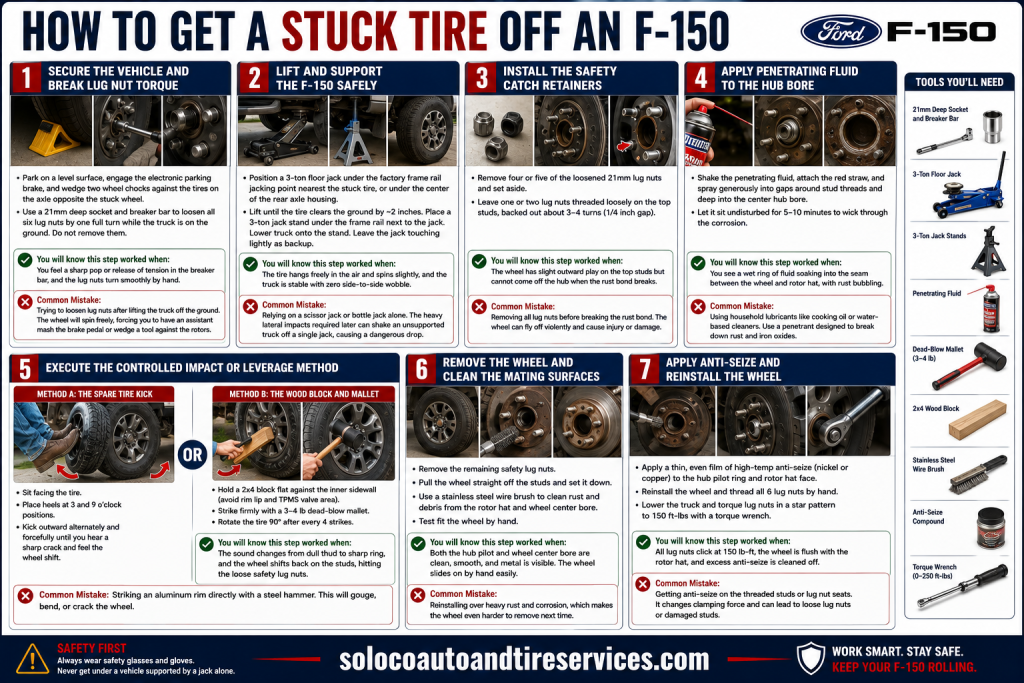
Step 1: Secure the Vehicle and Break Lug Nut Torque
- Park the truck on a level surface, engage the electronic parking brake, and firmly wedge two wheel chocks against the tires on the axle opposite the stuck wheel.
- Take your 21mm deep socket and breaker bar, and loosen all six lug nuts on the stuck wheel by exactly one full turn while the truck’s weight remains fully on the ground. Do not remove them completely yet. This initial cracking breaks the high-torque hold of the lug nuts while the weight of the F-150 prevents the wheel from spinning in place.
- You will know this step worked when you feel a sharp pop or release of tension in the breaker bar, and the lug nuts turn smoothly by hand with the socket extension.
- Common Mistake: Trying to loosen lug nuts after lifting the truck off the ground. The wheel will spin freely, forcing you to have an assistant mash the brake pedal or wedge a tool against the brake rotors.
Step 2: Lift and Support the F-150 Safely
- Position your 3-ton hydraulic floor jack beneath the factory-designated frame rail jacking point closest to the stuck tire, or beneath the center of the heavy-duty rear axle housing if you are working on the rear wheels.
- Pump the jack handle until the tire clears the ground by approximately 2 inches. Slide a 3-ton steel jack stand directly under the frame rail adjacent to the jack, and carefully lower the truck until its weight rests securely on the jack stand. Leave the hydraulic jack in light contact with the frame as a secondary backup support.
- You will know this step worked when the tire hangs freely in the air, allowing you to spin it slightly on the hub studs, and the truck is completely stable with zero side-to-side wobble when pushed with moderate force.
- Common Mistake: Relying on a standard emergency scissor jack or a hydraulic bottle jack alone. The heavy lateral impacts required later in this process will easily shake an unsupported truck off a single jack, leading to catastrophic vehicle drops.
Step 3: Install the Safety Catch Retainers
- Spin off and completely remove four or five of the loosened 21mm lug nuts, placing them safely in a clean tray or on the ground.
- Leave exactly one or two lug nuts threaded loosely onto the topmost wheel studs, backing them out by roughly three to four full turns so there is a 1/4 inch gap between the lug nut face and the wheel surface.
- You will know this step worked when the wheel has enough play to slide outward a fraction of an inch on the top studs, but is physically blocked from flying off the hub entirely when the rust bond breaks.
- Common Mistake: Removing all lug nuts prior to breaking the hub rust bond. When a heavily corroded F-150 wheel finally pops loose, it can fly off violently due to trapped spring tension or direct impact, crashing into your legs, damaging brake backing plates, or rolling down the street.
Step 4: Apply Penetrating Fluid to the Hub Bore
- Shake your can of penetrating fluid thoroughly, attach the red extension straw nozzle, and spray a generous stream directly into the exposed gaps around the wheel stud threads and deep into the center hub bore where the inner rim circle meets the raised steel lip of the brake rotor hat.
- Allow the chemical solvent to sit undisturbed for a minimum of 5 to 10 minutes, giving it time to wick through the microscopic gaps of the iron-oxide corrosion layer.
- You will know this step worked when you can see a wet ring of penetrating oil soaking into the mating seam between the wheel and the rotor hat, and minor brown corrosion bubbles begin to loosen.
- Common Mistake: Using standard household lubricants like cooking oil or water-based cleaners. You must use a specialized chemical penetrant engineered to break down iron oxides and surface rust molecules.
Step 5: Execute the Controlled Impact or Leverage Method
- Choose your breaking technique based on your physical positioning and the severity of the rust bond.
- Method A (The Spare Tire Kick): Sit firmly on the ground facing the sidewall of the stuck tire. Position your heels at the 3 o’clock and 9 o’clock positions on the outer tread. Kick outward forcefully and alternately with your heels, rocking the wheel on its center axis until you hear a sharp crack and feel the wheel shift.
- Method B (The Wood Block and Mallet): Hold your 2×4 scrap wood block flat against the inner rubber sidewall of the tire (avoiding the metal rim lip to protect the alloy, and staying far away from the plastic TPMS valve stem zone). Strike the wood block firmly and repeatedly with your 3 to 4 lb dead-blow mallet. Rotate the tire 90 degrees after every four strikes to distribute shock waves evenly around the entire circumference of the hub.
- You will know this step worked when the metallic tone of the strikes changes from a dull thud to a sharp, resonant ring, and the wheel shifts backward on the hub studs, hitting the loose safety lug nuts you left in place during Step 3.
- Common Mistake: Striking an aluminum factory F-150 rim directly with a heavy steel hammer. This will permanently gouge, bend, or crack the wheel, rendering it unsafe for driving.
Step 6: Remove the Wheel and Clean the Mating Surfaces
- Unscrew and remove the remaining safety lug nuts completely by hand.
- Grasp the tire firmly with both hands at the 12 o’clock and 6 o’clock positions, pull it straight toward you off the wheel studs, and lower it gently to the ground.
- Take your stainless steel wire brush and scrub away all flaky rust, scale, and debris from the face of the brake rotor hat and the inner circular mating ring of the wheel until bare metal is visible.
- You will know this step worked when both the rotor hub pilot and the wheel center bore are smooth, clean, and free of orange rust crust, and the wheel slides back onto the pilot ring smoothly by hand during a dry test fit.
- Common Mistake: Reinstalling the wheel over heavy crust and built-up corrosion, which guarantees the wheel will become even harder to remove during your next routine tire rotation or brake service.
Step 7: Apply Anti-Seize and Reinstall the Wheel
- Dip a clean brush into your high-temperature anti-seize compound (nickel or copper) and paint a very thin, uniform film around the outer circumference of the steel hub pilot ring and the flat mounting face of the rotor hat.
- Lift the wheel back onto the studs, thread all 6 lug nuts on by hand until snug, lower the vehicle back to the ground, and torque the lug nuts in a criss-cross star pattern to the factory specification of 150 foot-pounds using a calibrated torque wrench.
- You will know this step worked when all lug nuts reach the precise 150 lb-ft click point, the wheel sits completely flush against the rotor hat with zero wobble, and you have cleaned away any excess anti-seize that could migrate to the brake pads or rotors.
- Common Mistake: Getting anti-seize lubricant onto the threaded wheel studs or the tapered conical seats of the lug nuts. Lubricating the threads drastically alters the clamping clamp load, leading to over-torqued studs or loose lug nuts while driving.
Common Mistakes and How to Fix Them
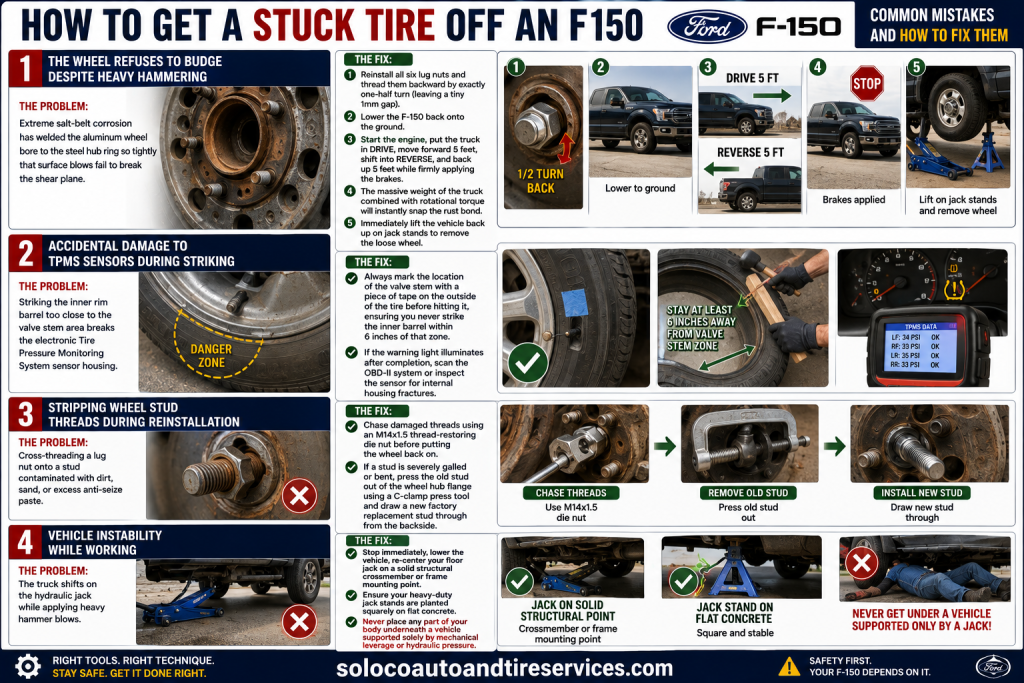
1. The Wheel Refuses to Budge Despite Heavy Hammering
- The Problem: Extreme salt-belt corrosion has welded the aluminum wheel bore to the steel hub ring so tightly that surface blows fail to break the shear plane.
- The Fix: Reinstall all six lug nuts and thread them backward by exactly one-half turn (leaving a tiny 1mm gap). Lower the F-150 back onto the ground. Start the engine, put the truck in drive, move forward 5 feet, shift into reverse, and back up 5 feet while firmly applying the brakes. The massive weight of the truck combined with rotational torque will instantly snap the rust bond. Immediately lift the vehicle back up on jack stands to remove the loose wheel.
2. Accidental Damage to TPMS Sensors During Striking
- The Problem: Striking the inner rim barrel too close to the valve stem area breaks the electronic Tire Pressure Monitoring System sensor housing.
- The Fix: Always mark the location of the valve stem with a piece of tape on the outside of the tire before hitting it, ensuring you never strike the inner barrel within 6 inches of that zone. If the warning light illuminates after completion, scan the OBD-II system or inspect the sensor for internal housing fractures.
3. Stripping Wheel Stud Threads During Reinstallation
- The Problem: Cross-threading a lug nut onto a stud contaminated with dirt, sand, or excess anti-seize paste.
- The Fix: Chase damaged threads using an M14x1.5 thread-restoring die nut before putting the wheel back on. If a stud is severely galled or bent, press the old stud out of the wheel hub flange using a C-clamp press tool and draw a new factory replacement stud through from the backside.
4. Vehicle Instability While Working
- The Problem: The truck shifts on the hydraulic jack while applying heavy hammer blows.
- The Fix: Stop immediately, lower the vehicle, re-center your floor jack on a solid structural crossmember or frame mounting point, and ensure your heavy-duty jack stands are planted squarely on flat concrete. Never place any part of your body underneath a vehicle supported solely by mechanical leverage or hydraulic pressure.
Variations: Adapting to Different F-150 Configurations
- Aluminum vs. Steel Wheels: Standard steel spare wheels or basic work truck steel rims are more rigid than high-end aluminum alloy rims, allowing you to use a rubber mallet or dead-blow directly against the inner steel rim lip without fear of structural cracking. Alloy wheels demand a thick wood buffer block to absorb point-impact forces.
- Four-Wheel Drive (4WD) Front Hubs: When working on the front wheels of a 4WD F-150 equipped with Integrated-Wheel-Ends (IWE) and automated vacuum actuators, avoid prying behind the dust shield with heavy pry bars, as you can easily puncture the vacuum seals or bend the thin tin backing plates, leading to 4WD engagement failure.
- Severe Rust Belt Environments (Midwest/Northeast): If the vehicle has spent winters on heavily salted roads, standard 5-minute penetrating oil soaks will fail. Switch to an industrial-grade freezing spray penetrant (which drops surface temperature to -45°F, causing thermal shock that shatters the rust crystals) or use an oxy-acetylene torch to gently warm the center aluminum wheel bore for 90 seconds to expand the metal before applying impact forces.
Time and Cost Breakdown
- Professional Mechanic Cost: $100 to $250 (Labor charge for removing frozen wheels and performing hub cleaning during standard service).
- DIY Cost: $0 (If you already own a jack, stands, and basic hand tools) up to $15 for a can of PB Blaster and a tube of high-temp anti-seize.
- Time Commitment: 15 to 30 minutes for a standard stuck wheel; 45 to 60 minutes if you must resort to the “driven wheel-break” technique for extreme galvanic corrosion.
Frequently Asked Questions
Can I drive my F-150 with loosened lug nuts to break a stuck tire?
Yes, but only under strictly controlled conditions. You must thread the lug nuts back onto the studs and leave them backed off by no more than one-half turn. Drive slowly (under 5 MPH) in a straight line for a very short distance (5 to 10 feet) in an empty driveway or parking lot while tapping the brakes. Never drive on public roads with loose lug nuts, as it can shear the wheel studs completely.
Will applying heat from a torch damage my F-150 brakes?
Applying a propane or MAP gas torch directly to the center hub bore can damage the rubber wheel bearing seals, ABS wheel speed sensors, and brake caliper dust boots if sustained for too long. Keep the flame moving constantly, restrict heating to the aluminum wheel center circle rather than the iron hub, and never heat the wheel past 200°F to prevent altering the metallurgical temper of alloy rims.
Why do F-150 wheels get stuck so easily?
Ford F-150 wheels are hub-centric, meaning the inner bore of the wheel centers tightly onto a raised steel pilot ring on the brake rotor. When moisture, road salt, and oxygen enter this tight clearance gap between dissimilar metals (aluminum wheel contacting steel/cast iron), galvanic corrosion occurs. This chemical reaction creates a hard layer of expanding iron oxide that effectively glues the two components together.
What kind of anti-seize should I use on an F-150 hub?
Use a high-temperature, heavy-duty anti-seize lubricant formulated with either nickel or copper flakes. Nickel anti-seize is superior for aluminum wheels because it prevents galvanic corrosion between dissimilar metals up to 2400°F. Always apply it sparingly with a brush, ensuring it never contaminates the threaded studs or the flat braking surfaces of the rotor and inner rim.


