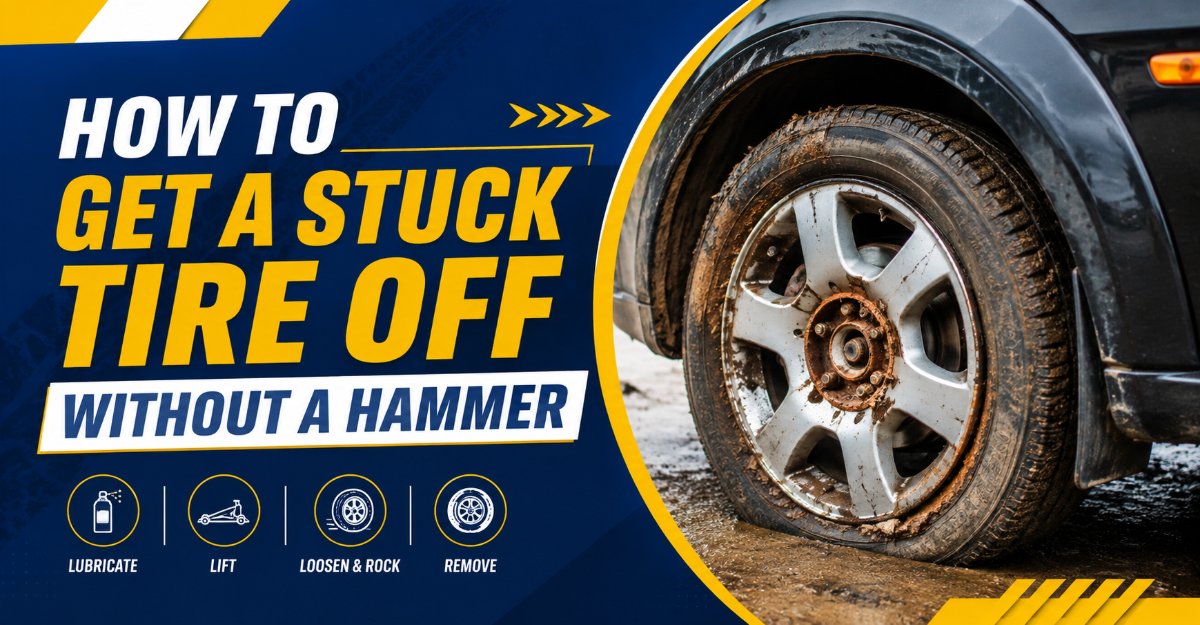
Getting a stuck tire off without a hammer requires using the vehicle’s own weight and braking system to safely break the rust seal, completing the entire process across eight precise steps in 20 to 30 minutes with moderate physical effort. Success depends entirely on maintaining a precise microscopic gap on the lug nuts during the vehicle weight-shift maneuver.
Before You Start
- Time Required: 20 to 30 minutes
- Difficulty Level: Moderate (Intermediate mechanical awareness required)
- Typical Cost: $0 (if tools are already owned) to $25 (for penetrating oil and anti-seize lubricant)
- Prerequisite Skills: Basic jack operation, wheel removal safety awareness
- Tools and Materials Checklist:
- Lug wrench or 1/2-inch breaker bar matching your lug nut socket size (1 unit)
- Hydraulic floor jack rated for your vehicle gross weight (1 unit)
- Heavy-duty steel jack stands (2 units)
- Rubber or heavy-duty plastic wheel chocks (2 units)
- Penetrating oil spray, such as WD-40 Specialist Rust Release or Liquid Wrench (1 can)
- High-temperature anti-seize lubricant, such as Permatex Nickel or Copper Anti-Seize (1 tube)
- Heavy-duty steel wire brush (1 unit)
- Torque wrench capable of your vehicle’s factory specification (1 unit)
Step 1: Safety Setup and Wheel Choking
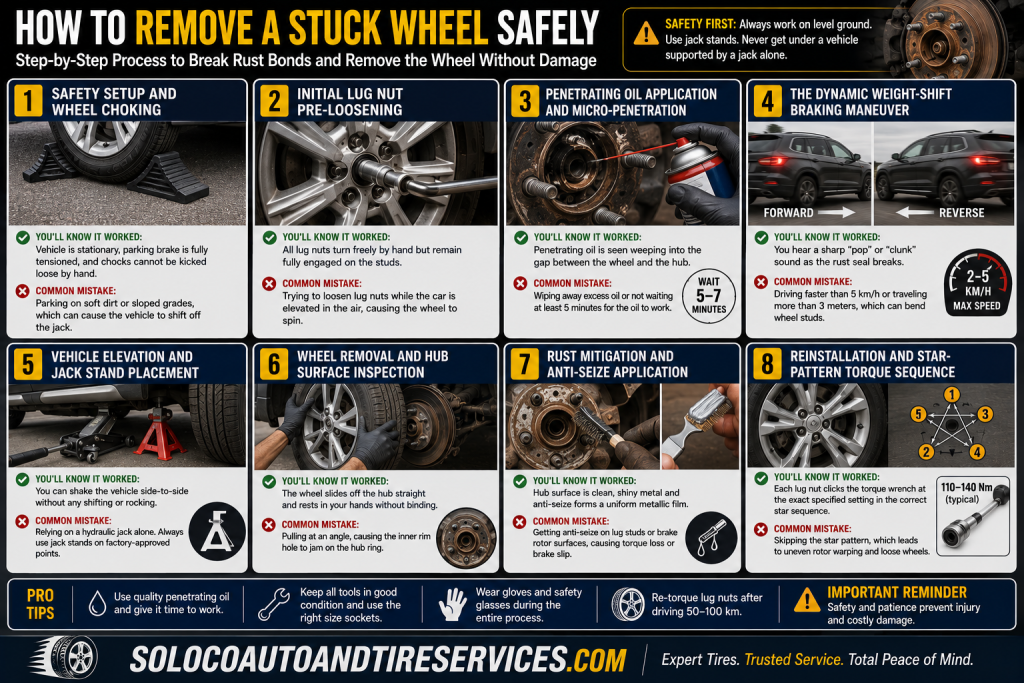
Park your vehicle on solid, level asphalt or concrete, engage the mechanical emergency parking brake firmly, and place wheel chocks tightly behind and in front of the tires diagonal from the stuck wheel.
To execute this step, verify the transmission is in Park for automatic vehicles or First Gear for manual vehicles, turn off the engine, and wedge two rubber wheel chocks securely against the tread of the opposing tires to prevent any rolling movement during the procedure.
You will know this step worked when the vehicle is entirely stationary, the parking brake is fully tensioned, and the chocks cannot be kicked loose by hand. A common mistake is parking on soft dirt or asphalt sloped grades, which causes the vehicle to shift off hydraulic jacks when weight is manipulated.
Step 2: Initial Lug Nut Pre-Loosening
Loosen all lug nuts on the stuck wheel by exactly one full counterclockwise turn while the vehicle tires remain firmly planted on the ground.
Take your lug wrench or breaker bar, attach the correct socket size to the lug nuts, and pull upward or push downward using your body weight to break factory torque, turning each nut counterclockwise one full rotation. Do not unscrew them completely.
You will know this step worked when all lug nuts spin freely with minimal resistance by hand after the initial break, but remain fully engaged on the threaded studs. The most frequent mistake here is trying to loosen lug nuts while the car is elevated in the air, which causes the wheel to spin freely instead of breaking the nut loose.
Step 3: Penetrating Oil Application and Micro-Penetration
Spray a generous stream of penetrating oil directly into the tiny annular gaps surrounding each wheel stud and into the central hub bore where the wheel center meets the axle flange.
Hold the aerosol can nozzle close to the mating surfaces, coat every stud base thoroughly, and allow the chemical formulation to sit undisturbed for 5 to 7 minutes to dissolve the iron oxide layers. Take a rubber mallet or the wooden handle of your wire brush and tap lightly around the face of the tire rim to send micro-vibrations through the metal, accelerating fluid penetration.
You will know this step worked when you observe the penetrating oil weeping inward and disappearing into the tight crevice between the wheel rim and the steel hub flange. A major error at this stage is wiping away excess oil or rushing straight to the next step without giving the chemical at least five minutes to break down rust bonds.
Step 4: The Dynamic Weight-Shift Braking Maneuver
Adjust all lug nuts so they are backed off by exactly 1 mm to 2 mm, leaving about one or two loose threads exposed, then get into the driver’s seat and use the engine power and brakes to snap the rust weld.
Start the engine, shift into Drive, and roll forward slowly for 2 to 3 meters at a crawl speed of 2 to 5 km/h, then firmly slam on the brake pedal; immediately shift into Reverse, roll backward 2 to 3 meters, and slam on the brake pedal firmly once more. The sudden forward and backward momentum transfer, resisted by the micro-gaps on the loose lug nuts, forces the heavy wheel assembly to snap away from the hub face.
You will know this step worked when you hear a sharp, distinct metal “pop” or “clunk” sound echoing from the wheel well as the rust seal shears apart. Avoid driving faster than 5 km/h or traveling more than 3 meters during this maneuver, as excessive speed or distance will bend your wheel studs under the lateral shear load.
Step 5: Vehicle Elevation and Jack Stand Placement
Lift the vehicle safely using your hydraulic floor jack at the manufacturer-designated pinch weld or frame lifting point, and immediately slide two steel jack stands underneath supporting frame members.
Pump the hydraulic floor jack handle until the stuck tire clears the ground by roughly 5 cm, slide the rated jack stands beneath the nearest factory-approved reinforced structural hardpoints, and slowly lower the vehicle until its weight rests securely on the jack stands while leaving the hydraulic jack in light contact as a secondary backup.
You will know this step worked when you can firmly shake the vehicle body side-to-side without any structural shifting or rocking on the jack stands. Never place any part of your body under a vehicle supported solely by a hydraulic jack without verified mechanical jack stands in place.
Step 6: Wheel Removal and Hub Surface Inspection
Unscrew the loose lug nuts completely by hand, remove them safely into a clean tray, and pull the tire straight off the hub assembly toward yourself.
Grasp the rubber tire at the 9 o’clock and 3 o’clock positions, pull straight outward with steady body weight, and slide the wheel off the threaded studs, taking care not to let the heavy rim rest its weight directly on the delicate threads. Inspect the back of the wheel mounting plate and the exposed axle hub for any fresh scoring, cracked studs, or metal fatigue.
You will know this step worked when the wheel slides completely off the center hub register and rests entirely in your hands without binding. A common mistake here is pulling at an angle, causing the inner rim hole to jam sideways onto the steel center hub ring.
Step 7: Rust Mitigation and Anti-Seize Application
Scrub the flat mating surface of the wheel hub and the inner bore of the wheel rim clean with a heavy wire brush, then apply a protective anti-seize coating.
Aggressively scour the metal surfaces with your steel wire brush until all flaky orange rust crust, dirt, and debris are completely removed, wipe the area clean with a dry shop rag, and apply a thin, uniform skim coat of high-temperature anti-seize lubricant using a gloved finger or brush across the flat hub face and the center ring lip.
You will know this step worked when the hub surface shines with clean bare metal and the anti-seize layer forms a uniform, semi-translucent metallic film. Ensure no anti-seize lubricant contacts the threaded lug studs or the flat brake rotor friction surfaces, as contamination here causes dangerous torque loss or brake slip.
Step 8: Reinstallation and Star-Pattern Torque Sequence
Mount the tire back onto the studs, hand-tighten all lug nuts, lower the vehicle, and torque them to factory specifications in a crisscross pattern.
Lift the wheel back onto the studs, thread all lug nuts on by hand until snug, lower the vehicle entirely to the ground by releasing the jack, and use a calibrated torque wrench to tighten the nuts in a star pattern to your vehicle manufacturer’s precise specification (typically between 110 to 140 Nm for most passenger vehicles).
You will know this step worked when every lug nut clicks the torque wrench at the exact specified setting in the correct star sequence. Skipping the star pattern leads to uneven rotor warping and loose wheels.
Common Mistakes and How to Fix Them
- Removing Lug Nuts Completely Before the Braking Maneuver: If you take all the nuts off before driving forward and backward, the wheel will detach instantly under vehicle weight, destroying your brake rotor, fender, and suspension components. Recovery: If the wheel partially separates while nuts are off, lower the vehicle immediately with the jack, reinstall the nuts loosely to 2 mm clearance, and repeat the braking maneuver correctly.
- Applying Anti-Seize Lubricant to Lug Stud Threads: Putting anti-seize directly onto the threaded studs radically changes the friction coefficient, causing you to over-torque the nuts and stretch or snap the steel studs during tightening. Recovery: Clean the studs thoroughly with brake cleaner and a wire brush to remove all lubricant before torquing.
- Using High Speeds During the Loosening Maneuver: Driving faster than 5 km/h during the weight-shift maneuver applies violent dynamic shear forces that bend or shear wheel studs clean off the hub flange. Recovery: Inspect all exposed studs with a straightedge; if any stud is bent or displays hairline cracks at the base, replace the entire wheel hub assembly immediately before driving.
- Neglecting Center Hub Bore Binding: Sometimes the flat rust seal breaks, but the inner wheel rim ring remains tightly wedged onto the center hub pilot lip due to tight manufacturing tolerances. Recovery: Sit on the ground facing the tire, alternate kicking the left and right rubber tread with the firm heel of your shoe to walk the rim off the center ring.
Variations
Alloy Rims vs. Steel Wheels
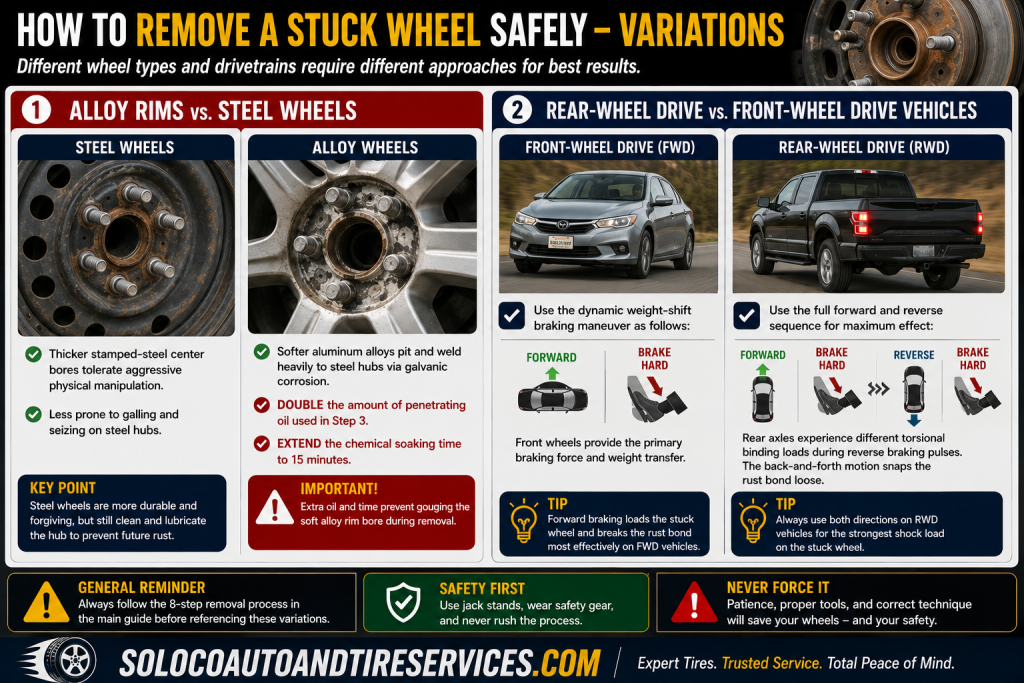
Steel wheels have thicker stamped-steel center bores that tolerate aggressive physical manipulation, whereas alloy wheels feature softer aluminum alloys that pit and weld heavily to steel hubs via galvanic corrosion. When dealing with aluminum alloy wheels, double the amount of penetrating oil used in Step 3 and extend the chemical soaking time to 15 minutes to prevent gouging the soft metal rim bore during removal.
Rear-Wheel Drive vs. Front-Wheel Drive Vehicles
When performing the dynamic weight-shift braking maneuver on front-wheel drive vehicles, ensure you drive forward and brake, as the front wheels handle primary braking force and weight transfer. For rear-wheel drive vehicles, ensure you utilize both the forward and reverse gear shifts thoroughly, as rear axles experience different torsional binding loads during reverse braking pulses.
How Long Does It Take / What Does It Cost
- Time Investment: Expect to spend 20 to 30 minutes from setup to final torque check if working uninterrupted. Rushing the chemical soak time in Step 3 is the primary reason technicians exceed this timeframe.
- Financial Cost: Total material cost ranges from $0 if you already own penetrating oil, a wire brush, and a jack, up to $25 if purchasing brand-name chemical aerosols and anti-seize compound from an auto parts store. Professional shop labor rates for seized wheel extraction typically range from $75 to $150.
Frequently Asked Questions
Can I use regular household cooking oil or motor oil instead of penetrating fluid?
Household cooking oil and standard engine oil lack the low surface tension and volatile carrier solvents required to wick into microscopic gaps between rust crystals. Use a dedicated automotive penetrating fluid like WD-40 Specialist Rust Release or PB Blaster, which are chemically engineered to creep vertically upward into seized metal threads and corrosion layers.
What should I do if the steering wheel method fails to break the rust seal?
If both the braking maneuver and the stationary steering wheel lock-to-lock method fail to break the rust seal, your vehicle’s corrosion level is extreme. Safely lift the vehicle on jack stands, spray penetrating oil directly into the back side of the hub assembly behind the rotor, let it soak for 30 minutes, and use a specialized pneumatic air hammer fitted with a blunt flat bit against the inner tire rim edge.
Is it safe to drive with the lug nuts loosened by 1 to 2 millimeters?
Driving with lug nuts loosened by 1 to 2 millimeters is safe strictly for a distance of 2 to 3 meters at a crawl speed of 2 to 5 km/h on flat, smooth ground. This controlled gap provides just enough clearance for the vehicle’s weight and brake friction to snap the rust bond without allowing the wheel studs to jump out of the wheel mounting holes or suffer structural impact damage.
Why do wheels get stuck on the hub in the first place?
Wheels become permanently stuck through a process called galvanic corrosion, which occurs when two dissimilar metals—such as an aluminum alloy wheel and a cast-iron or steel axle hub—are exposed to moisture, road salt, and heat cycles. This electrochemical reaction forms a hard, cement-like layer of iron oxide and aluminum oxide that effectively welds the two components together.
How can I prevent my tires from getting stuck to the hub next time?
You can completely prevent future rust welding by thoroughly cleaning the mating surfaces with a wire brush during tire rotations and applying a very thin, uniform layer of high-temperature anti-seize lubricant or wheel bearing grease directly to the flat hub face. Avoid applying any lubricant to the threaded studs or the conical seats of the lug nuts to maintain correct clamping tension.


