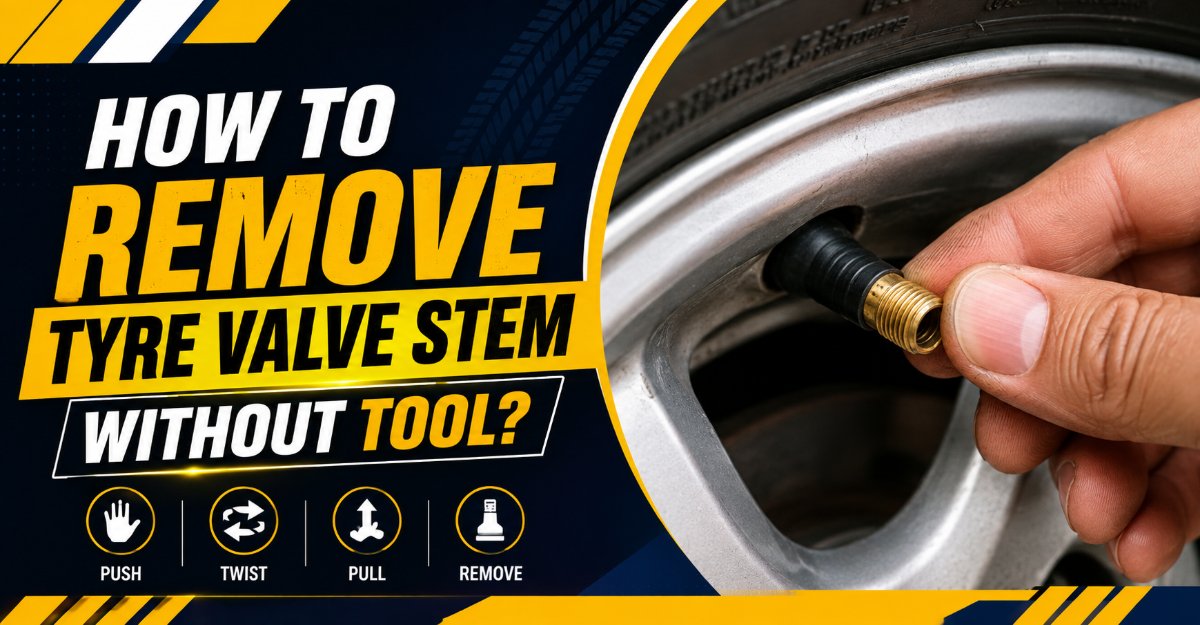
Replacing a tyre valve stem without professional pneumatic tyre machines is entirely possible using common household items, provided you follow a precise sequence. This comprehensive, 6-step process takes 15 to 20 minutes from start to finish at a minimal cost. The single factor that most determines success is ensuring complete deflation and proper lubrication to prevent tearing the rubber base inside the rim cavity.
Before You Start
- Time Required: 15 to 20 minutes
- Difficulty Level: Moderate
- Typical Cost: Free (using existing household items) or under 5 dollars for dish soap and a utility blade.
- Tools and Materials Checklist:
- Needle-nose or standard pliers (1 pair)
- Dish soap (2 tablespoons) combined with water (1/2 cup) in a squeeze bottle or spray bottle
- Utility knife with a sharp blade or heavy-duty wire cutters (1 piece)
- Small block of wood or an adjustable wrench (1 piece, used as a leverage fulcrum)
- Safety glasses (1 pair)
- Heavy-duty work gloves (1 pair)
- Small screwdriver, pen, or valve core tool (1 piece)
- Prerequisite Conditions: The tyre must be completely off the vehicle or safely supported on a stable, flat work surface. Confirm your tyre does not use an integrated TPMS (Tyre Pressure Monitoring System) sensor bolted through the valve stem, as pulling a sensor-equipped valve with pliers will destroy expensive electronics.
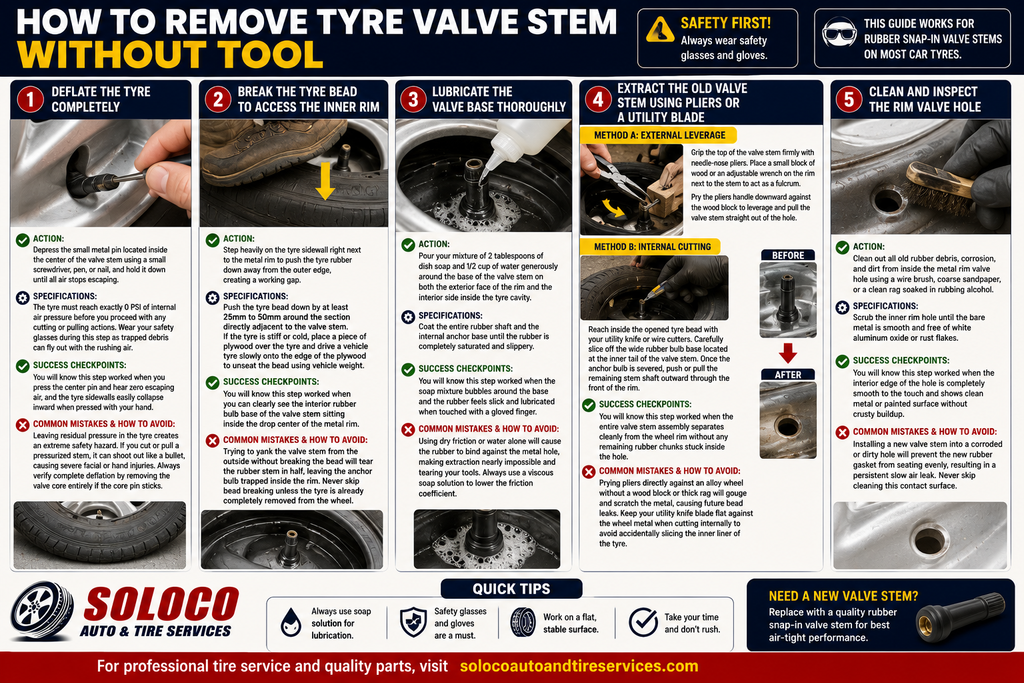
Step 1: Deflate the Tyre Completely
- Action: Depress the small metal pin located inside the center of the valve stem using a small screwdriver, pen, or nail, and hold it down until all air stops escaping.
- Specifications: The tyre must reach exactly 0 PSI of internal air pressure before you proceed with any cutting or pulling actions. Wear your safety glasses during this step as trapped debris can fly out with the rushing air.
- Success Checkpoints: You will know this step worked when you press the center pin and hear zero escaping air, and the tyre sidewalls easily collapse inward when pressed with your hand.
- Common Mistakes and How to Avoid Them: Leaving residual pressure in the tyre creates an extreme safety hazard. If you cut or pull a pressurized stem, it can shoot out like a bullet, causing severe facial or hand injuries. Always verify complete deflation by removing the valve core entirely if the core pin sticks.
Step 2: Break the Tyre Bead to Access the Inner Rim
- Action: Step heavily on the tyre sidewall right next to the metal rim to push the tyre rubber down away from the outer edge, creating a working gap.
- Specifications: Push the tyre bead down by at least 25mm to 50mm around the section directly adjacent to the valve stem. If the tyre is stiff or cold, place a piece of plywood over the tyre and drive a vehicle tyre slowly onto the edge of the plywood to unseat the bead using vehicle weight.
- Success Checkpoints: You will know this step worked when you can clearly see the interior rubber bulb base of the valve stem sitting inside the drop center of the metal rim.
- Common Mistakes and How to Avoid Them: Trying to yank the valve stem from the outside without breaking the bead will tear the rubber stem in half, leaving the anchor bulb trapped inside the rim. Never skip bead breaking unless the tyre is already completely removed from the wheel.
Step 3: Lubricate the Valve Base Thoroughly
- Action: Pour your mixture of 2 tablespoons of dish soap and 1/2 cup of water generously around the base of the valve stem on both the exterior face of the rim and the interior side inside the tyre cavity.
- Specifications: Coat the entire rubber shaft and the internal anchor base until the rubber is completely saturated and slippery.
- Success Checkpoints: You will know this step worked when the soap mixture bubbles around the base and the rubber feels slick and lubricated when touched with a gloved finger.
- Common Mistakes and How to Avoid Them: Using dry friction or water alone will cause the rubber to bind against the metal hole, making extraction nearly impossible and tearing your tools. Always use a viscous soap solution to lower the friction coefficient.
Step 4: Extract the Old Valve Stem Using Pliers or a Utility Blade
- Action: Execute either Method A from the outside using leverage or Method B from the inside using a cutting tool to remove the valve stem.
- Specifications:
- Method A (External Leverage): Grip the top of the valve stem firmly with your needle-nose pliers. Place a small block of wood or an adjustable wrench on the rim directly next to the stem to act as a fulcrum. Pry the pliers handle downward against the wood block to leverage and pull the valve stem straight out of the hole.
- Method B (Internal Cutting): Reach inside the opened tyre bead with your utility knife or wire cutters. Carefully slice off the wide rubber bulb base located at the inner tail of the valve stem. Once the anchor bulb is severed, push or pull the remaining stem shaft outward through the front of the rim.
- Success Checkpoints: You will know this step worked when the entire valve stem assembly separates cleanly from the wheel rim without any remaining rubber chunks stuck inside the hole.
- Common Mistakes and How to Avoid Them: Prying pliers directly against an alloy wheel without a wood block or thick rag will gouge and scratch the metal, causing future bead leaks. Keep your utility knife blade flat against the wheel metal when cutting internally to avoid accidentally slicing the inner liner of the tyre.
Step 5: Clean and Inspect the Rim Valve Hole
- Action: Clean out all old rubber debris, corrosion, and dirt from inside the metal rim valve hole using a wire brush, coarse sandpaper, or a clean rag soaked in rubbing alcohol.
- Specifications: Scrub the inner rim hole until the bare metal is smooth and free of white aluminum oxide or rust flakes.
- Success Checkpoints: You will know this step worked when the interior edge of the hole is completely smooth to the touch and shows clean metal or painted surface without crusty buildup.
- Common Mistakes and How to Avoid Them: Installing a new valve stem into a corroded or dirty hole will prevent the new rubber gasket from seating evenly, resulting in a persistent slow air leak. Never skip cleaning this contact surface.
Common Mistakes and How to Fix Them
The Valve Stem Tears in Half While Pulling
- Failure Mechanism: The upper rubber shaft snaps off under tension, leaving the thick rubber anchor base plugged firmly inside the rim hole.
- Recovery Instructions: Take a thin metal punch tool or a small screwdriver and place it against the remaining rubber piece from the outside or inside. Strike the tool lightly with a hammer to drive the remaining rubber plug directly inward so it falls loose into the tyre cavity. Reach inside the broken bead gap to retrieve the fallen rubber piece.
The Valve Stem is Seized Due to Severe Corrosion
- Failure Mechanism: Age, oxidation, and road salt have chemically bonded the rubber valve stem to the metal rim hole, locking it in place.
- Recovery Instructions: Spray a penetrating fluid like WD-40 or liquid silicone around the base of the stem. Allow it to penetrate for 5 to 10 minutes. Use your pliers to twist the valve stem left and right through a 90-degree arc to break the corrosive bond before applying upward pulling force. Clean all chemical residue thoroughly before installing the new valve.
The Utility Knife Slips During Internal Cutting
- Failure Mechanism: The blade slips while trying to cut the rubber base, threatening to puncture the tyre sidewall or inner liner.
- Recovery Instructions: Stop immediately and assess the tyre liner. If the cut is superficial on the heavy tread base, it may be fine, but if the inner airtight liner is breached, the tyre is unsafe and must be replaced or patched from the inside using a vulcanizing patch. Always cut away from your body and keep the flat side of the knife blade pressed firmly against the metal wheel.
Variations Based on Your Situation
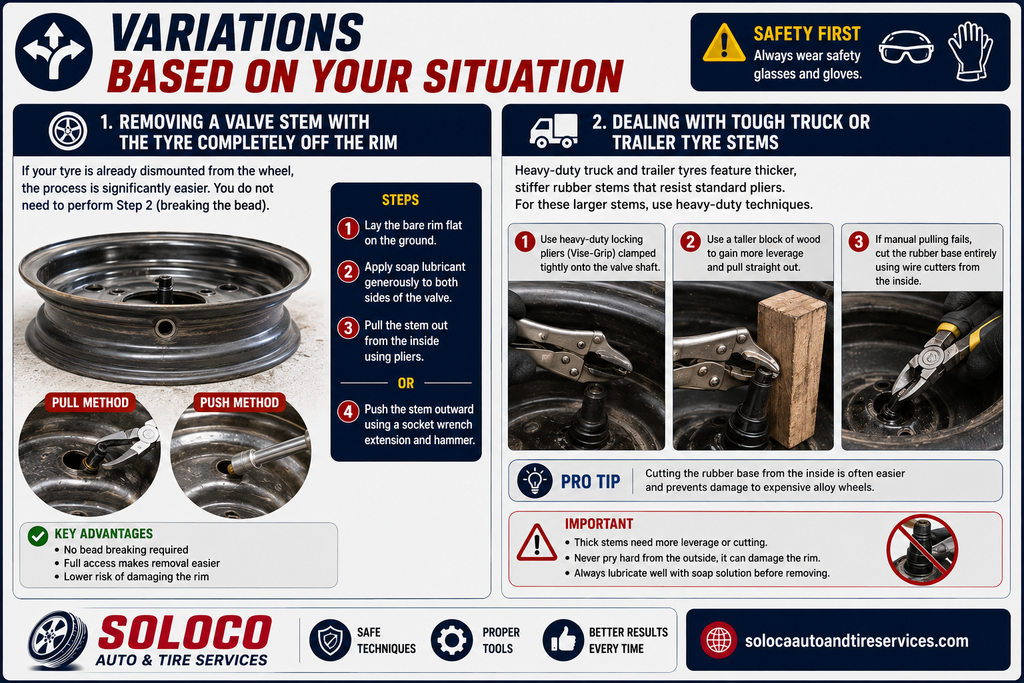
Removing a Valve Stem with the Tyre Completely Off the Rim
If your tyre is already dismounted from the wheel, the process is significantly easier. You do not need to perform Step 2 (breaking the bead). Simply lay the bare rim flat on the ground, apply your soap lubricant generously to both sides of the valve, and pull the stem out from the inside using pliers or push it outward using a hammer and a socket wrench extension placed against the base.
Dealing with Tough Truck or Trailer Tyre Stems
Heavy-duty truck and trailer tyres feature thicker, stiffer rubber stems that resist standard pliers. For these larger stems, use a heavy-duty locking pliers (Vise-Grip) clamped tightly onto the valve shaft, and use a taller block of wood to achieve mechanical advantage. If manual pulling fails, cut the rubber base entirely using wire cutters from the inside rather than fighting the external pull.
Frequently Asked Questions
Can I reuse an old tyre valve stem after removing it?
You should never reuse a rubber tyre valve stem. Once a valve stem is pulled or cut out, the internal rubber has stretched, fatigued, and compressed, losing its elasticity. Reusing an old stem almost always leads to sudden air loss and tyre failure. Always install a brand-new valve stem, which typically costs less than two dollars.
Do I need to rebalance my tyre after replacing the valve stem?
Replacing a standard rubber snap-in valve stem with an identical replacement generally does not alter the wheel balance enough to require a professional rebalancing. However, if you notice vibration at highway speeds after the repair, take the wheel to a local tyre shop for a quick dynamic balance check.
What causes a tyre valve stem to dry rot and fail?
Tyre valve stems degrade due to constant exposure to ultraviolet sunlight, ozone in the atmosphere, extreme temperature fluctuations, and centrifugal force while driving. Over time, the rubber hardens, develops microscopic surface cracks, and loses the sealing pressure required to keep air inside the tubeless assembly.
How do I install the new valve stem after removing the old one?
Lubricate the new valve stem base with soapy water or tyre mounting paste. Insert the narrow end of the stem from the inside of the rim outward through the valve hole. Attach a valve stem puller tool or standard pliers to the threaded tip from the outside, and pull firmly straight out until the rubber groove pops securely and audibly into place in the rim hole.


