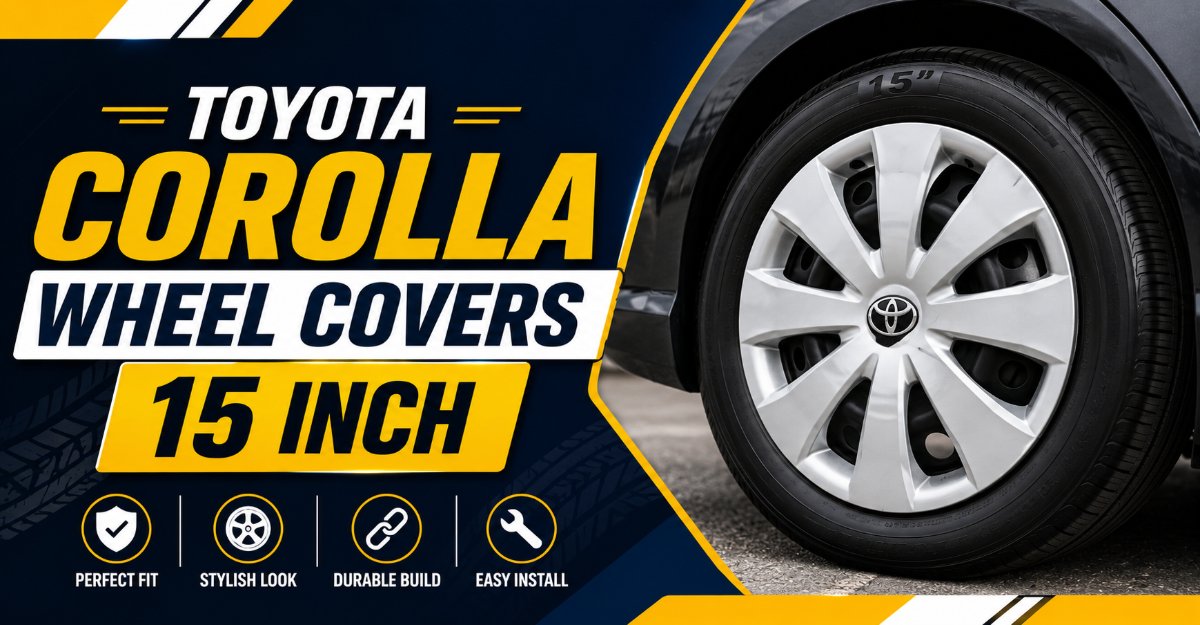
Toyota Corolla 15-inch wheel covers are protective and decorative thermoplastic discs designed to snap or bolt onto factory steel wheels, concealing structural imperfections, rusted lug nuts, and raw wheel faces while shielding brake components from environmental debris. Selecting and installing the correct wheel covers requires precise matching of tire sidewall sizing codes, retention ring diameters, and valve stem alignments to prevent high-speed detachment or wheel damage.
Key Facts At a Glance
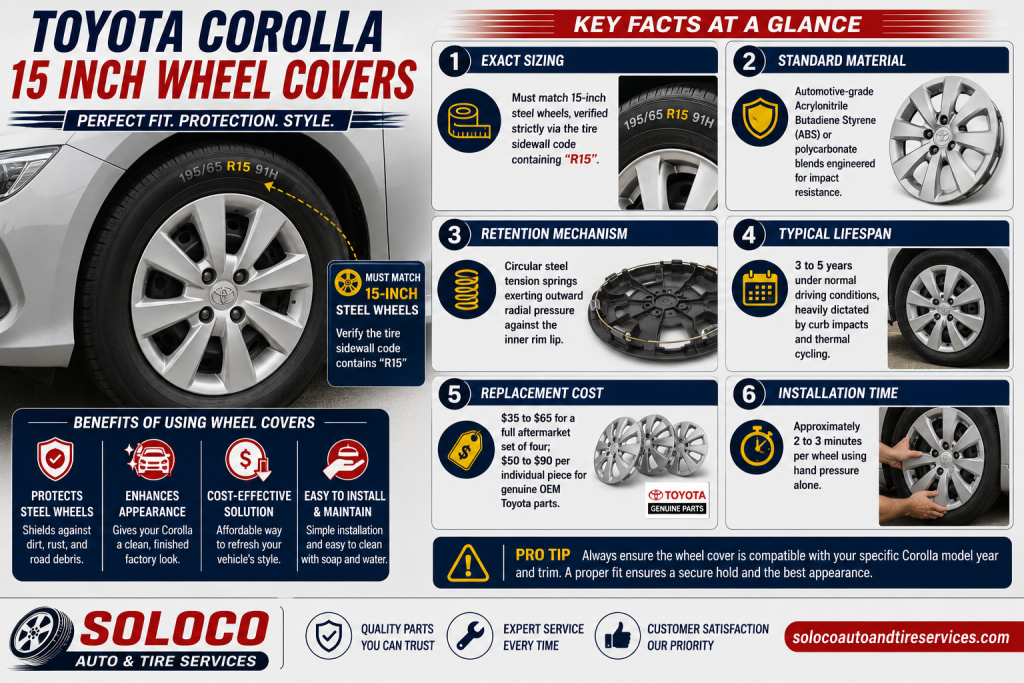
- Exact Sizing: Must match 15-inch steel wheels, verified strictly via the tire sidewall code containing the character string
R15. - Standard Material: Automotive-grade Acrylonitrile Butadiene Styrene (ABS) or polycarbonate blends engineered for impact resistance.
- Retention Mechanism: Circular steel tension springs exerting outward radial pressure against the inner rim lip.
- Typical Lifespan: 3 to 5 years under normal driving conditions, heavily dictated by curb impacts and thermal cycling.
- Replacement Cost: $35 to $65 for a full aftermarket set of four; $50 to $90 per individual piece for genuine OEM Toyota parts.
- Installation Time: Approximately 2 to 3 minutes per wheel using hand pressure alone.
Understanding Toyota Corolla 15 Inch Wheel Cover Architecture
A Toyota Corolla wheel cover functions as more than a mere cosmetic enhancement; it is an integrated mechanical assembly engineered to withstand harsh dynamic forces. The structural ecosystem of a wheel cover relies on three core components working in unison: the steel wheel face, the thermoplastic cover body, and the internal steel retention ring.
The central component is molded from high-impact ABS plastic, selected for its rigidity, dimensional stability, and resistance to petroleum-based road grime. Embedded into the rear perimeter of this plastic shell is a heavy-gauge steel retention spring. This ring acts as a continuous tensioner, forcing molded plastic retention tabs outward against the inner drop-center well of the steel wheel rim.
When the vehicle reaches highway speeds, centrifugal force attempts to pull the cover outward. The opposing radial force generated by the steel retention ring counters this outward migration, maintaining static friction against the steel rim. Understanding this mechanical interplay is vital, as any deformation to the steel retention ring or the plastic tabs compromises the integrity of the assembly, leading to vibration, rattling, or complete separation on public roadways.
How to Verify Sizing: Avoiding the Rim Measurement Trap
The single most common error vehicle owners make when sourcing replacement wheel covers for a Toyota Corolla is measuring the physical metal wheel rim with a tape measure. Steel wheel rims feature an outer decorative flange that creates a deceptive optical measurement, frequently leading buyers to purchase incorrect sizes.
To secure an exact fit for a 15-inch Corolla wheel configuration, you must inspect the tire sidewall. Locate the alphanumeric string imprinted by the manufacturer, which follows a standardized format such as P195/65R15 or 205/60R15. The critical indicator is the letter R followed by the number 15. This designation confirms that the tire is manufactured to fit a 15-inch wheel diameter.
[Tire Sidewall Code: P195/65R15] ---> [R15 Designation] ---> [Required Wheel Cover Size: Exactly 15 Inches]
Never attempt to install a 14-inch or 16-inch cover on a 15-inch wheel. Mismatched sizing prevents the retention ring from engaging the inner rim wall, resulting in immediate detachment during vehicle operation.
Genuine OEM vs. Aftermarket vs. Bolt-On: A Comprehensive Comparison
Choosing the right replacement wheel cover requires balancing upfront cost, aesthetic preferences, and mechanical security. The market offers three distinct categories for Toyota Corolla applications.
| Feature / Criteria | Genuine OEM Toyota Covers | Aftermarket ABS Replicas | Bolt-On Custom Covers |
|---|---|---|---|
| Average Cost (Set of 4) | $200 – $360 | $35 – $65 | $55 – $95 |
| Material Composition | Virgin ABS / Polycarbonate Blend | Recycled or Blended ABS Plastic | Heavy-Duty ABS with Metal Inserts |
| Dimensional Accuracy | Exact factory tolerances | Varies by manufacturer | Varies; universal or vehicle-specific |
| Retention Method | Clip-on with factory-calibrated spring | Standard steel tension ring | Secured directly by vehicle lug nuts |
| Theft Resistance | Moderate (easily pried off) | Moderate | High (requires lug nut removal) |
| Durability & Finish | High resistance to UV fade | Moderate; clear coat may peel | High structural durability |
Genuine OEM Toyota Factory Originals
Genuine OEM covers are manufactured to exact dealership specifications, utilizing the precise mold geometry and paint codes intended for your specific Corolla model year. They guarantee a flawless fit and preserve the original factory aesthetic, which is beneficial for vehicle resale value. However, they command a significant financial premium, often costing four to six times the price of aftermarket alternatives.
Aftermarket ABS Custom Styles
Aftermarket options dominate the replacement market due to their accessibility and diverse styling options, ranging from matte black and gloss carbon finishes to multi-spoke sport configurations. While modern aftermarket manufacturers utilize high-grade ABS, lower-tier options may feature thinner plastic walls that become brittle under prolonged exposure to sub-zero winter temperatures and road salt.
Bolt-On Custom Covers
Bolt-on covers eliminate the risk of losing a hubcap to a severe pothole or aggressive car wash brush. Instead of relying solely on plastic retention clips and a tension ring, these covers are physically trapped against the steel wheel by the vehicle’s actual lug nuts. Removing them requires unthreading the lug nuts with a tire iron, making them virtually impossible to lose while driving, though seasonal tire rotations become slightly more time-consuming.
Pre-Installation Preparation and Required Tools
Before attempting installation or removal, gather the necessary tools and ensure your vehicle is safely positioned on flat, stable ground with the parking brake firmly engaged.
Tools Required
- Flat-head screwdriver or dedicated plastic trim removal tool (wrapped in electrical tape to prevent scratching).
- Clean microfiber towel and automotive wheel cleaner.
- Silicone spray lubricant (optional, for stubborn retention rings).
- Flashlight or work light.
Pre-Installation Checkpoints
- Verify Wheel Integrity: Inspect the outer lip of the steel wheel for structural dents or rust blooms resulting from prior impacts. A bent steel rim prevents the plastic retention tabs from seating uniformly.
- Clean the Inner Rim Well: Brake dust, mud, and road salt accumulate inside the inner rim groove. Wipe this surface clean to ensure maximum friction between the steel retention ring and the wheel.
- Inspect the Retention Ring: Examine the circular steel spring on the back of the new wheel cover. Ensure it rests securely inside the designated plastic guide slots and is not twisted or kinked.
Step-by-Step Installation and Removal Protocol
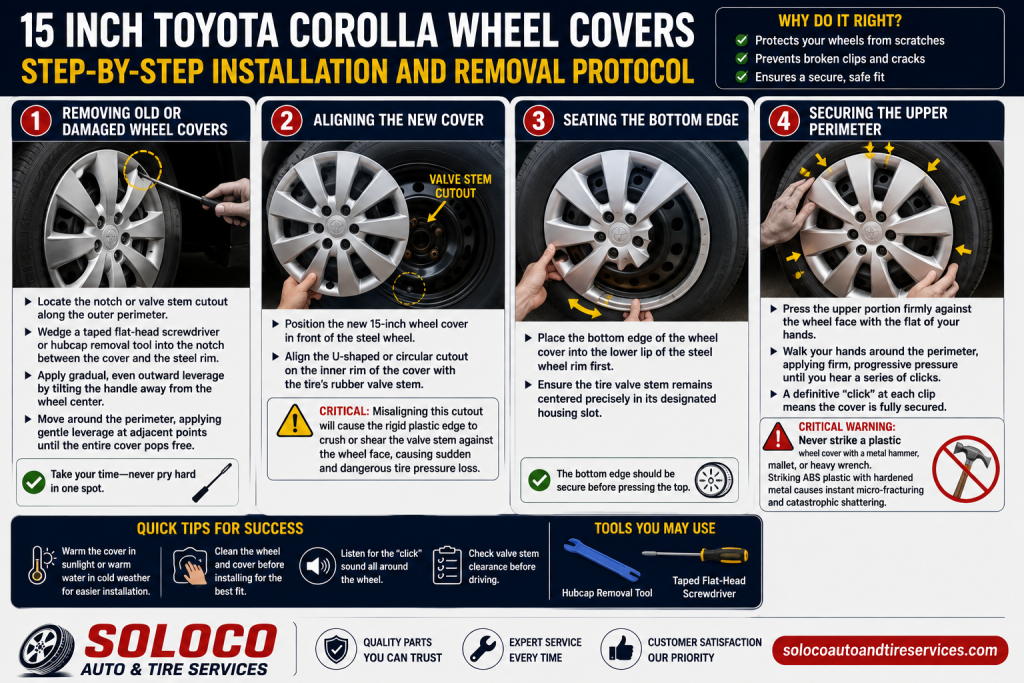
Executing the removal and installation process correctly prevents cosmetic damage to your alloy or steel wheels and eliminates structural failure of the plastic clips.
Step 1: Removing Old or Damaged Wheel Covers
- Locate the notch or valve stem cutout along the outer perimeter of the existing wheel cover.
- Wedge a taped flat-head screwdriver or dedicated hubcap removal tool into the notch between the cover and the steel rim.
- Apply gradual, even outward leverage by tilting the handle of the tool away from the wheel center. Do not pry aggressively at a single point, as this snaps the plastic clips.
- Move around the perimeter of the wheel progressively, applying gentle leverage at adjacent points until the entire cover pops free from the retention ring.
Step 2: Aligning the New Cover
- Position the new 15-inch wheel cover in front of the steel wheel, aligning the distinct U-shaped or circular cutout on the inner rim of the cover with the tire’s rubber valve stem.
- Misaligning this cutout will cause the rigid plastic edge to crush or shear the valve stem against the wheel face, resulting in a sudden, dangerous tire pressure loss.
Step 3: Seating the Bottom Edge
- Place the bottom edge of the wheel cover into the lower lip of the steel wheel rim first, ensuring the tire valve stem remains centered precisely within its designated housing slot.
Step 4: Securing the Upper Perimeter
- Press the upper portion of the cover firmly against the wheel face with the flat of your hands.
- Walk your hands around the perimeter, applying firm, progressive pressure until you hear a definitive series of mechanical clicks, indicating that all retention clips have snapped past the rim lip.
- Critical Warning: Never strike a plastic wheel cover with a metal hammer, mallet, or heavy wrench. Striking ABS plastic with hardened metal causes instant micro-fracturing and catastrophic shattering, rendering the cover unusable.
Common Mistakes and How to Avoid Them
Even experienced DIY mechanics occasionally commit errors when mounting replacement wheel covers. Avoiding these pitfalls ensures long-term retention and vehicle safety.
- Failing to Calibrate Tension Rings: Installing a cover out of the box without checking spring tension often leads to rattling. If the ring is set to the wrong slot, the cover will vibrate loose over rough pavement.
- Ignoring Valve Stem Clearance: Forcing a cover over a misaligned valve stem damages the rubber casing, causing a slow leak that drains tire pressure over several days. Always verify valve clearance before applying final installation pressure.
- Neglecting Rim Corrosion: Mounting new covers over heavy rust scale prevents proper seating. Wire-brush the inner rim lip prior to installation to ensure a flush, secure interface.
- Using Incorrect Sourcing Metrics: Ordering parts based on car model year alone without cross-referencing the tire sidewall
R15specification frequently results in incompatible diameters being delivered.
Troubleshooting Common Wheel Cover Issues
If you encounter performance issues after installing your 15-inch Toyota Corolla wheel covers, diagnose and resolve the root cause using the structured protocols below.
Issue 1: The Wheel Cover Emits a Metallic Rattling Noise at Highway Speeds
- Root Cause: The steel tension ring lacks sufficient outward radial tension, allowing the cover to vibrate against the steel wheel face.
- Solution: Remove the wheel cover and locate the steel tension ring. Unclip the ring from its mounting guides and use pliers to gently bend the wire outward at the expansion loops to increase its overall diameter and tension. Reinstall the ring and mount the cover securely.
Issue 2: The Wheel Cover Keeps Detaching Over Small Bumps
- Root Cause: One or more plastic retention tabs have snapped off due to fatigue or improper removal, or the steel wheel rim has been deformed by a severe pothole impact.
- Solution: Inspect the rear of the detached cover. If multiple plastic clips are broken, replace the individual cover unit. If the clips are intact, inspect the steel wheel rim edge for inward bending using a straightedge ruler.
Issue 3: The Cover Refuses to Snap Into Place
- Root Cause: The steel retention ring is seated in the incorrect depth adjustment slot on the rear of the plastic cover, or the ring has shifted out of alignment during handling.
- Solution: Check the rear of the cover where multiple slot depths are often provided for custom fitment. Move the retention ring to the outermost slot to maximize tension, ensuring the valve stem notch remains completely unobstructed.
Expert Recommendations for Different Corolla Owners
Maximizing value and satisfaction depends on aligning your purchasing decision with your specific driving profile and vehicle maintenance goals.
The Budget Commuter
If your primary objective is maintaining a clean, uniform factory appearance on your daily commuter Corolla without significant financial investment, select a standard set of silver or chrome-accented aftermarket ABS replica covers. They deliver the clean aesthetic of factory wheels at a fraction of the cost.
The Style Enthusiast
If you want to modernize an older Corolla model generation, opt for matte black or gloss black split-spoke aftermarket covers. Pairing a dark wheel cover finish with clean tire dressing completely transforms the vehicle’s visual stance, lending it a contemporary, aggressive aesthetic.
The Factory Purist
If you are preparing your Toyota Corolla for resale or wish to maintain absolute authenticity down to factory specifications, purchase individual genuine OEM Toyota covers directly from authorized parts distributors. While more expensive, they preserve the vehicle’s original manufacturing lineage and secure maximum buyer confidence.
Frequently Asked Questions
Are 15-inch wheel covers universal for all car brands?
No. While wheel sizing is standardized by diameter (e.g., 15-inch), the contour, depth, and clip placement of steel wheel rims vary significantly across vehicle manufacturers. Always purchase covers specifically engineered to match standard steel wheel profiles or OEM specifications.
Can I install wheel covers on aluminum alloy wheels?
No. Wheel covers (hubcaps) are structurally designed to mount exclusively onto stamped steel wheels. Alloy wheels feature an entirely different outer rim geometry, lack the internal drop-center retention lip required for plastic clips, and are finished for aesthetic exposure without covers.
How do I prevent my wheel covers from being stolen?
While standard clip-on covers can be easily removed, you can significantly reduce theft risk by switching to bolt-on wheel covers secured directly behind your vehicle’s factory lug nuts, or by applying a small bead of exterior-grade silicone adhesive along the inner rim flange during installation.
What should I do if a wheel cover cracks during installation?
A cracked ABS plastic wheel cover cannot be structurally repaired to withstand high-speed centrifugal stress and thermal expansion. Super glue or epoxy will fail under road vibration. Replace the damaged single unit immediately to prevent complete structural disintegration while driving.
Do wheel covers affect fuel economy or tire balance?
Standard ABS plastic wheel covers weigh only a few pounds distributed evenly across the wheel circumference, creating a negligible impact on vehicle weight and fuel economy. However, an improperly seated or unbalanced cover can cause minor steering wheel vibrations at sustained highway speeds.


